HP 4400C HP Scanjet 4400C/5400C Series Scanner Mac - (English) User Manual - Page 28
Scanning quickly with scanner buttons, Scanning to the HP Precisionscan Pro software - scanjet windows 7
 |
UPC - 725184800566
View all HP 4400C manuals
Add to My Manuals
Save this manual to your list of manuals |
Page 28 highlights
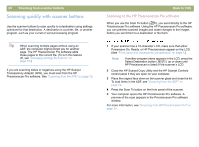
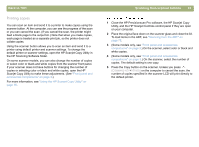
28 Scanning from scanner buttons Scanning quickly with scanner buttons Use the scanner buttons to scan quickly to a destination using settings optimized for that destination. A destination is a printer, file, or another program, such as your e-mail or word-processing program. Tip When scanning multiple pages without using an ADF, the computer might prompt you for another page. The HP Precisionscan Pro software adds these pages to the current file. (To turn this feature off, see "Changing settings for buttons" on page 35.) If you are scanning slides or negatives using the HP Scanjet Transparency Adapter (XPA), you must scan from the HP Precisionscan Pro software. See "Scanning from the XPA" on page 79. Back to TOC Scanning to the HP Precisionscan Pro software When you use the Scan To button ( ), you send directly to the HP Precisionscan Pro software. Using the HP Precisionscan Pro software, you can preview scanned images and make changes to the images before you send them to a destination or file them. 1 If your scanner has a 16-character LCD, make sure that either Powersave On, Ready, or HP Precisionscan appear on the LCD. (See "Front panel and accessories comparisons" on page 3.) Note: If another program name appears in the LCD, press the Select Destination button ( ) up or down until HP Precisionscan is listed in the scanner's LCD. 2 Close the HP Scanjet Copy Utility and the HP Scanjet Controls control panel if they are open on your computer. 3 Place the original face down on the scanner glass and close the lid. To load items in the ADF, see "Scanning from the ADF" on page 78. 4 Press the Scan To button on the front panel of the scanner. 5 Your computer opens the HP Precisionscan Pro software. A preview of the scan appears in the Precisionscan Pro software window. For more information, see "Scanning from HP Precisionscan Pro" on page 39.
-
 1
1 -
2
-
3
-
4
-
5
-
6
-
7
-
8
-
9
-
10
-
11
-
12
-
13
-
14
-
15
-
16
-
17
-
18
-
19
-
20
-
21
-
22
-
 23
23 -
 24
24 -
 25
25 -
 26
26 -
 27
27 -
 28
28 -
 29
29 -
 30
30 -
 31
31 -
 32
32 -
 33
33 -
34
-
35
-
36
-
37
-
38
-
39
-
40
-
41
-
42
-
43
-
44
-
45
-
46
-
47
-
48
-
49
-
50
-
51
-
52
-
53
-
54
-
55
-
56
-
57
-
58
-
59
-
60
-
61
-
62
-
63
-
64
-
65
-
66
-
67
-
68
-
69
-
70
-
71
-
72
-
73
-
74
-
75
-
76
-
77
-
78
-
79
-
80
-
81
-
82
-
83
-
84
-
85
-
86
-
87
-
88
-
89
-
90
-
91
-
92
-
93
-
94
-
95
-
96
-
97
-
98
-
99
-
100
-
101
-
102
-
103
-
104
-
105
-
106
-
107
-
108
-
109
-
110
-
111
-
112
-
113
-
114
-
115
-
116
-
117
-
118
-
119
-
120
-
121
-
122
-
123
-
124
-
125
-
126
-
127
-
128
-
129
-
130
-
131
-
132
-
133
-
134
-
135
-
136
-
137
-
138
-
139
-
140
-
141
-
142
-
143
-
144
-
145
-
146
 |
 |