HP 4400C HP Scanjet 4400C/5400C Series Scanner Mac - (English) User Manual - Page 72
Adjust B&W Threshold, Adjust Black & White
 |
UPC - 725184800566
View all HP 4400C manuals
Add to My Manuals
Save this manual to your list of manuals |
Page 72 highlights
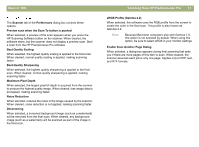
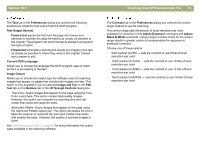
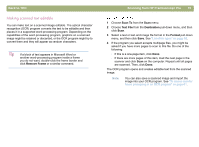
72 Scanning from HP Precisionscan Pro The Selection Area tab controls the following preferences. Automatically create selection area after a mouse click When selected, a selection area will be created around an area on which you click with the cursor. Automatically set the Output Type after selection When selected, the software automatically determines the output type of the area inside the selection border. Automatically adjust exposure after selection When selected, the scanning software automatically changes the values in the Adjust Exposure or Adjust Black & White dialog boxes to the optimal values each time you create a new selection area. Values for an image do not change if you adjust the selection area while the Adjust Exposure or Adjust B&W Threshold dialog box is open. When cleared, the scanning software does not automatically reset the controls in these two tools. Automatically adjust color after selection When selected, the scanning software automatically changes the values in the Adjust Color dialog box to the optimal values each time you create a new selection area. Values never change if you create a different selection area while the Adjust Color dialog box is open. When cleared, the scanning software does not automatically reset the controls. Back to TOC The Resolution tab controls the default resolution values available when you select Resolution on the Tools menu. Default values are already set, but you can add custom resolution values or delete values. The range of resolution is 12 to 999,999. Click Add to add a value. Or, select a value and click Delete to delete that value.
-
 1
1 -
2
-
3
-
4
-
5
-
6
-
7
-
8
-
9
-
10
-
11
-
12
-
13
-
14
-
15
-
16
-
17
-
18
-
19
-
20
-
21
-
22
-
23
-
24
-
25
-
26
-
27
-
28
-
29
-
30
-
31
-
32
-
33
-
34
-
35
-
36
-
37
-
38
-
39
-
40
-
41
-
42
-
43
-
44
-
45
-
46
-
47
-
48
-
49
-
50
-
51
-
52
-
53
-
54
-
55
-
56
-
57
-
58
-
59
-
60
-
61
-
62
-
63
-
64
-
65
-
66
-
 67
67 -
 68
68 -
 69
69 -
 70
70 -
 71
71 -
 72
72 -
 73
73 -
 74
74 -
 75
75 -
 76
76 -
 77
77 -
78
-
79
-
80
-
81
-
82
-
83
-
84
-
85
-
86
-
87
-
88
-
89
-
90
-
91
-
92
-
93
-
94
-
95
-
96
-
97
-
98
-
99
-
100
-
101
-
102
-
103
-
104
-
105
-
106
-
107
-
108
-
109
-
110
-
111
-
112
-
113
-
114
-
115
-
116
-
117
-
118
-
119
-
120
-
121
-
122
-
123
-
124
-
125
-
126
-
127
-
128
-
129
-
130
-
131
-
132
-
133
-
134
-
135
-
136
-
137
-
138
-
139
-
140
-
141
-
142
-
143
-
144
-
145
-
146
 |
 |