HP LaserJet Enterprise MFP M630 LaserJet Analog Fax Accessory 500 - Fax Guide - Page 43
Set fit-to- Set the paper tray, Fax archive and forwarding
 |
View all HP LaserJet Enterprise MFP M630 manuals
Add to My Manuals
Save this manual to your list of manuals |
Page 43 highlights
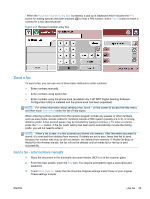
5. Touch Disabled (default) to disable the stamp, or touch Enabled to enable the stamp. 6. Touch Save. Set fit-to-page When selecting a page size to print a fax, the product determines the closest page size that matches the intended size from sizes available in the product. If the fit-to-page setting is enabled and the received image is larger than that page size, the product attempts to scale the image to fit the page. If this setting is disabled, an incoming image larger than the page splits across pages. 1. On the control panel, scroll to and touch the Administration icon to open the Administration menu. 2. Touch Default Job Options and then Default Fax Options. 3. Scroll to and touch Fax Receive to see the Fax Receive setting. 4. Touch Fit to Page to see the fit-to-page settings. 5. Touch Enabled (default) to enable fit-to-page, or touch Disabled to disable fit-to-page. 6. Touch Save. Set the paper tray The paper tray setting selects the product paper tray to pull paper from for printing faxes. 1. On the control panel, scroll to and touch the Administration icon to open the Administration menu. 2. Touch Default Job Options. 3. Touch Default Fax Options. 4. Touch Fax Receive to display the Fax Receive menu. 5. Touch Fax Paper Tray to display the Fax Paper Tray menu. 6. Touch the name of the tray to use for received faxes. 7. Touch Save to save the paper tray value. Fax archive and forwarding Use the fax archive feature to save archival copies of all incoming faxes, all outgoing faxes, or both, to a specified email address. Use the fax forwarding feature to forward all received faxes, all outgoing faxes, or both, to another fax number. When fax forwarding is enabled, the receiving product prints the fax (if fax printing is disabled, the fax prints when the printing is enabled), and also forwards the fax to the fax forward number. NOTE: To use the Archive to Email Address feature, the SMTP server must be configured, and responding, on the product. For information about configuring the SMTP server, see the product user guide. ENWW Fax settings 31
-
 1
1 -
2
-
3
-
4
-
5
-
6
-
7
-
8
-
9
-
10
-
11
-
12
-
13
-
14
-
15
-
16
-
17
-
18
-
19
-
20
-
21
-
22
-
23
-
24
-
25
-
26
-
27
-
28
-
29
-
30
-
31
-
32
-
33
-
34
-
35
-
36
-
37
-
 38
38 -
 39
39 -
 40
40 -
 41
41 -
 42
42 -
 43
43 -
 44
44 -
 45
45 -
 46
46 -
 47
47 -
 48
48 -
49
-
50
-
51
-
52
-
53
-
54
-
55
-
56
-
57
-
58
-
59
-
60
-
61
-
62
-
63
-
64
-
65
-
66
-
67
-
68
-
69
-
70
-
71
-
72
-
73
-
74
-
75
-
76
-
77
-
78
-
79
-
80
-
81
-
82
-
83
-
84
-
85
-
86
-
87
-
88
-
89
-
90
-
91
-
92
-
93
-
94
-
95
-
96
-
97
-
98
-
99
-
100
-
101
-
102
-
103
-
104
-
105
-
106
-
107
-
108
-
109
-
110
-
111
-
112
-
113
-
114
-
115
-
116
-
117
-
118
-
119
-
120
-
121
-
122
-
123
-
124
-
125
-
126
-
127
-
128
-
129
-
130
-
131
-
132
-
133
-
134
-
135
-
136
-
137
-
138
-
139
-
140
-
141
-
142
-
143
-
144
-
145
-
146
-
147
-
148
-
149
-
150
-
151
-
152
-
153
-
154
-
155
-
156
-
157
-
158
-
159
-
160
-
161
-
162
-
163
-
164
-
165
-
166
-
167
-
168
 |
 |
