LG LX610 Red User Guide - Page 100
Video Mode Options
 |
View all LG LX610 Red manuals
Add to My Manuals
Save this manual to your list of manuals |
Page 100 highlights
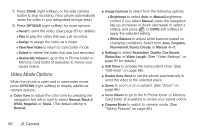
5. Press DONE (right softkey), or the side camera button to stop recording. (Your phone automatically saves the video in your designated storage area.) 6. Press OPTIONS (right softkey) for more options: Ⅲ Send to send the video. (See page 93 for details.) Ⅲ Play to play the video that was just recorded. Ⅲ Assign to assign the video as a ringer. Ⅲ Take New Video to return to camcorder mode. Ⅲ Delete to delete the video that was just recorded. Ⅲ Review My Videos to go to the In Phone folder or Memory Card folder (if available) to review your saved videos. Video Mode Options When the phone is open and in camcorder mode, press OPTIONS (right softkey) to display additional camera options: ⅷ Color Tone to adjust the color tone by pressing the navigation key left or right to select Normal, Black & White, Negative, or Sepia. (The default setting is Normal.) ⅷ Image Controls to select from the following options: Ⅲ Brightness to select Auto or Manual brightness control. If you select Manual, press the navigation key up (increase) or down (decrease) to select a setting, and press or DONE (left softkey) to apply the selected setting. Ⅲ White Balance to adjust white balance based on changing conditions. Select from Auto, Tungsten, Fluorescent, Sunny, Cloudy, or Manual -5~5. ⅷ Settings to select Resolution, Quality, Cue Sound, Status Bar, or Video Length. (See "Video Settings" on page 91 for details.) ⅷ Self Timer to activate the camcorder's timer. (See "Self-timer" on page 88.) ⅷ Enable Auto-Send to set the phone automatically to send the video to the selected place. ⅷ Zoom to zoom in on a subject. (See "Zoom" on page 88.) ⅷ Go to Album to go to the In Phone folder or Memory Card folder (if available) to review your saved videos. ⅷ Camera Mode to switch to camera mode. (See "Taking Pictures" on page 85.) 90 2I. Camera
-
 1
1 -
2
-
3
-
4
-
5
-
6
-
7
-
8
-
9
-
10
-
11
-
12
-
13
-
14
-
15
-
16
-
17
-
18
-
19
-
20
-
21
-
22
-
23
-
24
-
25
-
26
-
27
-
28
-
29
-
30
-
31
-
32
-
33
-
34
-
35
-
36
-
37
-
38
-
39
-
40
-
41
-
42
-
43
-
44
-
45
-
46
-
47
-
48
-
49
-
50
-
51
-
52
-
53
-
54
-
55
-
56
-
57
-
58
-
59
-
60
-
61
-
62
-
63
-
64
-
65
-
66
-
67
-
68
-
69
-
70
-
71
-
72
-
73
-
74
-
75
-
76
-
77
-
78
-
79
-
80
-
81
-
82
-
83
-
84
-
85
-
86
-
87
-
88
-
89
-
90
-
91
-
92
-
93
-
94
-
 95
95 -
 96
96 -
 97
97 -
 98
98 -
 99
99 -
 100
100 -
 101
101 -
 102
102 -
 103
103 -
 104
104 -
 105
105 -
106
-
107
-
108
-
109
-
110
-
111
-
112
-
113
-
114
-
115
-
116
-
117
-
118
-
119
-
120
-
121
-
122
-
123
-
124
-
125
-
126
-
127
-
128
-
129
-
130
-
131
-
132
-
133
-
134
-
135
-
136
-
137
-
138
-
139
-
140
-
141
-
142
-
143
-
144
-
145
-
146
-
147
-
148
-
149
-
150
-
151
-
152
-
153
-
154
-
155
-
156
-
157
-
158
-
159
-
160
-
161
-
162
 |
 |
