LG LX610 Red User Guide - Page 74
Assigning a Picture to an Entry, Creating a Group
 |
View all LG LX610 Red manuals
Add to My Manuals
Save this manual to your list of manuals |
Page 74 highlights
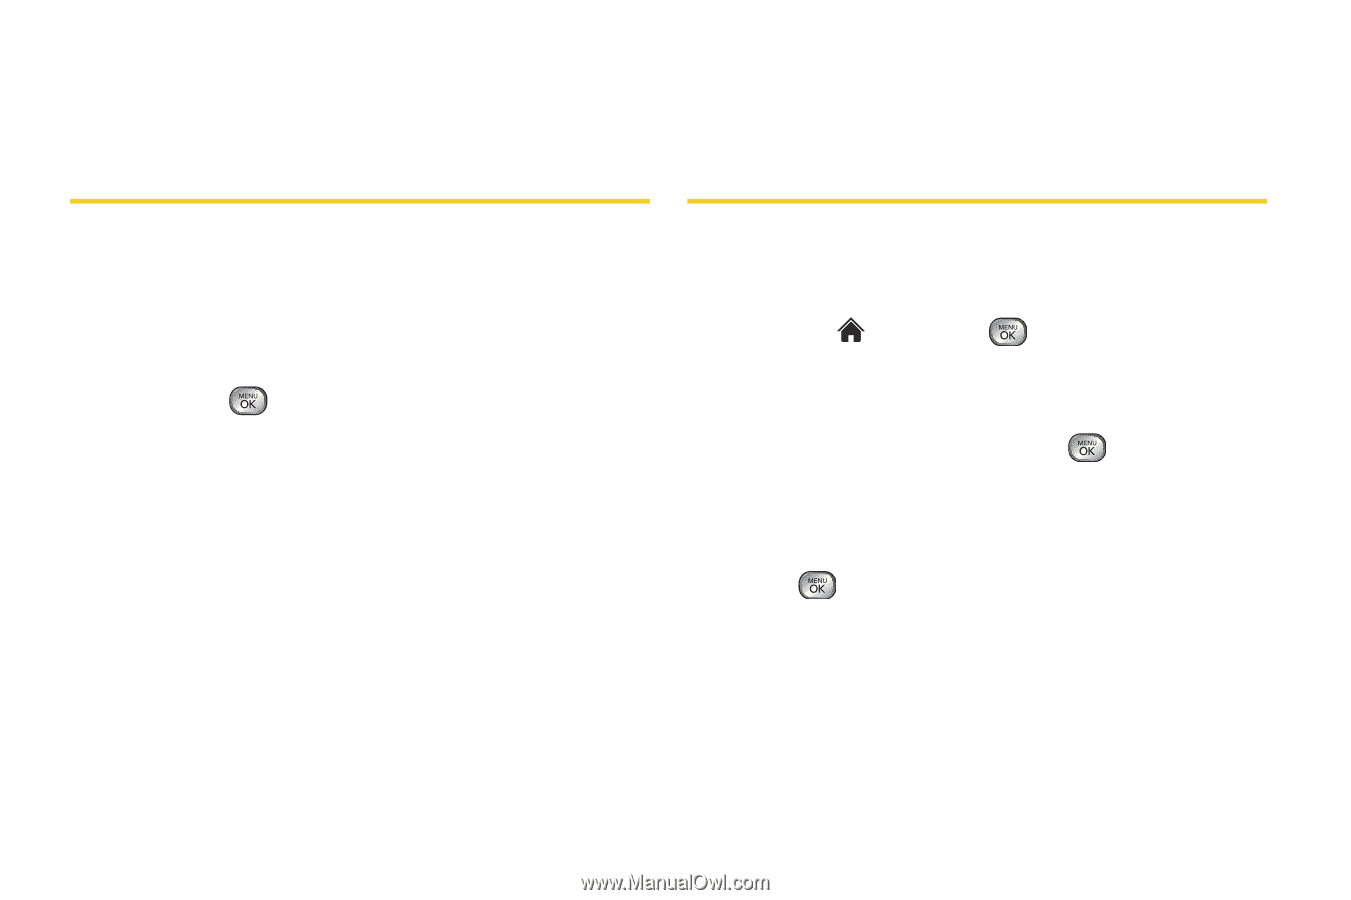
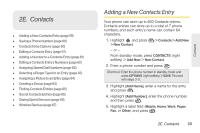
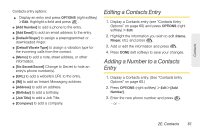
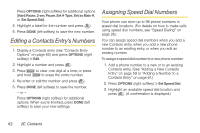
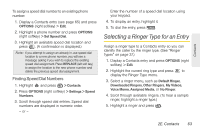
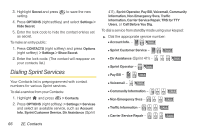
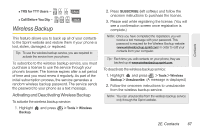
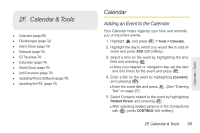
6. Press DONE (left softkey) to save the new ringer type. Assigning a Picture to an Entry 5. Press DONE (left softkey) to save the assigned picture. Creating a Group Assign a picture to display each time a certain contact calls you. 1. Display a Contacts entry and press OPTIONS (right softkey) > Edit. 2. Highlight the current image on the top of the entry and press to display the Picture ID menu. 3. Select an option, such as No Image, Take New Picture, My Photos, Screen Savers, or Assigned Media. 4. Highlight a picture and press ASSIGN (left softkey) to assign it. Ⅲ If you selected Take New Picture, the camera will launch and you will use it to take a new picture. (See "2I. Camera" on page 85 for details.) Ⅲ If you selected My Photos, you may need to select In Phone or Memory Card to find the picture. Create a group to send a message to the members of a group at a time. Created groups also will be shown in Contacts in alphabetical order. 1. Highlight and press > Contacts > Add New. - or - Press CONTACTS (right softkey) > Add New. 2. Highlight New Group and press . (You will see an informational message.) 3. Press START (left softkey). 4. Highlight each member to assign to the group and press . 5. After selecting all members, press CONTINUE (left softkey). 6. Enter a name for the new group. 7. Press SAVE (left softkey). 64 2E. Contacts
-
 1
1 -
2
-
3
-
4
-
5
-
6
-
7
-
8
-
9
-
10
-
11
-
12
-
13
-
14
-
15
-
16
-
17
-
18
-
19
-
20
-
21
-
22
-
23
-
24
-
25
-
26
-
27
-
28
-
29
-
30
-
31
-
32
-
33
-
34
-
35
-
36
-
37
-
38
-
39
-
40
-
41
-
42
-
43
-
44
-
45
-
46
-
47
-
48
-
49
-
50
-
51
-
52
-
53
-
54
-
55
-
56
-
57
-
58
-
59
-
60
-
61
-
62
-
63
-
64
-
65
-
66
-
67
-
68
-
 69
69 -
 70
70 -
 71
71 -
 72
72 -
 73
73 -
 74
74 -
 75
75 -
 76
76 -
 77
77 -
 78
78 -
 79
79 -
80
-
81
-
82
-
83
-
84
-
85
-
86
-
87
-
88
-
89
-
90
-
91
-
92
-
93
-
94
-
95
-
96
-
97
-
98
-
99
-
100
-
101
-
102
-
103
-
104
-
105
-
106
-
107
-
108
-
109
-
110
-
111
-
112
-
113
-
114
-
115
-
116
-
117
-
118
-
119
-
120
-
121
-
122
-
123
-
124
-
125
-
126
-
127
-
128
-
129
-
130
-
131
-
132
-
133
-
134
-
135
-
136
-
137
-
138
-
139
-
140
-
141
-
142
-
143
-
144
-
145
-
146
-
147
-
148
-
149
-
150
-
151
-
152
-
153
-
154
-
155
-
156
-
157
-
158
-
159
-
160
-
161
-
162
 |
 |