Xerox 3200MFPN User Guide - Page 138
Xerox Network Scan Manager, Properties, CentreWare IS, E-mail, User Authentication, Save Changes
 |
UPC - 095205731958
View all Xerox 3200MFPN manuals
Add to My Manuals
Save this manual to your list of manuals |
Page 138 highlights
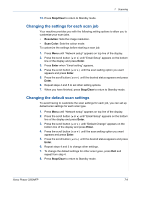
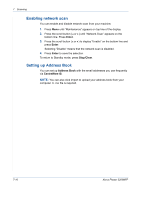
7 Scanning NOTE: You can change the scanner properties of your machine and the scan settings from the Xerox Network Scan Manager window. Click Properties and set the options in each tab. Registering authorized users You can add up to 50 authorized users using CentreWare IS. This feature, when enabled, will prevent unauthorized access to scan to email. One must be authorized before being able to send an email. If this feature is not enabled, then any user can send an email. 1. Enter your machine's IP address as the URL in a browser and click Go to access the web site of your machine. 2. Click Properties. 3. Click E-mail and User Authentication. 4. Click ADD. 5. Select the index number where the corresponding entry will be stored, from 1 to 50. 6. Enter your name, Auth ID, password, and e-mail address. 7. You need to enter the registered user ID and password in the machine when you start scanning to email from the control panel. NOTE: Enable Auth User must be checked. 8. Click Save Changes. Setting up an e-mail account To scan and send an image as an email attachment, you need to set up network parameters using CentreWare IS. 1. Enter your machine's IP address as the URL in a browser and click Go to access the web site of your machine. 2. Click Properties. 3. Click Protocol and SMTP Server. 4. Select IP Address or Host Name. 7-6 Xerox Phaser 3200MFP
-
 1
1 -
2
-
3
-
4
-
5
-
6
-
7
-
8
-
9
-
10
-
11
-
12
-
13
-
14
-
15
-
16
-
17
-
18
-
19
-
20
-
21
-
22
-
23
-
24
-
25
-
26
-
27
-
28
-
29
-
30
-
31
-
32
-
33
-
34
-
35
-
36
-
37
-
38
-
39
-
40
-
41
-
42
-
43
-
44
-
45
-
46
-
47
-
48
-
49
-
50
-
51
-
52
-
53
-
54
-
55
-
56
-
57
-
58
-
59
-
60
-
61
-
62
-
63
-
64
-
65
-
66
-
67
-
68
-
69
-
70
-
71
-
72
-
73
-
74
-
75
-
76
-
77
-
78
-
79
-
80
-
81
-
82
-
83
-
84
-
85
-
86
-
87
-
88
-
89
-
90
-
91
-
92
-
93
-
94
-
95
-
96
-
97
-
98
-
99
-
100
-
101
-
102
-
103
-
104
-
105
-
106
-
107
-
108
-
109
-
110
-
111
-
112
-
113
-
114
-
115
-
116
-
117
-
118
-
119
-
120
-
121
-
122
-
123
-
124
-
125
-
126
-
127
-
128
-
129
-
130
-
131
-
132
-
 133
133 -
 134
134 -
 135
135 -
 136
136 -
 137
137 -
 138
138 -
 139
139 -
 140
140 -
 141
141 -
 142
142 -
 143
143 -
144
-
145
-
146
-
147
-
148
-
149
-
150
-
151
-
152
-
153
-
154
-
155
-
156
-
157
-
158
-
159
-
160
-
161
-
162
-
163
-
164
-
165
-
166
-
167
-
168
-
169
-
170
-
171
-
172
-
173
-
174
-
175
-
176
-
177
-
178
-
179
-
180
-
181
-
182
-
183
-
184
-
185
-
186
-
187
-
188
-
189
-
190
-
191
-
192
-
193
-
194
-
195
-
196
-
197
-
198
-
199
-
200
-
201
-
202
-
203
-
204
-
205
-
206
-
207
-
208
-
209
-
210
-
211
-
212
-
213
-
214
-
215
-
216
-
217
-
218
-
219
-
220
-
221
-
222
-
223
-
224
-
225
-
226
-
227
-
228
-
229
-
230
-
231
-
232
-
233
-
234
-
235
-
236
 |
 |