Adobe 22011292 User Guide - Page 271
Select All Blocks in Track, Insert/Delete Time
 |
UPC - 883919139081
View all Adobe 22011292 manuals
Add to My Manuals
Save this manual to your list of manuals |
Page 271 highlights
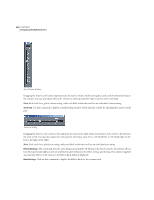
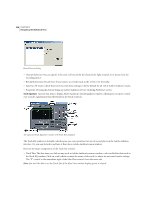
ADOBE AUDITION 257 User Guide • Output: The item shows where the track will be output to, such as a sound card or bus. If you have more than one output device in your system, you can select it from the dropdown list. • Record: The device (such as a sound card) that this track will record through to is shown here. If your system has more than one recording device, you can select it from the dropdown list. • Channel: Use this dropdown list to decide if you want this track to be Left Only, Right Only, or Stereo. • Bit Depth: Here's where you select whether you want the track to be 16 bit or 32 bit. An Adobe Audition session can contain a mix of 16-bit and 32-bit tracks. • Effects: Press the FX button to bring up the Effects Rack for that track. • Lock: If the track has one or more real-time effects applied to it, this button locks the track. • Bus: If you've added this track to a bus, the Wet and Dry percentages are shown here. You can left-click and drag on these boxes to adjust these percentages. • EQ: The Low ("L"), Mid ("M"), and High ("H") equalization values of the track are displayed in these three fields. You can adjust the EQ level of one of these fields by left-clicking on it and dragging. Dragging to the right increases the number, while dragging to the left reduces it. For more equalization control, go to View > Track EQ. • Record: This button arms the track for recording. Press the master record button in the transport controls to start recording. • Solo: This button solos the track so that only it will be heard on playback. All other tracks are muted. Note: Despite its singular name, more than one track may be soloed. To do this, hold down the Ctrl key while clicking on the solo buttons of all tracks you wish to put into solo mode. • Mute: The Mute button silences the output of this track. More than one track in an Adobe Audition session can be muted at one time. Select All Blocks in Track As you'd expect, this command selects all blocks in the current track. Each block in the track is highlighted. Insert/Delete Time Use Insert/Delete Time to introduce an amount of silence into the session (Insert) at the cursor location, or to cut the selected area out of the session (Delete). Insert will shift all material (wave blocks or parts of wave blocks) right of the cursor position to a location after the time amount. Wave blocks will be split if necessary, and the silence inserted. If Delete is chosen, the highlighted area will be removed, with all wave blocks to the right of the selected region shifted to the left. Insert/Delete Time Dialog
-
 1
1 -
2
-
3
-
4
-
5
-
6
-
7
-
8
-
9
-
10
-
11
-
12
-
13
-
14
-
15
-
16
-
17
-
18
-
19
-
20
-
21
-
22
-
23
-
24
-
25
-
26
-
27
-
28
-
29
-
30
-
31
-
32
-
33
-
34
-
35
-
36
-
37
-
38
-
39
-
40
-
41
-
42
-
43
-
44
-
45
-
46
-
47
-
48
-
49
-
50
-
51
-
52
-
53
-
54
-
55
-
56
-
57
-
58
-
59
-
60
-
61
-
62
-
63
-
64
-
65
-
66
-
67
-
68
-
69
-
70
-
71
-
72
-
73
-
74
-
75
-
76
-
77
-
78
-
79
-
80
-
81
-
82
-
83
-
84
-
85
-
86
-
87
-
88
-
89
-
90
-
91
-
92
-
93
-
94
-
95
-
96
-
97
-
98
-
99
-
100
-
101
-
102
-
103
-
104
-
105
-
106
-
107
-
108
-
109
-
110
-
111
-
112
-
113
-
114
-
115
-
116
-
117
-
118
-
119
-
120
-
121
-
122
-
123
-
124
-
125
-
126
-
127
-
128
-
129
-
130
-
131
-
132
-
133
-
134
-
135
-
136
-
137
-
138
-
139
-
140
-
141
-
142
-
143
-
144
-
145
-
146
-
147
-
148
-
149
-
150
-
151
-
152
-
153
-
154
-
155
-
156
-
157
-
158
-
159
-
160
-
161
-
162
-
163
-
164
-
165
-
166
-
167
-
168
-
169
-
170
-
171
-
172
-
173
-
174
-
175
-
176
-
177
-
178
-
179
-
180
-
181
-
182
-
183
-
184
-
185
-
186
-
187
-
188
-
189
-
190
-
191
-
192
-
193
-
194
-
195
-
196
-
197
-
198
-
199
-
200
-
201
-
202
-
203
-
204
-
205
-
206
-
207
-
208
-
209
-
210
-
211
-
212
-
213
-
214
-
215
-
216
-
217
-
218
-
219
-
220
-
221
-
222
-
223
-
224
-
225
-
226
-
227
-
228
-
229
-
230
-
231
-
232
-
233
-
234
-
235
-
236
-
237
-
238
-
239
-
240
-
241
-
242
-
243
-
244
-
245
-
246
-
247
-
248
-
249
-
250
-
251
-
252
-
253
-
254
-
255
-
256
-
257
-
258
-
259
-
260
-
261
-
262
-
263
-
264
-
265
-
 266
266 -
 267
267 -
 268
268 -
 269
269 -
 270
270 -
 271
271 -
 272
272 -
 273
273 -
 274
274 -
 275
275 -
 276
276 -
277
-
278
-
279
-
280
-
281
-
282
-
283
-
284
-
285
-
286
-
287
-
288
-
289
-
290
-
291
-
292
-
293
-
294
-
295
-
296
-
297
-
298
-
299
-
300
-
301
-
302
-
303
-
304
-
305
-
306
-
307
-
308
-
309
-
310
-
311
-
312
-
313
-
314
-
315
-
316
-
317
-
318
-
319
-
320
-
321
-
322
-
323
-
324
-
325
-
326
-
327
-
328
-
329
-
330
-
331
-
332
-
333
-
334
-
335
-
336
-
337
-
338
-
339
-
340
-
341
-
342
-
343
-
344
-
345
-
346
-
347
-
348
-
349
-
350
-
351
-
352
-
353
-
354
-
355
-
356
-
357
-
358
-
359
-
360
-
361
-
362
-
363
-
364
-
365
-
366
-
367
-
368
-
369
-
370
-
371
-
372
-
373
-
374
-
375
-
376
-
377
-
378
-
379
-
380
-
381
-
382
-
383
-
384
-
385
-
386
-
387
-
388
-
389
-
390
 |
 |
