Brother International MFC-J4710DW Users Manual Advanced - English - Page 20
Restoring fax options to the factory settings, Saving fax options as a Shortcut, h
 |
View all Brother International MFC-J4710DW manuals
Add to My Manuals
Save this manual to your list of manuals |
Page 20 highlights
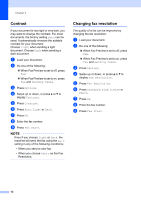
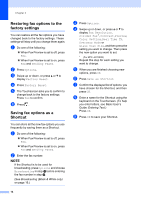
Chapter 3 Restoring fax options to the factory settings 3 You can restore all the fax options you have changed back to the factory settings. These settings will stay until you change them again. a Do one of the following: When Fax Preview is set to off, press Fax. When Fax Preview is set to on, press Fax and Sending Faxes. b Press Options. c Swipe up or down, or press a or b to display Factory Reset. d Press Factory Reset. e The Touchscreen asks you to confirm to change back to the factory settings. Press Yes to confirm. f Press . Saving fax options as a Shortcut 3 You can store all the new fax options you use frequently by saving them as a Shortcut. a Do one of the following: When Fax Preview is set to off, press Fax. When Fax Preview is set to on, press Fax and Sending Faxes. b Enter the fax number. NOTE If the Shortcut is to be used for broadcasting, press Options and choose Broadcasting in step d before entering the fax number in step b. (See Broadcasting (Black & White only) on page 16.) 14 c Press Options. d Swipe up or down, or press a or b to display Fax Resolution, 2-sided Fax 1, Contrast, Preview, Color Setting, Real Time TX, Overseas Mode or Glass Scan Size, and then press the setting you want to change. Then press the new option you want to set. 1 (For MFC-J4710DW) Repeat this step for each setting you want to change. e When you are finished choosing new options, press OK. f Press Save as Shortcut. g Confirm the displayed list of options you have chosen for the Shortcut, and then press OK. h Enter a name for the Shortcut using the keyboard on the Touchscreen. (To help you enter letters, see Basic User's Guide: Entering Text.) Press OK. i Press OK to save your Shortcut.
-
 1
1 -
2
-
3
-
4
-
5
-
6
-
7
-
8
-
9
-
10
-
11
-
12
-
13
-
14
-
 15
15 -
 16
16 -
 17
17 -
 18
18 -
 19
19 -
 20
20 -
 21
21 -
 22
22 -
 23
23 -
 24
24 -
 25
25 -
26
-
27
-
28
-
29
-
30
-
31
-
32
-
33
-
34
-
35
-
36
-
37
-
38
-
39
-
40
-
41
-
42
-
43
-
44
-
45
-
46
-
47
-
48
-
49
-
50
-
51
-
52
-
53
-
54
-
55
-
56
-
57
-
58
-
59
-
60
-
61
-
62
-
63
-
64
-
65
-
66
-
67
-
68
-
69
-
70
-
71
-
72
-
73
-
74
-
75
-
76
-
77
-
78
-
79
-
80
-
81
-
82
-
83
-
84
-
85
-
86
-
87
-
88
-
89
-
90
-
91
-
92
-
93
-
94
-
95
-
96
-
97
-
98
-
99
 |
 |