Brother International MFC-J4710DW Users Manual Advanced - English - Page 46
Setting up Groups for Broadcasting, Changing a Group name
 |
View all Brother International MFC-J4710DW manuals
Add to My Manuals
Save this manual to your list of manuals |
Page 46 highlights
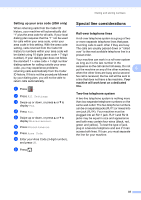
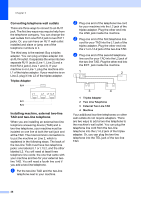
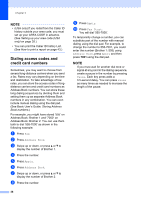
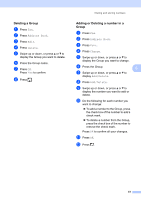
Chapter 5 Setting up Groups for Broadcasting 5 A Group, which can be stored on Address Book, allows you to send the same fax message to many fax numbers by pressing Fax, Address Book, Apply and Fax Start. First, you'll need to store each fax number in Address Book. (See Basic User's Guide: Storing Address Book numbers.) Then you can include them as numbers in the Group. Each Group uses up an Address Book number. You can have up to six Groups, or you can assign up to 198 numbers to a large Group. (See Broadcasting (Black & White only) on page 16.) a Press Fax. b Press Address Book. c Press Edit. d Press Setup Groups. e Press Name. f Enter the Group name (up to 16 characters) using the keyboard on the Touchscreen. Press OK. g Press Add/Delete. h Add Address Book numbers to the Group by pressing them to display a red checkmark. Press OK. i Read and confirm the displayed list of names and numbers you have chosen, and then press OK to save your Group. j Do one of the following: To store another Group for broadcasting, repeat steps c to i. To finish storing Groups for broadcasting, press . 40 NOTE You can print a list of all the Address Book numbers. (See Reports on page 43.) Changing a Group name 5 a Press Fax. b Press Address Book. c Press Edit. d Press Change. e Swipe up or down, or press a or b to display the Group you want to change. f Press the Group. g Press Name. h Enter the new name (up to 16 characters) using the keyboard on the Touchscreen. Press OK. (For example, type NEW CLIENTS.) NOTE How to change the stored name: If you want to change a character, press d or c to position the cursor to highlight the character you want to change, and then press . Enter the new character. (See Basic User's Guide: Entering Text.) i Press OK. j Press .
-
 1
1 -
2
-
3
-
4
-
5
-
6
-
7
-
8
-
9
-
10
-
11
-
12
-
13
-
14
-
15
-
16
-
17
-
18
-
19
-
20
-
21
-
22
-
23
-
24
-
25
-
26
-
27
-
28
-
29
-
30
-
31
-
32
-
33
-
34
-
35
-
36
-
37
-
38
-
39
-
40
-
 41
41 -
 42
42 -
 43
43 -
 44
44 -
 45
45 -
 46
46 -
 47
47 -
 48
48 -
 49
49 -
 50
50 -
 51
51 -
52
-
53
-
54
-
55
-
56
-
57
-
58
-
59
-
60
-
61
-
62
-
63
-
64
-
65
-
66
-
67
-
68
-
69
-
70
-
71
-
72
-
73
-
74
-
75
-
76
-
77
-
78
-
79
-
80
-
81
-
82
-
83
-
84
-
85
-
86
-
87
-
88
-
89
-
90
-
91
-
92
-
93
-
94
-
95
-
96
-
97
-
98
-
99
 |
 |