Brother International MFC-J4710DW Users Manual Advanced - English - Page 78
How to set a new default, How to reset to the factory settings, Scan Type, Resolution, File Type
 |
View all Brother International MFC-J4710DW manuals
Add to My Manuals
Save this manual to your list of manuals |
Page 78 highlights
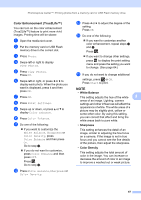
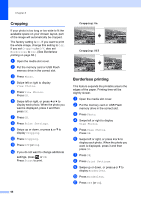
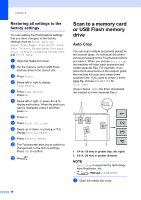
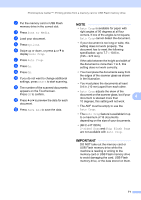
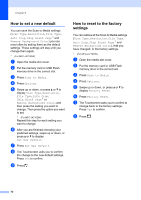
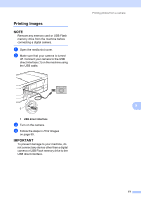
Chapter 8 How to set a new default 8 You can save the Scan to Media settings (Scan Type, Resolution, File Type, Auto Crop, Skip Blank Page 1 and Remove Background Color) you use most often by setting them as the default settings. These settings will stay until you change them again. 1 (For MFC-J4710DW) a Open the media slot cover. b Put the memory card or USB Flash memory drive in the correct slot. c Press Scan to Media. d Press Options. e Swipe up or down, or press a or b to display Scan Type, Resolution, File Type, Auto Crop, Skip Blank Page 1 or Remove Background Color, and then press the setting you want to change. Then press the option you want to set. 1 (For MFC-J4710DW) Repeat this step for each setting you want to change. f After you are finished choosing your preferred settings, swipe up or down, or press a or b to display Set New Default. g Press Set New Default. h The Touchscreen asks you to confirm the change to the new default settings. Press Yes to confirm. i Press . How to reset to the factory settings 8 You can restore all the Scan to Media settings (Scan Type, Resolution, File Type, Auto Crop, Skip Blank Page 1 and Remove Background Color), that you have changed, to the factory settings. 1 (For MFC-J4710DW) a Open the media slot cover. b Put the memory card or USB Flash memory drive in the correct slot. c Press Scan to Media. d Press Options. e Swipe up or down, or press a or b to display Factory Reset. f Press Factory Reset. g The Touchscreen asks you to confirm to change back to the factory settings. Press Yes to confirm. h Press . 72
-
 1
1 -
2
-
3
-
4
-
5
-
6
-
7
-
8
-
9
-
10
-
11
-
12
-
13
-
14
-
15
-
16
-
17
-
18
-
19
-
20
-
21
-
22
-
23
-
24
-
25
-
26
-
27
-
28
-
29
-
30
-
31
-
32
-
33
-
34
-
35
-
36
-
37
-
38
-
39
-
40
-
41
-
42
-
43
-
44
-
45
-
46
-
47
-
48
-
49
-
50
-
51
-
52
-
53
-
54
-
55
-
56
-
57
-
58
-
59
-
60
-
61
-
62
-
63
-
64
-
65
-
66
-
67
-
68
-
69
-
70
-
71
-
72
-
 73
73 -
 74
74 -
 75
75 -
 76
76 -
 77
77 -
 78
78 -
 79
79 -
 80
80 -
 81
81 -
 82
82 -
 83
83 -
84
-
85
-
86
-
87
-
88
-
89
-
90
-
91
-
92
-
93
-
94
-
95
-
96
-
97
-
98
-
99
 |
 |