Canon PIXMA MX532 Fax Guide - Page 15
Setting Daylight Saving Time Summer Time
 |
View all Canon PIXMA MX532 manuals
Add to My Manuals
Save this manual to your list of manuals |
Page 15 highlights
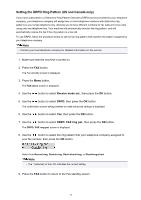
1. Make sure that the machine is turned on. 2. Press the Setup button. The Setup menu screen is displayed. 3. Use the button to select Device settings, then press the OK button. 4. Use the button to select Dev. user settings, then press the OK button. 5. Use the button to select Date/time setting, then press the OK button. 6. Set the date and time. Use the button to move the cursor under the desired position, then use the Numeric buttons to enter the date and time. Enter the date and time in 24-hour format. Enter only the last two digits of the year. 7. Press the OK button. 8. Press the FAX button to return to the Fax standby screen. Setting Daylight Saving Time (Summer Time) Some countries adopt the daylight saving time (summer time) system that shifts the clock time forward at certain periods of the year. You can set your machine to automatically change the time by registering the date and time that daylight saving time (summer time) begins and ends. Important • Not all the latest information of all countries or regions is applied for DST setting by default. You need to change the default setting according to the latest information of your country or region. Note • This setting may not be available depending on the country or region of purchase. 1. Make sure that the machine is turned on. 2. Press the Setup button. The Setup menu screen is displayed. 3. Use the button to select Device settings, then press the OK button. 15
-
 1
1 -
2
-
3
-
4
-
5
-
6
-
7
-
8
-
9
-
 10
10 -
 11
11 -
 12
12 -
 13
13 -
 14
14 -
 15
15 -
 16
16 -
 17
17 -
 18
18 -
 19
19 -
 20
20 -
21
-
22
-
23
-
24
-
25
-
26
-
27
-
28
-
29
-
30
-
31
-
32
-
33
-
34
-
35
-
36
-
37
-
38
-
39
-
40
-
41
-
42
-
43
-
44
-
45
-
46
-
47
-
48
-
49
-
50
-
51
-
52
-
53
-
54
-
55
-
56
-
57
-
58
-
59
-
60
-
61
-
62
-
63
-
64
-
65
-
66
-
67
-
68
-
69
-
70
-
71
-
72
-
73
-
74
-
75
-
76
-
77
-
78
-
79
-
80
-
81
-
82
-
83
-
84
-
85
-
86
-
87
-
88
-
89
-
90
-
91
-
92
-
93
-
94
-
95
-
96
-
97
-
98
-
99
-
100
-
101
-
102
-
103
-
104
-
105
-
106
-
107
-
108
-
109
-
110
-
111
-
112
-
113
-
114
-
115
 |
 |
