Canon PIXMA MX532 Fax Guide - Page 39
Registering Recipients to Coded Memory Dial
 |
View all Canon PIXMA MX532 manuals
Add to My Manuals
Save this manual to your list of manuals |
Page 39 highlights
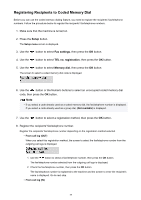
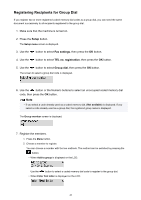
Registering Recipients to Coded Memory Dial Before you can use the coded memory dialing feature, you need to register the recipients' fax/telephone numbers. Follow the procedure below to register the recipients' fax/telephone numbers. 1. Make sure that the machine is turned on. 2. Press the Setup button. The Setup menu screen is displayed. 3. Use the button to select Fax settings, then press the OK button. 4. Use the button to select TEL no. registration, then press the OK button. 5. Use the button to select Memory dial, then press the OK button. The screen to select a coded memory dial code is displayed. 6. Use the button or the Numeric buttons to select an unoccupied coded memory dial code, then press the OK button. Note • If you select a code already used as a coded memory dial, the fax/telephone number is displayed. If you select a code already used as a group dial, (Not available) is displayed. 7. Use the button to select a registration method, then press the OK button. 8. Register the recipients' fax/telephone number. Register the recipients' fax/telephone number depending on the registration method selected. • From call log (OUT) When you select this registration method, the screen to select the fax/telephone number from the outgoing call logs is displayed. 1. Use the button to select a fax/telephone number, then press the OK button. The fax/telephone number selected from the outgoing call logs is displayed. 2. Check the fax/telephone number, then press the OK button. The fax/telephone number is registered to the machine and the screen to enter the recipient's name is displayed. Go to next step. • From call log (IN) 39
-
 1
1 -
2
-
3
-
4
-
5
-
6
-
7
-
8
-
9
-
10
-
11
-
12
-
13
-
14
-
15
-
16
-
17
-
18
-
19
-
20
-
21
-
22
-
23
-
24
-
25
-
26
-
27
-
28
-
29
-
30
-
31
-
32
-
33
-
 34
34 -
 35
35 -
 36
36 -
 37
37 -
 38
38 -
 39
39 -
 40
40 -
 41
41 -
 42
42 -
 43
43 -
 44
44 -
45
-
46
-
47
-
48
-
49
-
50
-
51
-
52
-
53
-
54
-
55
-
56
-
57
-
58
-
59
-
60
-
61
-
62
-
63
-
64
-
65
-
66
-
67
-
68
-
69
-
70
-
71
-
72
-
73
-
74
-
75
-
76
-
77
-
78
-
79
-
80
-
81
-
82
-
83
-
84
-
85
-
86
-
87
-
88
-
89
-
90
-
91
-
92
-
93
-
94
-
95
-
96
-
97
-
98
-
99
-
100
-
101
-
102
-
103
-
104
-
105
-
106
-
107
-
108
-
109
-
110
-
111
-
112
-
113
-
114
-
115
 |
 |