Canon PIXMA MX532 Fax Guide - Page 76
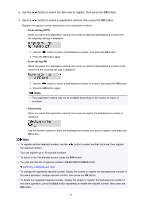
Use the, button to select the dial code to register, then press the, button., button to select
 |
View all Canon PIXMA MX532 manuals
Add to My Manuals
Save this manual to your list of manuals |
Page 76 highlights
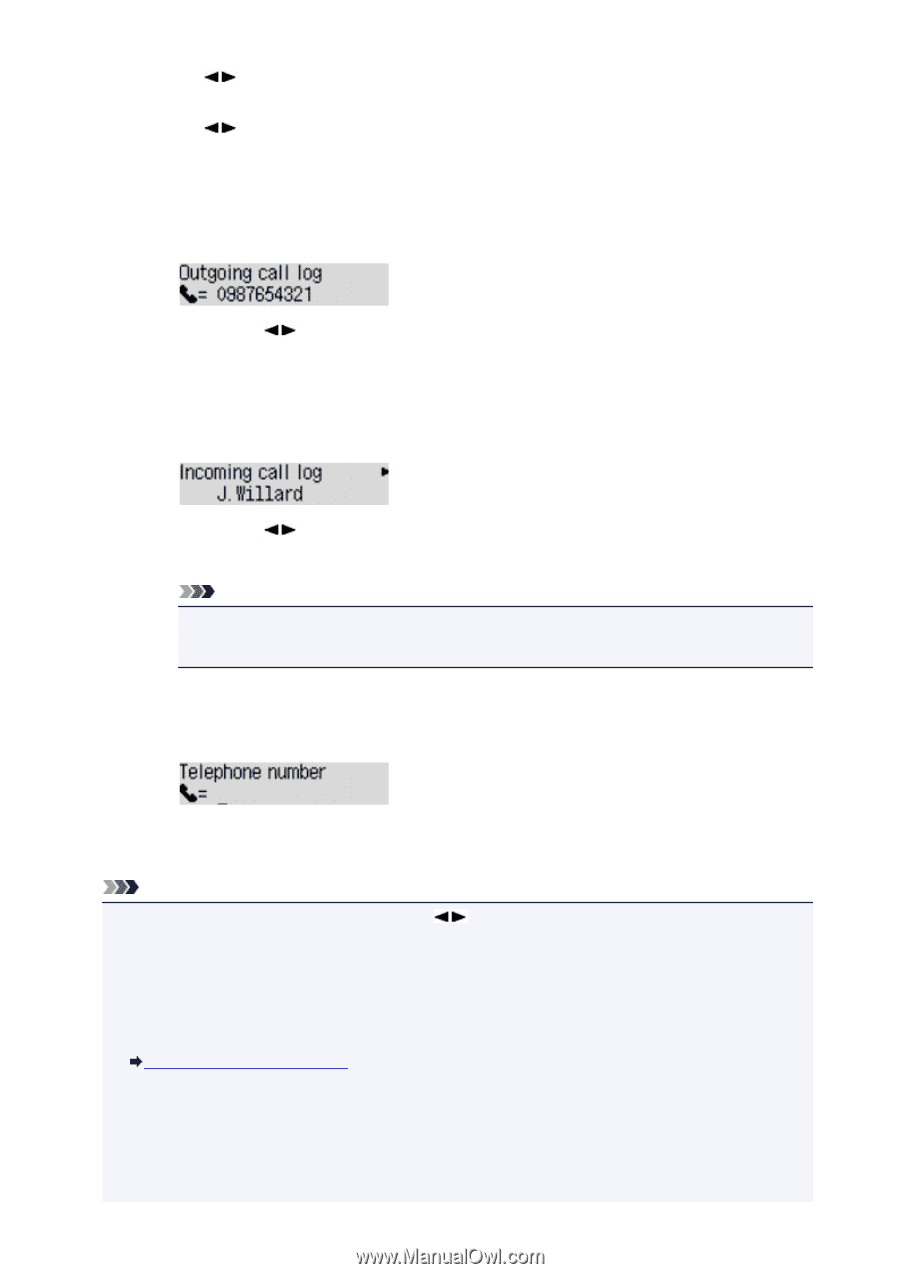
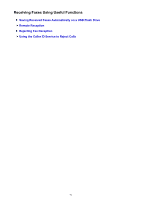
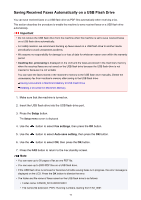
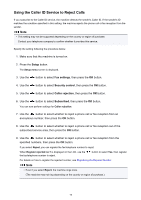
2. Use the button to select the dial code to register, then press the OK button. 3. Use the button to select a registration method, then press the OK button. Register the rejected number depending on the registration method. • From call log (OUT) When you select this registration method, the screen to select the fax/telephone number from the outgoing call logs is displayed. 1. Use the button to select a fax/telephone number, then press the OK button. 2. Press the OK button again. • From call log (IN) When you select this registration method, the screen to select the fax/telephone number or the name from the incoming call logs is displayed. 1. Use the button to select a fax/telephone number or a name, then press the OK button. 2. Press the OK button again. Note • This registration method may not be available depending on the country or region of purchase. • Direct entry When you select this registration method, the screen to register the fax/telephone number is displayed. Use the Numeric buttons to enter the fax/telephone number you want to register, then press the OK button. Note • To register another rejected number, use the the rejected number. button to select another dial code, then register You can register up to 10 rejected numbers. • To return to the Fax standby screen, press the FAX button. • You can print the list of rejected numbers (REJECTED NUMBER LIST). Summary of Reports and Lists • To change the registered rejected number, display the screen to register the fax/telephone number in the same operation, change rejected number, then press the OK button. • To delete the registered rejected number, display the screen to register the fax/telephone number in the same operation, press the Back button repeatedly to delete the rejected number, then press the OK button. 76
-
 1
1 -
2
-
3
-
4
-
5
-
6
-
7
-
8
-
9
-
10
-
11
-
12
-
13
-
14
-
15
-
16
-
17
-
18
-
19
-
20
-
21
-
22
-
23
-
24
-
25
-
26
-
27
-
28
-
29
-
30
-
31
-
32
-
33
-
34
-
35
-
36
-
37
-
38
-
39
-
40
-
41
-
42
-
43
-
44
-
45
-
46
-
47
-
48
-
49
-
50
-
51
-
52
-
53
-
54
-
55
-
56
-
57
-
58
-
59
-
60
-
61
-
62
-
63
-
64
-
65
-
66
-
67
-
68
-
69
-
70
-
 71
71 -
 72
72 -
 73
73 -
 74
74 -
 75
75 -
 76
76 -
 77
77 -
 78
78 -
 79
79 -
 80
80 -
 81
81 -
82
-
83
-
84
-
85
-
86
-
87
-
88
-
89
-
90
-
91
-
92
-
93
-
94
-
95
-
96
-
97
-
98
-
99
-
100
-
101
-
102
-
103
-
104
-
105
-
106
-
107
-
108
-
109
-
110
-
111
-
112
-
113
-
114
-
115
 |
 |