Canon PIXMA MX532 Fax Guide - Page 43
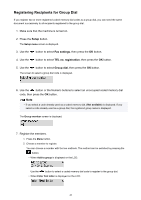
Use the Numeric buttons to enter the group name.
 |
View all Canon PIXMA MX532 manuals
Add to My Manuals
Save this manual to your list of manuals |
Page 43 highlights
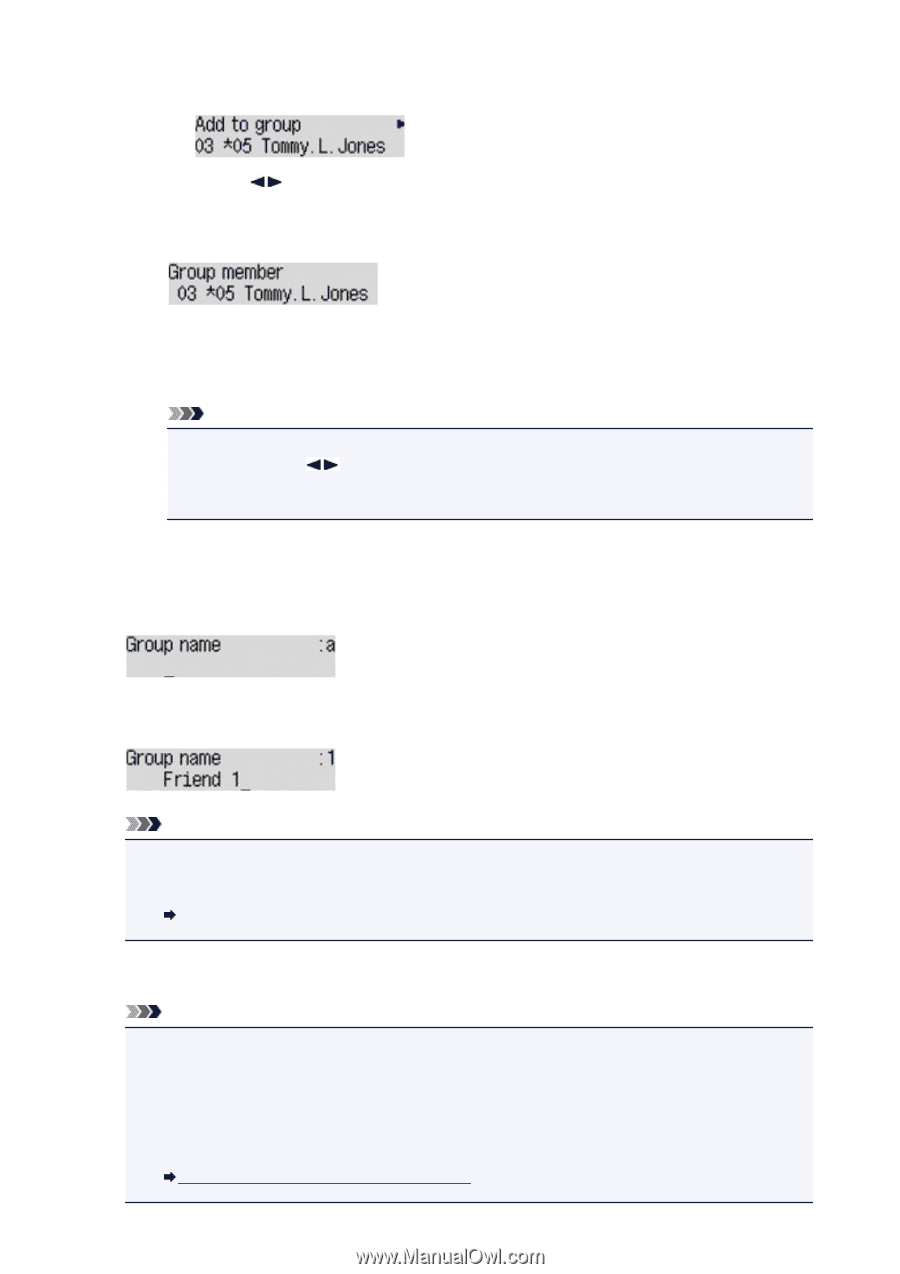
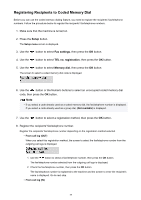
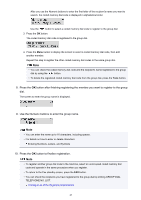
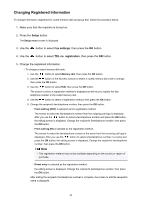
After you use the Numeric buttons to enter the first letter of the recipient's name you want to search, the coded memory dial code is displayed in alphabetical order. Use the button to select a coded memory dial code to register to the group dial. 3. Press the OK button. The coded memory dial code is registered to the group dial. 4. Press the Menu button to display the screen to select a coded memory dial code, then add another member. Repeat this step to register the other coded memory dial codes to the same group dial. Note • You can check the coded memory dial code and the recipient's name registered to the group dial by using the button. • To delete the registered coded memory dial code from the group dial, press the Tone button. 8. Press the OK button after finishing registering the member you want to register to the group dial. The screen to enter the group name is displayed. 9. Use the Numeric buttons to enter the group name. Note • You can enter the name up to 16 characters, including spaces. • For details on how to enter or delete characters: Entering Numbers, Letters, and Symbols 10. Press the OK button to finalize registration. Note • To register another group dial code to the machine, select an unoccupied coded memory dial code and operate in the same procedure when you register. • To return to the Fax standby screen, press the FAX button. • You can check the recipients you have registered to the group dial by printing GROUP DIAL TELEPHONE NO. LIST. Printing a List of the Registered Destinations 43
-
 1
1 -
2
-
3
-
4
-
5
-
6
-
7
-
8
-
9
-
10
-
11
-
12
-
13
-
14
-
15
-
16
-
17
-
18
-
19
-
20
-
21
-
22
-
23
-
24
-
25
-
26
-
27
-
28
-
29
-
30
-
31
-
32
-
33
-
34
-
35
-
36
-
37
-
 38
38 -
 39
39 -
 40
40 -
 41
41 -
 42
42 -
 43
43 -
 44
44 -
 45
45 -
 46
46 -
 47
47 -
 48
48 -
49
-
50
-
51
-
52
-
53
-
54
-
55
-
56
-
57
-
58
-
59
-
60
-
61
-
62
-
63
-
64
-
65
-
66
-
67
-
68
-
69
-
70
-
71
-
72
-
73
-
74
-
75
-
76
-
77
-
78
-
79
-
80
-
81
-
82
-
83
-
84
-
85
-
86
-
87
-
88
-
89
-
90
-
91
-
92
-
93
-
94
-
95
-
96
-
97
-
98
-
99
-
100
-
101
-
102
-
103
-
104
-
105
-
106
-
107
-
108
-
109
-
110
-
111
-
112
-
113
-
114
-
115
 |
 |