Canon PIXMA Pro9500 Quick Start Guide - Page 16
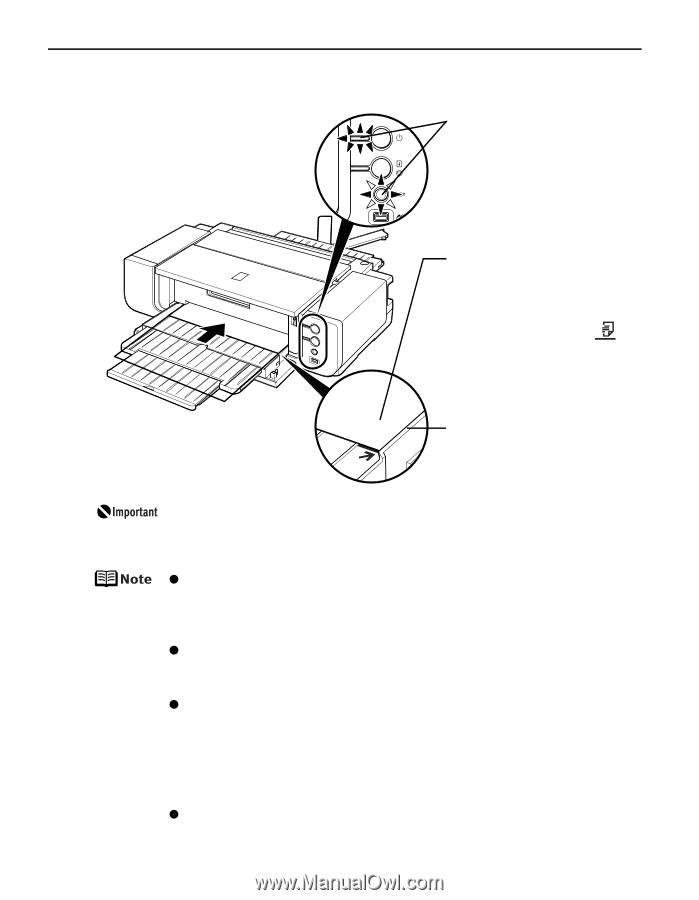
Basic Printing, Load the paper., FRONT FEED, POWER, FRONT - mark
 |
View all Canon PIXMA Pro9500 manuals
Add to My Manuals
Save this manual to your list of manuals |
Page 16 highlights
Basic Printing 5 Load the paper. (1) Ensure that the POWER lamp is lit and the FRONT FEED button is flashing quickly. If the POWER lamp is flashing blue, wait until it stops flashing. (2) Load the paper straight into the Front Tray with the print side facing UP. Align the front edge of the paper with the mark on the Front Tray. When printing from the Front Tray, load one sheet in the Front Tray at a time. Align the right edge of the paper against the right side of the Front Tray. If the printer is not used for 5 minutes or more while it is as described in (1) above, then the FRONT FEED button stops flashing and stays lit and you cannot set the paper. If this happens, return to (3) in step 4. z When paper is curled, gently bend it in the opposite direction of the curl (without curling the reverse side) and then load the paper. For details on how to flatten paper curl, refer to "Media is curled" on page 72. z When using Photo Paper Plus Semi-gloss, even if the sheet is curled, load one sheet at a time as it is. If you roll up this paper to flatten, this may cause cracks on the surface of the paper and reduce the print quality. z To prevent paper from being curled, we recommend handling it in the following ways: - Put unused paper back into the package, and store them horizontally. - Remove only as many sheets from the package as you need right before printing. z For details on how to load the paper, refer to the appropriate section in "Printing Media" in the User's Guide on-screen manual. 12
-
 1
1 -
2
-
3
-
4
-
5
-
6
-
7
-
8
-
9
-
10
-
 11
11 -
 12
12 -
 13
13 -
 14
14 -
 15
15 -
 16
16 -
 17
17 -
 18
18 -
 19
19 -
 20
20 -
 21
21 -
22
-
23
-
24
-
25
-
26
-
27
-
28
-
29
-
30
-
31
-
32
-
33
-
34
-
35
-
36
-
37
-
38
-
39
-
40
-
41
-
42
-
43
-
44
-
45
-
46
-
47
-
48
-
49
-
50
-
51
-
52
-
53
-
54
-
55
-
56
-
57
-
58
-
59
-
60
-
61
-
62
-
63
-
64
-
65
-
66
-
67
-
68
-
69
-
70
-
71
-
72
-
73
-
74
-
75
-
76
-
77
-
78
-
79
-
80
-
81
-
82
-
83
-
84
-
85
-
86
-
87
-
88
-
89
-
90
-
91
-
92
-
93
-
94
-
95
-
96
-
97
-
98
-
99
-
100
-
101
-
102
-
103
-
104
 |
 |