Canon PIXMA Pro9500 Quick Start Guide - Page 73
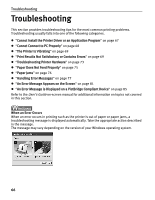
The Printer Is Vibrating, Print Results Not Satisfactory or Contains Errors
 |
View all Canon PIXMA Pro9500 manuals
Add to My Manuals
Save this manual to your list of manuals |
Page 73 highlights
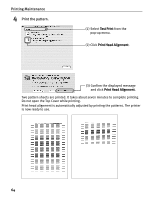
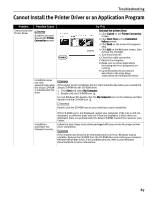
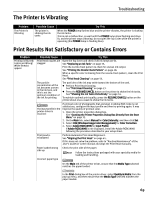
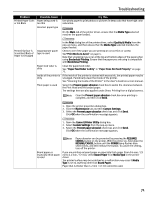
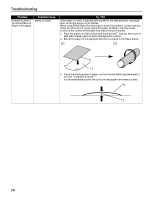
The Printer Is Vibrating Troubleshooting Problem The Printer Is Vibrating Possible Cause The printer is shaking the ink tanks Try This When the POWER lamp flashes blue and the printer vibrates, the printer is shaking the ink tanks. This is not a malfunction, so wait until the POWER lamp stops flashing and stays lit, and the printer stops vibrating. Do not open the Top Cover while the printer is operating (the POWER lamp is flashing blue). Print Results Not Satisfactory or Contains Errors Problem Printing is Blurred/ Colors are Wrong/ White Streaks appear Possible Cause Print Head nozzles are clogged The particle concentration of the ink becomes uneven in the ink tank, and this is not the optimum condition of the ink for printing The input profile in the printer driver is incorrect Print Head is misaligned Paper loaded wrong side up Incorrect paper type Try This Open the Top Cover and check if all ink lamps are lit. See "Replacing an Ink Tank" on page 35. Print the nozzle check pattern to check for uneven ink output. See "Printing the Nozzle Check Pattern" on page 48. When a specific color is missing from the nozzle check pattern, clean the Print Head. See "Print Head Cleaning" on page 53. The particles of the ink may settle toward the bottom of the tank. z Perform Print Head Cleaning. See "Print Head Cleaning" on page 53. z Press the RESUME/CANCEL button on the printer to shake the ink tanks. See "Shaking the Ink Tanks Periodically" on page 34. To maintain optimal print quality, press the RESUME/CANCEL button on the printer about once a week to shake the ink tanks. If printout color of photographs that are taken in Adobe RGB mode is not satisfactory, configure the input profile and then try printing again. It may improve the quality of printout color. 1. Open the printer properties dialog box. See "Opening the Printer Properties Dialog Box Directly from the Start Menu" on page 32. 2. On the Main tab, select Manual for Color/Intensity, and then click Set. 3. Select ICM [Windows Image Color Management] for Color Correction. 4. Select Adobe RGB(1998) for Input Profile. If Adobe RGB(1998) is not displayed, install the Adobe RGB(1998) following the procedure described in your setup sheet. Perform Automatic Print Head Alignment. See "Aligning the Print Head" on page 61. If this does not solve the problem, refer to "Routine Maintenance" of the User's Guide on-screen manual and align the Print Head manually. Check the print side of the paper. Follow the instructions packaged with your specialty media for loading and handling. On the Main tab of the printer driver, ensure that the Media Type selected matches the paper loaded. In the Print dialog box of the printer driver, select Quality & Media from the pop-up menu, and then ensure that the Media Type selected matches the paper loaded. 69
-
 1
1 -
2
-
3
-
4
-
5
-
6
-
7
-
8
-
9
-
10
-
11
-
12
-
13
-
14
-
15
-
16
-
17
-
18
-
19
-
20
-
21
-
22
-
23
-
24
-
25
-
26
-
27
-
28
-
29
-
30
-
31
-
32
-
33
-
34
-
35
-
36
-
37
-
38
-
39
-
40
-
41
-
42
-
43
-
44
-
45
-
46
-
47
-
48
-
49
-
50
-
51
-
52
-
53
-
54
-
55
-
56
-
57
-
58
-
59
-
60
-
61
-
62
-
63
-
64
-
65
-
66
-
67
-
 68
68 -
 69
69 -
 70
70 -
 71
71 -
 72
72 -
 73
73 -
 74
74 -
 75
75 -
 76
76 -
 77
77 -
 78
78 -
79
-
80
-
81
-
82
-
83
-
84
-
85
-
86
-
87
-
88
-
89
-
90
-
91
-
92
-
93
-
94
-
95
-
96
-
97
-
98
-
99
-
100
-
101
-
102
-
103
-
104
 |
 |
