Canon PowerShot G7 X User Guide - Page 120
Editing Still Images
 |
View all Canon PowerShot G7 X manuals
Add to My Manuals
Save this manual to your list of manuals |
Page 120 highlights
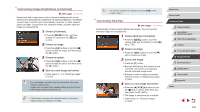
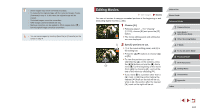
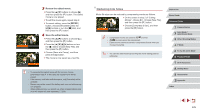
2 Assign a function to a Touch Action. zzPress the [ ][ ] buttons or turn the [ ] dial to choose a dragging pattern, and then press the [ ][ ] buttons to choose the function to assign. Assignable Functions Favorites Next Favorite Previous Favorite Next Date Previous Date Smart Shuffle To Camera To Smartphone To Computer To Printer To Web Service Slideshow Erase Protect Rotate Tag images as favorites, or untag the image. Switch to displaying the next image tagged as a favorite. Switch to displaying the previous image tagged as a favorite. Switch to displaying the first image with the next shooting date. Switch to displaying the first image with the previous shooting date. Start Smart Shuffle playback. Access the Wi-Fi connection screen. For Wi-Fi details, see "Wi-Fi Functions" (= 127). Start a slideshow. Erase an image. Protect an image or cancel protection. Rotate an image. Editing Still Images ●● Image editing (=120 - =123) is only available when the memory card has sufficient free space. ●● You can access editing screens for various functions by touching an image after choosing the function in the menu. ●● When [ ] is shown on an editing screen, you can touch [ ] instead of pressing the [ ] button, if you prefer. ●● When [ ] is shown on an editing screen, you can touch [ ] instead of pressing the [ ] button, if you prefer. Resizing Images Save a copy of images at a lower resolution. Still Images Movies 1 Choose [Resize]. zzPress the [ ] button and choose [Resize] on the [ ] tab (=30). 2 Choose an image. zzPress the [ ][ ] buttons or turn the [ ] dial to choose an image, and then press the [ ] button. 3 Choose an image size. zzPress the [ ][ ] buttons or turn the [ ] dial to choose the size, and then press the [ ] button. zz[Save new image?] is displayed. Before Use Basic Guide Advanced Guide 1 Camera Basics 2 Auto Mode / Hybrid Auto Mode 3 Other Shooting Modes 4 P Mode 5 Tv, Av, M, and C Mode 6 Playback Mode 7 Wi-Fi Functions 8 Setting Menu 9 Accessories 10 Appendix Index 120
-
 1
1 -
2
-
3
-
4
-
5
-
6
-
7
-
8
-
9
-
10
-
11
-
12
-
13
-
14
-
15
-
16
-
17
-
18
-
19
-
20
-
21
-
22
-
23
-
24
-
25
-
26
-
27
-
28
-
29
-
30
-
31
-
32
-
33
-
34
-
35
-
36
-
37
-
38
-
39
-
40
-
41
-
42
-
43
-
44
-
45
-
46
-
47
-
48
-
49
-
50
-
51
-
52
-
53
-
54
-
55
-
56
-
57
-
58
-
59
-
60
-
61
-
62
-
63
-
64
-
65
-
66
-
67
-
68
-
69
-
70
-
71
-
72
-
73
-
74
-
75
-
76
-
77
-
78
-
79
-
80
-
81
-
82
-
83
-
84
-
85
-
86
-
87
-
88
-
89
-
90
-
91
-
92
-
93
-
94
-
95
-
96
-
97
-
98
-
99
-
100
-
101
-
102
-
103
-
104
-
105
-
106
-
107
-
108
-
109
-
110
-
111
-
112
-
113
-
114
-
 115
115 -
 116
116 -
 117
117 -
 118
118 -
 119
119 -
 120
120 -
 121
121 -
 122
122 -
 123
123 -
 124
124 -
 125
125 -
126
-
127
-
128
-
129
-
130
-
131
-
132
-
133
-
134
-
135
-
136
-
137
-
138
-
139
-
140
-
141
-
142
-
143
-
144
-
145
-
146
-
147
-
148
-
149
-
150
-
151
-
152
-
153
-
154
-
155
-
156
-
157
-
158
-
159
-
160
-
161
-
162
-
163
-
164
-
165
-
166
-
167
-
168
-
169
-
170
-
171
-
172
-
173
-
174
-
175
-
176
-
177
-
178
-
179
-
180
-
181
-
182
-
183
-
184
-
185
-
186
-
187
-
188
-
189
-
190
-
191
-
192
-
193
-
194
-
195
-
196
-
197
-
198
-
199
-
200
-
201
-
202
 |
 |
