Canon PowerShot G7 X User Guide - Page 155
Metric / Non-Metric Display, Electronic Level Calibration, File Numbering, Date-Based Image Storage
 |
View all Canon PowerShot G7 X manuals
Add to My Manuals
Save this manual to your list of manuals |
Page 155 highlights
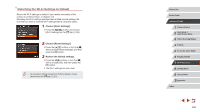
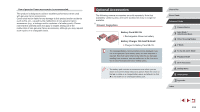
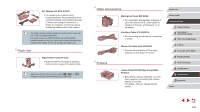
File Numbering Your shots are automatically numbered in sequential order (0001 - 9999) and saved in folders that store up to 2,000 images each. You can change how the camera assigns file numbers. zzChoose [File Numbering], and then choose an option. Continuous Auto Reset Images are numbered consecutively (until the 9999th shot is taken/saved) even if you switch memory cards. Image numbering is reset to 0001 if you switch memory cards, or when a new folder is created. ●● Regardless of the option selected in this setting, shots may be numbered consecutively after the last number of existing images on newly inserted memory cards. To start saving shots from 0001, use an empty (or formatted (=154)) memory card. ●● Refer to "Software Instruction Manual" (= 163) for information on the card folder structure and image formats. Date-Based Image Storage Instead of saving images in folders created each month, you can have the camera create folders each day you shoot to store shots taken that day. zzChoose [Create Folder], and then choose [Daily]. zzImages will now be saved in folders created on the shooting date. Metric / Non-Metric Display Change the unit of measurement shown in the zoom bar (=34), the MF indicator (=81), and elsewhere from m/cm to ft/in as needed. zzChoose [Units], and then choose [ft/in]. Electronic Level Calibration Calibrate the electronic level if it seems ineffective in helping you level the camera. For greater calibration accuracy, display grid lines (=99) to help you level the camera in advance. 1 Make sure the camera is level. zzPlace the camera on a flat surface, such as a table. 2 Calibrate the electronic level. zzChoose [Electronic Level], and then press the [ ] button. zzTo adjust left/right tilt, choose [Horizontal Roll Calibration], and to adjust forward/ backward tilt, choose [Vertical Pitch Calibration], followed by the [ ] button. A confirmation message is displayed. zzChoose [OK], and then press the [ ] button. Before Use Basic Guide Advanced Guide 1 Camera Basics 2 Auto Mode / Hybrid Auto Mode 3 Other Shooting Modes 4 P Mode 5 Tv, Av, M, and C Mode 6 Playback Mode 7 Wi-Fi Functions 8 Setting Menu 9 Accessories 10 Appendix Index 155
-
 1
1 -
2
-
3
-
4
-
5
-
6
-
7
-
8
-
9
-
10
-
11
-
12
-
13
-
14
-
15
-
16
-
17
-
18
-
19
-
20
-
21
-
22
-
23
-
24
-
25
-
26
-
27
-
28
-
29
-
30
-
31
-
32
-
33
-
34
-
35
-
36
-
37
-
38
-
39
-
40
-
41
-
42
-
43
-
44
-
45
-
46
-
47
-
48
-
49
-
50
-
51
-
52
-
53
-
54
-
55
-
56
-
57
-
58
-
59
-
60
-
61
-
62
-
63
-
64
-
65
-
66
-
67
-
68
-
69
-
70
-
71
-
72
-
73
-
74
-
75
-
76
-
77
-
78
-
79
-
80
-
81
-
82
-
83
-
84
-
85
-
86
-
87
-
88
-
89
-
90
-
91
-
92
-
93
-
94
-
95
-
96
-
97
-
98
-
99
-
100
-
101
-
102
-
103
-
104
-
105
-
106
-
107
-
108
-
109
-
110
-
111
-
112
-
113
-
114
-
115
-
116
-
117
-
118
-
119
-
120
-
121
-
122
-
123
-
124
-
125
-
126
-
127
-
128
-
129
-
130
-
131
-
132
-
133
-
134
-
135
-
136
-
137
-
138
-
139
-
140
-
141
-
142
-
143
-
144
-
145
-
146
-
147
-
148
-
149
-
 150
150 -
 151
151 -
 152
152 -
 153
153 -
 154
154 -
 155
155 -
 156
156 -
 157
157 -
 158
158 -
 159
159 -
 160
160 -
161
-
162
-
163
-
164
-
165
-
166
-
167
-
168
-
169
-
170
-
171
-
172
-
173
-
174
-
175
-
176
-
177
-
178
-
179
-
180
-
181
-
182
-
183
-
184
-
185
-
186
-
187
-
188
-
189
-
190
-
191
-
192
-
193
-
194
-
195
-
196
-
197
-
198
-
199
-
200
-
201
-
202
 |
 |
