Canon PowerShot G7 X User Guide - Page 52
Customizing Camera Operation - reviews
 |
View all Canon PowerShot G7 X manuals
Add to My Manuals
Save this manual to your list of manuals |
Page 52 highlights
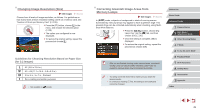
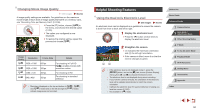
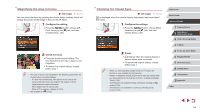
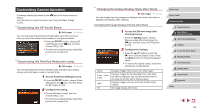
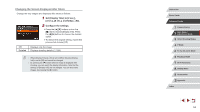
Customizing Camera Operation Customize shooting functions on the [ ] tab of the menu screen as follows. For instructions on menu functions, see "Using the Menu Screen" (= 30). Deactivating the AF-Assist Beam Still Images Movies You can deactivate the lamp that normally lights up to help you focus when you press the shutter button halfway in low-light conditions. zzPress the [ ] button, choose [AF- assist Beam] on the [ ] tab, and then choose [Off] (=30). zzTo restore the original setting, repeat this process but choose [On]. Deactivating the Red-Eye Reduction Lamp Still Images Movies You can deactivate the red-eye reduction lamp that lights up to reduce red-eye when the flash is used in low-light shots. 1 Access the [Flash Settings] screen. zzPress the [ ] button, choose [Flash Settings] on the [ ] tab, and then press the [ ] button (=30). 2 Configure the setting. zzChoose [Red-Eye Lamp], and then choose [Off] (=30). zzTo restore the original setting, repeat this process but choose [On]. Changing the Image Display Style after Shots Still Images Movies You can change how long images are displayed and what information is displayed immediately after shooting. Changing the Image Display Period after Shots 1 Access the [Review image after shooting] screen. zzPress the [ ] button, choose [Review image after shooting] on the [ ] tab, and then press the [ ] button (= 30). 2 Configure the settings. zzPress the [ ][ ] buttons or turn the [ ] dial to choose [Display Time]. Press the [ ][ ] buttons to choose the desired option. zzTo restore the original setting, repeat this process but choose [Quick]. Quick 2 sec., 4 sec., 8 sec. Hold Off Displays images only until you can shoot again. Displays images for the specified time. Even while the shot is displayed, you can take another shot by pressing the shutter button halfway again. Displays images until you press the shutter button halfway. No image display after shots. Before Use Basic Guide Advanced Guide 1 Camera Basics 2 Auto Mode / Hybrid Auto Mode 3 Other Shooting Modes 4 P Mode 5 Tv, Av, M, and C Mode 6 Playback Mode 7 Wi-Fi Functions 8 Setting Menu 9 Accessories 10 Appendix Index 52
-
 1
1 -
2
-
3
-
4
-
5
-
6
-
7
-
8
-
9
-
10
-
11
-
12
-
13
-
14
-
15
-
16
-
17
-
18
-
19
-
20
-
21
-
22
-
23
-
24
-
25
-
26
-
27
-
28
-
29
-
30
-
31
-
32
-
33
-
34
-
35
-
36
-
37
-
38
-
39
-
40
-
41
-
42
-
43
-
44
-
45
-
46
-
 47
47 -
 48
48 -
 49
49 -
 50
50 -
 51
51 -
 52
52 -
 53
53 -
 54
54 -
 55
55 -
 56
56 -
 57
57 -
58
-
59
-
60
-
61
-
62
-
63
-
64
-
65
-
66
-
67
-
68
-
69
-
70
-
71
-
72
-
73
-
74
-
75
-
76
-
77
-
78
-
79
-
80
-
81
-
82
-
83
-
84
-
85
-
86
-
87
-
88
-
89
-
90
-
91
-
92
-
93
-
94
-
95
-
96
-
97
-
98
-
99
-
100
-
101
-
102
-
103
-
104
-
105
-
106
-
107
-
108
-
109
-
110
-
111
-
112
-
113
-
114
-
115
-
116
-
117
-
118
-
119
-
120
-
121
-
122
-
123
-
124
-
125
-
126
-
127
-
128
-
129
-
130
-
131
-
132
-
133
-
134
-
135
-
136
-
137
-
138
-
139
-
140
-
141
-
142
-
143
-
144
-
145
-
146
-
147
-
148
-
149
-
150
-
151
-
152
-
153
-
154
-
155
-
156
-
157
-
158
-
159
-
160
-
161
-
162
-
163
-
164
-
165
-
166
-
167
-
168
-
169
-
170
-
171
-
172
-
173
-
174
-
175
-
176
-
177
-
178
-
179
-
180
-
181
-
182
-
183
-
184
-
185
-
186
-
187
-
188
-
189
-
190
-
191
-
192
-
193
-
194
-
195
-
196
-
197
-
198
-
199
-
200
-
201
-
202
 |
 |
