Canon PowerShot G7 X User Guide - Page 64
Using the Wink Self-Timer
 |
View all Canon PowerShot G7 X manuals
Add to My Manuals
Save this manual to your list of manuals |
Page 64 highlights
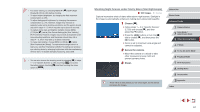
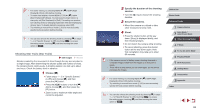
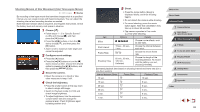
●● You can also shoot as usual by pressing the shutter button. ●● The camera can detect smiles more easily when subjects face the camera and open their mouth wide enough so that teeth are visible. ●● To change the number of shots, press the [ ][ ] buttons after choosing [ ] in step 1. [Blink Detection] (=51) is only available for the final shot. ●● You can also choose the shooting mode by choosing [ ] in steps 1 - 2 of "Specific Scenes" (=55), touching [ ] to access the setting screen, touching [ ], and then touching the same option or [ ]. Using the Wink Self-Timer Still Images Movies Aim the camera at a person and press the shutter button all the way down. The camera will shoot about two seconds after a wink is detected. 1 Choose [ ]. zzFollow steps 1 - 2 in "Specific Scenes" (=55) and choose [ ], and then press the [ ] button. zzPress the [ ][ ] buttons or turn the [ ] dial to choose [ ], and then press the [ ] button. 2 Compose the shot and press the shutter button halfway. zzOn the screen, touch the face of the person who will wink to choose it (Touch AF), and then press the shutter button halfway. zzMake sure a green frame is displayed around the face of the person who will wink. 3 Press the shutter button all the way down. zzThe camera now enters shooting standby mode, and [Wink to take picture] is displayed. zzThe lamp blinks and the self-timer sound is played. 4 Face the camera and wink. zzThe camera will shoot about two seconds after detecting a wink by the person whose face is inside the frame. zzTo cancel shooting after you have triggered the self-timer, press the [ ] button. ●● If the wink is not detected, wink again slowly and deliberately. ●● Winking may not be detected if eyes are obscured by hair, a hat, or glasses. ●● Closing and opening both eyes at once will also be detected as a wink. ●● If winking is not detected, the camera will shoot about 15 seconds later. ●● To change the number of shots, press the [ ][ ] buttons after choosing [ ] in step 1. [Blink Detection] (=51) is only available for the final shot. ●● If no one is in the shooting area when the shutter button is pressed all the way down, the camera will shoot after a person enters the shooting area and winks. ●● You can also choose the shooting mode by choosing [ ] in steps 1 - 2 of "Specific Scenes" (=55), touching [ ] to access the setting screen, touching [ ], and then touching the same option or [ ]. Before Use Basic Guide Advanced Guide 1 Camera Basics 2 Auto Mode / Hybrid Auto Mode 3 Other Shooting Modes 4 P Mode 5 Tv, Av, M, and C Mode 6 Playback Mode 7 Wi-Fi Functions 8 Setting Menu 9 Accessories 10 Appendix Index 64
-
 1
1 -
2
-
3
-
4
-
5
-
6
-
7
-
8
-
9
-
10
-
11
-
12
-
13
-
14
-
15
-
16
-
17
-
18
-
19
-
20
-
21
-
22
-
23
-
24
-
25
-
26
-
27
-
28
-
29
-
30
-
31
-
32
-
33
-
34
-
35
-
36
-
37
-
38
-
39
-
40
-
41
-
42
-
43
-
44
-
45
-
46
-
47
-
48
-
49
-
50
-
51
-
52
-
53
-
54
-
55
-
56
-
57
-
58
-
 59
59 -
 60
60 -
 61
61 -
 62
62 -
 63
63 -
 64
64 -
 65
65 -
 66
66 -
 67
67 -
 68
68 -
 69
69 -
70
-
71
-
72
-
73
-
74
-
75
-
76
-
77
-
78
-
79
-
80
-
81
-
82
-
83
-
84
-
85
-
86
-
87
-
88
-
89
-
90
-
91
-
92
-
93
-
94
-
95
-
96
-
97
-
98
-
99
-
100
-
101
-
102
-
103
-
104
-
105
-
106
-
107
-
108
-
109
-
110
-
111
-
112
-
113
-
114
-
115
-
116
-
117
-
118
-
119
-
120
-
121
-
122
-
123
-
124
-
125
-
126
-
127
-
128
-
129
-
130
-
131
-
132
-
133
-
134
-
135
-
136
-
137
-
138
-
139
-
140
-
141
-
142
-
143
-
144
-
145
-
146
-
147
-
148
-
149
-
150
-
151
-
152
-
153
-
154
-
155
-
156
-
157
-
158
-
159
-
160
-
161
-
162
-
163
-
164
-
165
-
166
-
167
-
168
-
169
-
170
-
171
-
172
-
173
-
174
-
175
-
176
-
177
-
178
-
179
-
180
-
181
-
182
-
183
-
184
-
185
-
186
-
187
-
188
-
189
-
190
-
191
-
192
-
193
-
194
-
195
-
196
-
197
-
198
-
199
-
200
-
201
-
202
 |
 |
