Canon PowerShot G7 X User Guide - Page 62
Shooting with a Soft Focus Effect, Making Subjects Stand Out Background Defocus
 |
View all Canon PowerShot G7 X manuals
Add to My Manuals
Save this manual to your list of manuals |
Page 62 highlights
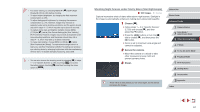
Making Subjects Stand Out (Background Defocus) Still Images Movies You can shoot subjects so that they stand out from the background. Two consecutive images are captured with settings optimized for background defocus. The background is defocused through lens effects and subject- and scene-based image processing. 1 Choose [ ]. zzFollow steps 1 - 2 in "Image Effects (Creative Filters)" (=58) and choose [ ]. 2 Shoot. zzHold the camera steady as you shoot. Two consecutive images are captured when you press the shutter button all the way down. zzA blinking [ ] icon indicates that the images could not be processed. ●● Excessive motion blur or certain shooting conditions may prevent you from obtaining the desired results. ●● For the best results with this effect, try shooting close to the subject, and ensure ample distance between the subject and background. ●● There may be a delay after shooting before you can shoot again. ●● To adjust the effect level, turn the [ ] ring. Shooting with a Soft Focus Effect Still Images Movies This function allows you to shoot images as if a soft focus filter were attached to the camera. You can adjust the effect level as desired. 1 Choose [ ]. zzFollow steps 1 - 2 in "Image Effects (Creative Filters)" (=58) and choose [ ]. 2 Choose an effect level. zzTurn the [ ] ring to choose an effect level. zzA preview is shown of how your shot will look with the effect applied. 3 Shoot. ●● Try taking some test shots first, to make sure you obtain the desired results. Before Use Basic Guide Advanced Guide 1 Camera Basics 2 Auto Mode / Hybrid Auto Mode 3 Other Shooting Modes 4 P Mode 5 Tv, Av, M, and C Mode 6 Playback Mode 7 Wi-Fi Functions 8 Setting Menu 9 Accessories 10 Appendix Index 62
-
 1
1 -
2
-
3
-
4
-
5
-
6
-
7
-
8
-
9
-
10
-
11
-
12
-
13
-
14
-
15
-
16
-
17
-
18
-
19
-
20
-
21
-
22
-
23
-
24
-
25
-
26
-
27
-
28
-
29
-
30
-
31
-
32
-
33
-
34
-
35
-
36
-
37
-
38
-
39
-
40
-
41
-
42
-
43
-
44
-
45
-
46
-
47
-
48
-
49
-
50
-
51
-
52
-
53
-
54
-
55
-
56
-
 57
57 -
 58
58 -
 59
59 -
 60
60 -
 61
61 -
 62
62 -
 63
63 -
 64
64 -
 65
65 -
 66
66 -
 67
67 -
68
-
69
-
70
-
71
-
72
-
73
-
74
-
75
-
76
-
77
-
78
-
79
-
80
-
81
-
82
-
83
-
84
-
85
-
86
-
87
-
88
-
89
-
90
-
91
-
92
-
93
-
94
-
95
-
96
-
97
-
98
-
99
-
100
-
101
-
102
-
103
-
104
-
105
-
106
-
107
-
108
-
109
-
110
-
111
-
112
-
113
-
114
-
115
-
116
-
117
-
118
-
119
-
120
-
121
-
122
-
123
-
124
-
125
-
126
-
127
-
128
-
129
-
130
-
131
-
132
-
133
-
134
-
135
-
136
-
137
-
138
-
139
-
140
-
141
-
142
-
143
-
144
-
145
-
146
-
147
-
148
-
149
-
150
-
151
-
152
-
153
-
154
-
155
-
156
-
157
-
158
-
159
-
160
-
161
-
162
-
163
-
164
-
165
-
166
-
167
-
168
-
169
-
170
-
171
-
172
-
173
-
174
-
175
-
176
-
177
-
178
-
179
-
180
-
181
-
182
-
183
-
184
-
185
-
186
-
187
-
188
-
189
-
190
-
191
-
192
-
193
-
194
-
195
-
196
-
197
-
198
-
199
-
200
-
201
-
202
 |
 |
