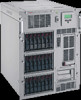
Compaq ProLiant 8000 ProLiant 8000 Intel Pentium III Xeon 700MHz Servers Maint - Page 94
I/O Board, Remove any I/O expansion boards. See
 |
View all Compaq ProLiant 8000 manuals
Add to My Manuals
Save this manual to your list of manuals |
Page 94 highlights
Removal and Replacement Procedures 2-77 I/O Board To remove the I/O board: 1. Perform the preparation procedures. See "Preparation Procedures" earlier in this chapter. 2. Remove the array controller with Extended SCSI. See "Array Controllers with Extended SCSI" earlier in this chapter. 3. Remove any I/O expansion boards. See "I/O Expansion Boards" earlier in this chapter. 4. Remove the Extended SCSI Dividers. See "Extended SCSI Dividers" earlier in this chapter. 5. Remove the hot-plug basket insulator. See "Hot-Plug Basket Insulator" earlier in this chapter. 6. Disconnect all cables from the I/O board. 7. Loosen the I/O board captive thumbscrews . 8. Lift up on the ejector lever to release the I/O board . Then gently pull up the board ends to release them from the push-pull pins . 1 3 2 Figure 2-68. Removing the I/O board
-
 1
1 -
2
-
3
-
4
-
5
-
6
-
7
-
8
-
9
-
10
-
11
-
12
-
13
-
14
-
15
-
16
-
17
-
18
-
19
-
20
-
21
-
22
-
23
-
24
-
25
-
26
-
27
-
28
-
29
-
30
-
31
-
32
-
33
-
34
-
35
-
36
-
37
-
38
-
39
-
40
-
41
-
42
-
43
-
44
-
45
-
46
-
47
-
48
-
49
-
50
-
51
-
52
-
53
-
54
-
55
-
56
-
57
-
58
-
59
-
60
-
61
-
62
-
63
-
64
-
65
-
66
-
67
-
68
-
69
-
70
-
71
-
72
-
73
-
74
-
75
-
76
-
77
-
78
-
79
-
80
-
81
-
82
-
83
-
84
-
85
-
86
-
87
-
88
-
 89
89 -
 90
90 -
 91
91 -
 92
92 -
 93
93 -
 94
94 -
 95
95 -
 96
96 -
 97
97 -
 98
98 -
 99
99 -
100
-
101
-
102
-
103
-
104
-
105
-
106
-
107
-
108
-
109
-
110
-
111
-
112
-
113
-
114
-
115
-
116
-
117
-
118
-
119
-
120
-
121
-
122
-
123
-
124
-
125
-
126
-
127
-
128
-
129
-
130
-
131
-
132
-
133
-
134
-
135
-
136
-
137
-
138
-
139
-
140
-
141
-
142
-
143
-
144
-
145
-
146
-
147
-
148
-
149
-
150
-
151
-
152
-
153
-
154
-
155
-
156
-
157
-
158
-
159
-
160
-
161
-
162
-
163
-
164
-
165
-
166
-
167
-
168
-
169
-
170
-
171
-
172
-
173
-
174
-
175
-
176
-
177
-
178
-
179
-
180
-
181
-
182
-
183
-
184
-
185
-
186
-
187
-
188
-
189
-
190
-
191
-
192
-
193
-
194
-
195
-
196
-
197
-
198
-
199
-
200
-
201
-
202
-
203
-
204
-
205
-
206
-
207
-
208
-
209
-
210
-
211
-
212
-
213
-
214
-
215
-
216
-
217
-
218
-
219
-
220
-
221
-
222
-
223
-
224
-
225
-
226
-
227
-
228
-
229
-
230
-
231
 |
 |
