HP Brio ba410 hp brio ba410, user guide - Page 72
CD SLAVE, CD Master
 |
View all HP Brio ba410 manuals
Add to My Manuals
Save this manual to your list of manuals |
Page 72 highlights
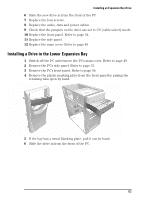
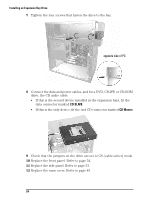
Installing an Expansion Bay Drive 7 Tighten the four screws that fasten the drive to the bay. opposite side of PC 8 Connect the data and power cables, and for a DVD, CD-RW or CD-ROM drive, the CD audio cable. • If this is the second device installed in the expansion bays, fit the data connector marked CD SLAVE. • If this is the only device, fit the end CD connector marked CD Master. 9 Check that the jumpers on the drive are set to CS (cable select) mode. 10 Replace the front panel. Refer to page 54. 11 Replace the side panel. Refer to page 53. 12 Replace the main cover. Refer to page 49. 64
-
 1
1 -
2
-
3
-
4
-
5
-
6
-
7
-
8
-
9
-
10
-
11
-
12
-
13
-
14
-
15
-
16
-
17
-
18
-
19
-
20
-
21
-
22
-
23
-
24
-
25
-
26
-
27
-
28
-
29
-
30
-
31
-
32
-
33
-
34
-
35
-
36
-
37
-
38
-
39
-
40
-
41
-
42
-
43
-
44
-
45
-
46
-
47
-
48
-
49
-
50
-
51
-
52
-
53
-
54
-
55
-
56
-
57
-
58
-
59
-
60
-
61
-
62
-
63
-
64
-
65
-
66
-
 67
67 -
 68
68 -
 69
69 -
 70
70 -
 71
71 -
 72
72 -
 73
73 -
 74
74 -
 75
75 -
 76
76 -
 77
77 -
78
-
79
-
80
-
81
-
82
-
83
-
84
-
85
-
86
-
87
-
88
-
89
-
90
-
91
-
92
-
93
-
94
-
95
-
96
-
97
-
98
-
99
-
100
-
101
-
102
-
103
-
104
-
105
-
106
-
107
-
108
-
109
-
110
-
111
-
112
-
113
-
114
 |
 |
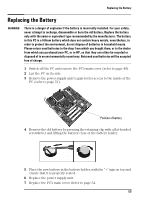
Installing an Expansion Bay Drive
64
7
Tighten the four screws that fasten the drive to the bay.
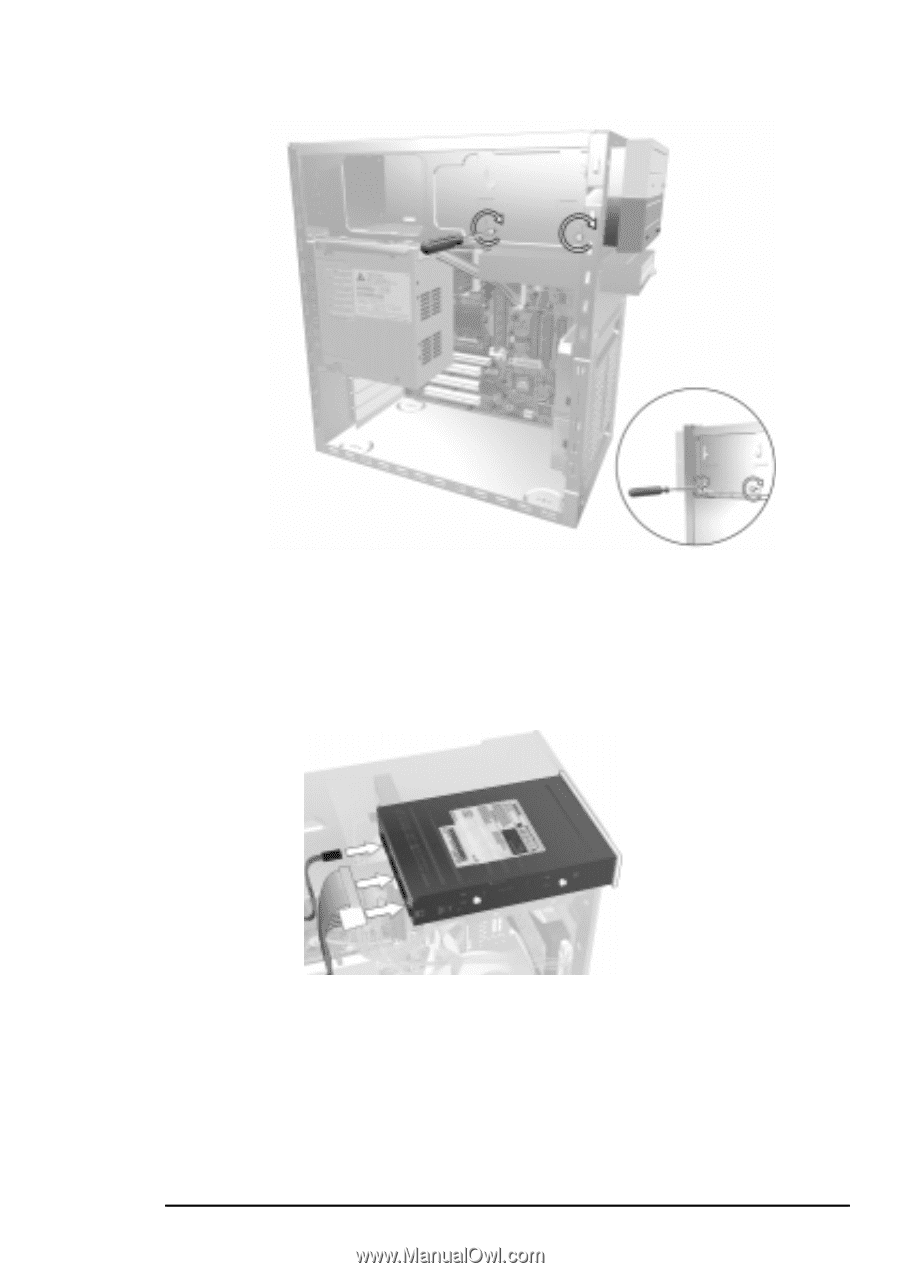
8
Connect the data and power cables, and for a DVD, CD-RW or CD-ROM
drive, the CD audio cable.
•
If this is the second device installed in the expansion bays, fit the
data connector marked
CD SLAVE
.
•
If this is the only device, fit the end CD connector marked
CD Master
.
9
Check that the jumpers on the drive are set to CS (cable select) mode.
10
Replace the front panel. Refer to page 54.
11
Replace the side panel. Refer to page 53.
12
Replace the main cover. Refer to page 49.
opposite side of PC