HP Brio ba410 hp brio ba410, user guide - Page 76
Reconnect all the power cables to the drives and the system board.
 |
View all HP Brio ba410 manuals
Add to My Manuals
Save this manual to your list of manuals |
Page 76 highlights
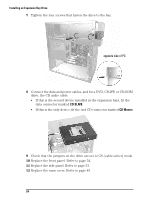
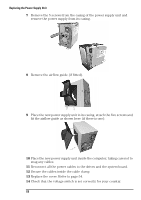
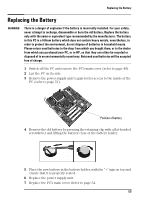
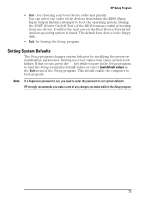
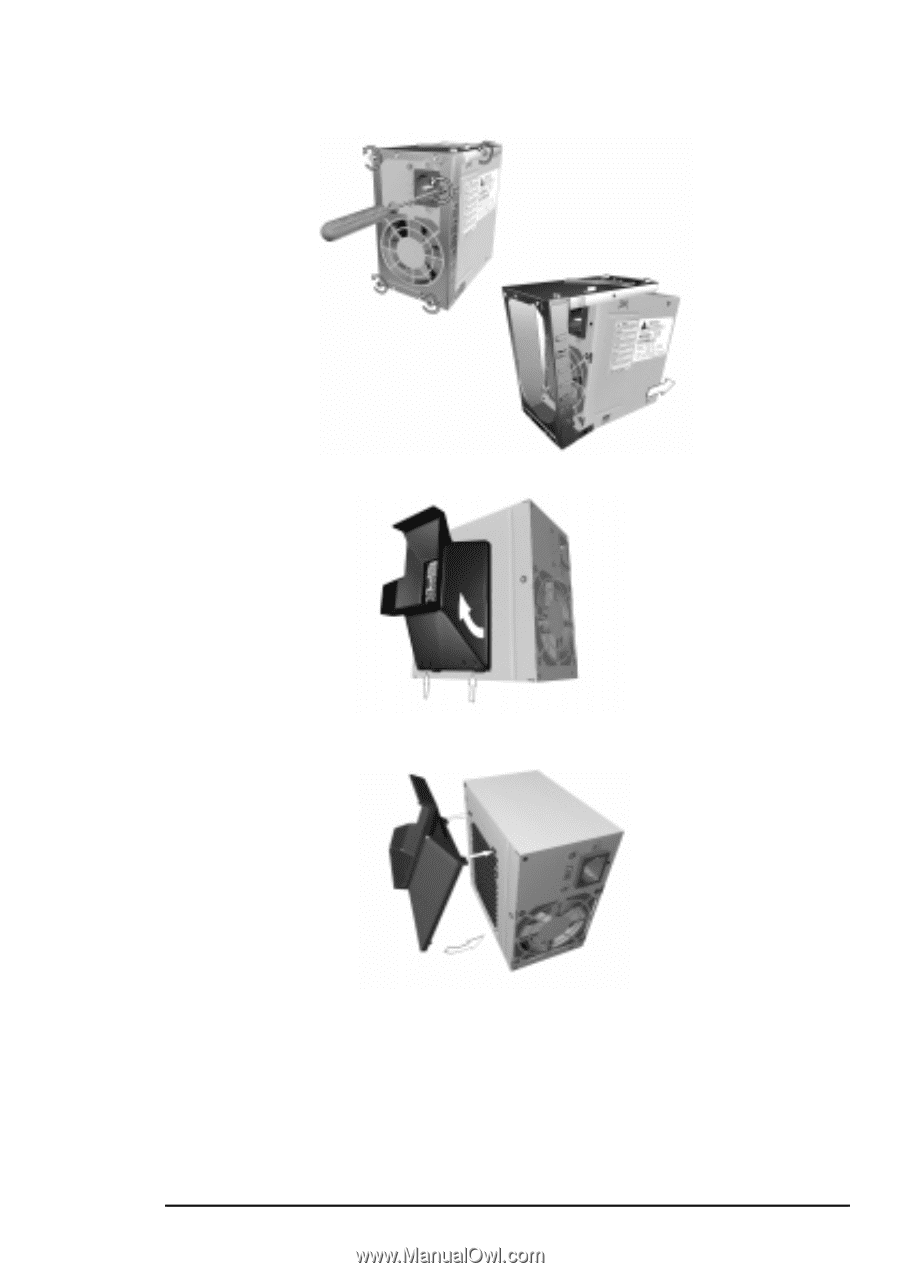
Replacing the Power Supply Unit 7 Remove the 5 screws from the casing of the power supply unit and remove the power supply from its casing. 8 Remove the airflow guide (if fitted). 9 Place the new power supply unit in its casing, attach the five screws and fit the airflow guide as shown here (if there is one). 10 Place the new power supply unit inside the computer, taking care not to snag any cables. 11 Reconnect all the power cables to the drives and the system board. 12 Secure the cables inside the cable clamp 13 Replace the cover. Refer to page 54. 14 Check that the voltage switch is set correctly for your country. 68
-
 1
1 -
2
-
3
-
4
-
5
-
6
-
7
-
8
-
9
-
10
-
11
-
12
-
13
-
14
-
15
-
16
-
17
-
18
-
19
-
20
-
21
-
22
-
23
-
24
-
25
-
26
-
27
-
28
-
29
-
30
-
31
-
32
-
33
-
34
-
35
-
36
-
37
-
38
-
39
-
40
-
41
-
42
-
43
-
44
-
45
-
46
-
47
-
48
-
49
-
50
-
51
-
52
-
53
-
54
-
55
-
56
-
57
-
58
-
59
-
60
-
61
-
62
-
63
-
64
-
65
-
66
-
67
-
68
-
69
-
70
-
 71
71 -
 72
72 -
 73
73 -
 74
74 -
 75
75 -
 76
76 -
 77
77 -
 78
78 -
 79
79 -
 80
80 -
 81
81 -
82
-
83
-
84
-
85
-
86
-
87
-
88
-
89
-
90
-
91
-
92
-
93
-
94
-
95
-
96
-
97
-
98
-
99
-
100
-
101
-
102
-
103
-
104
-
105
-
106
-
107
-
108
-
109
-
110
-
111
-
112
-
113
-
114
 |
 |
Replacing the Power Supply Unit
68
7
Remove the 5 screws from the casing of the power supply unit and
remove the power supply from its casing.
8
Remove the airflow guide (if fitted).
9
Place the new power supply unit in its casing, attach the five screws and
fit the airflow guide as shown here (if there is one).
10
Place the new power supply unit inside the computer, taking care not to
snag any cables.
11
Reconnect all the power cables to the drives and the system board.
12
Secure the cables inside the cable clamp
13
Replace the cover. Refer to page 54.
14
Check that the voltage switch is set correctly for your country.