HP Color LaserJet Enterprise CP4020 HP Designjet 4020 and 4520 Printer Series - Page 67
Using the PostScript printer driver for Mac OS X, Using the Embedded Web Server
 |
View all HP Color LaserJet Enterprise CP4020 manuals
Add to My Manuals
Save this manual to your list of manuals |
Page 67 highlights
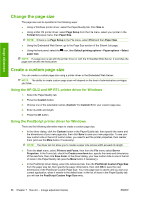
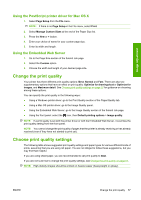
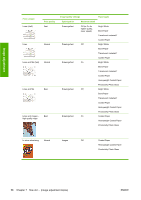
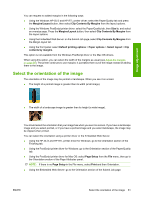
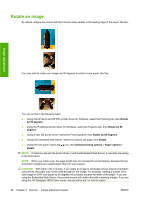
Image adjustment Using the PostScript printer driver for Mac OS X 1. Select Page Setup from the File menu. NOTE: If there is no Page Setup in the File menu, select Print. 2. Select Manage Custom Sizes at the end of the Paper Size list. 3. Press the New or + button. 4. Enter your choice of name for your custom page size. 5. Enter its width and length. Using the Embedded Web Server 1. Go to the Page Size section of the Submit Job page. 2. Select the Custom option. 3. Choose the width and length of your desired page size. Change the print quality Your printer has three different print quality options: Best, Normal and Fast. There are also two supplementary options that have an effect on print quality: Optimize for drawings/text or Optimize for images, and Maximum detail. See Choose print quality settings on page 57 for guidance on choosing among these options. You can specify the print quality in the following ways: ● Using a Windows printer driver: go to the Print Quality section of the Paper/Quality tab. ● Using a Mac OS printer driver: go to the Image Quality panel. ● Using the Embedded Web Server: go to the Image Quality section of the Submit Job page. ● Using the front panel: select the icon, then Default printing options > Image quality. NOTE: If a print quality is set with the printer driver or with the Embedded Web Server, it overrides the print quality setting from the front panel. NOTE: You cannot change the print quality of pages that the printer is already receiving or has already received (even if they have not started to print yet). Choose print quality settings The following table shows suggested print quality settings and paper types for various different kinds of prints, assuming that you are using roll paper. You are not obliged to follow these suggestions, but you may find them helpful. If you are using sheet paper, you are recommended to set print quality to Best. If you are not sure how to change the print quality settings, see Change the print quality on page 57. NOTE: High-density images should be printed on heavier paper (heavyweight or glossy). ENWW Change the print quality 57
-
 1
1 -
2
-
3
-
4
-
5
-
6
-
7
-
8
-
9
-
10
-
11
-
12
-
13
-
14
-
15
-
16
-
17
-
18
-
19
-
20
-
21
-
22
-
23
-
24
-
25
-
26
-
27
-
28
-
29
-
30
-
31
-
32
-
33
-
34
-
35
-
36
-
37
-
38
-
39
-
40
-
41
-
42
-
43
-
44
-
45
-
46
-
47
-
48
-
49
-
50
-
51
-
52
-
53
-
54
-
55
-
56
-
57
-
58
-
59
-
60
-
61
-
 62
62 -
 63
63 -
 64
64 -
 65
65 -
 66
66 -
 67
67 -
 68
68 -
 69
69 -
 70
70 -
 71
71 -
 72
72 -
73
-
74
-
75
-
76
-
77
-
78
-
79
-
80
-
81
-
82
-
83
-
84
-
85
-
86
-
87
-
88
-
89
-
90
-
91
-
92
-
93
-
94
-
95
-
96
-
97
-
98
-
99
-
100
-
101
-
102
-
103
-
104
-
105
-
106
-
107
-
108
-
109
-
110
-
111
-
112
-
113
-
114
-
115
-
116
-
117
-
118
-
119
-
120
-
121
-
122
-
123
-
124
-
125
-
126
-
127
-
128
-
129
-
130
-
131
-
132
-
133
-
134
-
135
-
136
-
137
-
138
-
139
-
140
-
141
-
142
-
143
-
144
-
145
-
146
-
147
-
148
-
149
-
150
-
151
-
152
-
153
-
154
-
155
-
156
-
157
-
158
-
159
-
160
-
161
-
162
-
163
-
164
-
165
-
166
-
167
-
168
-
169
-
170
-
171
-
172
-
173
-
174
-
175
-
176
-
177
-
178
-
179
-
180
-
181
-
182
-
183
-
184
-
185
-
186
-
187
-
188
-
189
-
190
-
191
-
192
-
193
-
194
-
195
-
196
-
197
-
198
-
199
-
200
-
201
-
202
-
203
-
204
-
205
-
206
-
207
-
208
-
209
-
210
-
211
-
212
-
213
-
214
-
215
-
216
-
217
-
218
-
219
-
220
-
221
-
222
-
223
-
224
-
225
-
226
-
227
-
228
-
229
-
230
-
231
-
232
-
233
-
234
-
235
 |
 |
