HP Color LaserJet Enterprise CP4020 HP Designjet 4020 and 4520 Printer Series - Page 70
Print on oversize s, Print without added margins, Margins/Layout
 |
View all HP Color LaserJet Enterprise CP4020 manuals
Add to My Manuals
Save this manual to your list of manuals |
Page 70 highlights
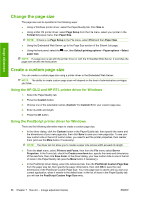
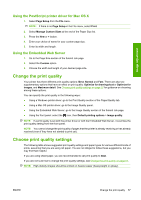
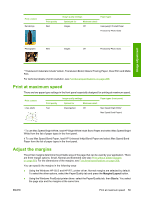
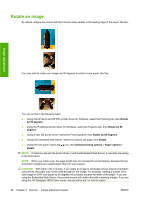
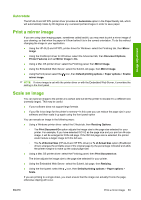
Image adjustment ● Using a Mac OS printer driver: select Page Setup from the File menu, then Paper Size. You select the page size and the margins at the same time. NOTE: If there is no Page Setup in the File menu, select Print and then Paper Size. ● Using the Embedded Web Server: select from the Margins list on the Submit Job page. ● With a firmware level of a least FW9, it is possible to reduce the nesting margins to 0. This can be done via the front panel: Job management > Nesting options > Nest spacing. There are two settings: Automatic (default) or 0. Selecting 0, it is possible for example to nest three A3 size documents on a 36" roll. ● Using the front panel: select the icon, then Default printing options > Paper options > Select margins. NOTE: If margins are set with the printer driver or with the Embedded Web Server, they override the margins set with the front panel. Print on oversize pages For technical reasons, it is impossible to print an image that covers the full width or length of the paper. There must always be a margin around the image. However, if you want to print, for example, an A3sized image with no margins around it, you can print on paper larger than A3 (leaving margins around the image as usual), and then cut off the margins after printing. Oversize page layouts are designed for this purpose. Each oversize page is large enough to accommodate a standard paper size plus margins. You can specify an oversize page layout in the following ways: ● Using the Windows HP-GL/2 and HP RTL printer driver: select the Paper/Quality tab and press the Margins/Layout button, then select Oversize from the layout options. ● Using the Windows PostScript printer driver: select the Paper/Quality tab, then Size is. You select the oversize page and the margins at the same time. ● Using a Mac OS X printer driver: select the paper size, and then margins options will appear. Select the Oversize option. ● Using the Embedded Web Server: on the Submit Job page, select Oversize from the Margin layout list. ● Using the front panel: select Default printing options > Paper options > Select layout > Oversize. When using oversize pages, you can select the width of the margins as usual (see Adjust the margins on page 59). See also Print without added margins on page 60. Print without added margins For technical reasons, it is impossible to print an image that covers the full width or length of the paper. There must always be a margin around the image. However, if your image already contains adequate margins (white space around the edges) then you can tell the printer not to add margins to the image when printing it. In this case it will, in fact, clip the edges of your image, assuming that the edges contain nothing that needs to be printed. 60 Chapter 7 How do I... (image adjustment topics) ENWW
-
 1
1 -
2
-
3
-
4
-
5
-
6
-
7
-
8
-
9
-
10
-
11
-
12
-
13
-
14
-
15
-
16
-
17
-
18
-
19
-
20
-
21
-
22
-
23
-
24
-
25
-
26
-
27
-
28
-
29
-
30
-
31
-
32
-
33
-
34
-
35
-
36
-
37
-
38
-
39
-
40
-
41
-
42
-
43
-
44
-
45
-
46
-
47
-
48
-
49
-
50
-
51
-
52
-
53
-
54
-
55
-
56
-
57
-
58
-
59
-
60
-
61
-
62
-
63
-
64
-
 65
65 -
 66
66 -
 67
67 -
 68
68 -
 69
69 -
 70
70 -
 71
71 -
 72
72 -
 73
73 -
 74
74 -
 75
75 -
76
-
77
-
78
-
79
-
80
-
81
-
82
-
83
-
84
-
85
-
86
-
87
-
88
-
89
-
90
-
91
-
92
-
93
-
94
-
95
-
96
-
97
-
98
-
99
-
100
-
101
-
102
-
103
-
104
-
105
-
106
-
107
-
108
-
109
-
110
-
111
-
112
-
113
-
114
-
115
-
116
-
117
-
118
-
119
-
120
-
121
-
122
-
123
-
124
-
125
-
126
-
127
-
128
-
129
-
130
-
131
-
132
-
133
-
134
-
135
-
136
-
137
-
138
-
139
-
140
-
141
-
142
-
143
-
144
-
145
-
146
-
147
-
148
-
149
-
150
-
151
-
152
-
153
-
154
-
155
-
156
-
157
-
158
-
159
-
160
-
161
-
162
-
163
-
164
-
165
-
166
-
167
-
168
-
169
-
170
-
171
-
172
-
173
-
174
-
175
-
176
-
177
-
178
-
179
-
180
-
181
-
182
-
183
-
184
-
185
-
186
-
187
-
188
-
189
-
190
-
191
-
192
-
193
-
194
-
195
-
196
-
197
-
198
-
199
-
200
-
201
-
202
-
203
-
204
-
205
-
206
-
207
-
208
-
209
-
210
-
211
-
212
-
213
-
214
-
215
-
216
-
217
-
218
-
219
-
220
-
221
-
222
-
223
-
224
-
225
-
226
-
227
-
228
-
229
-
230
-
231
-
232
-
233
-
234
-
235
 |
 |
