HP Color LaserJet Enterprise CP4020 HP Designjet 4020 and 4520 Printer Series - Page 78
Perform color calibration, Perform black point compensation
 |
View all HP Color LaserJet Enterprise CP4020 manuals
Add to My Manuals
Save this manual to your list of manuals |
Page 78 highlights
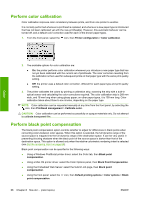
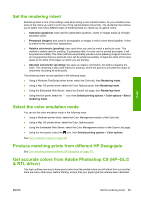
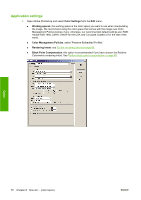
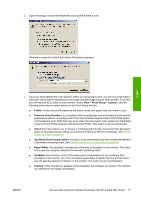
Perform color calibration Color calibration improves color consistency between prints, and from one printer to another. It is normally performed whenever a printhead is replaced, and whenever a new paper type is introduced that has not been calibrated yet with the new printhead(s). However, this automatic behavior can be turned off, and a default color correction used for each of the known paper types. 1. From the front panel, select the icon, then Printer configuration > Color calibration. Color 2. The available options for color calibration are: ● On: the printer performs color calibration whenever you introduce a new paper type that has not yet been calibrated with the current set of printheads. The color correction resulting from the calibration is then used for subsequent prints on that paper type with the same print quality setting. ● Off: the printer uses a default color correction, different for each paper type and print quality setting. 3. The printer calibrates the colors by printing a calibration strip, scanning the strip with a built-in optical sensor and calculating the color corrections required. The color calibration strip is 269 mm wide, and 18 mm long when using glossy paper; on other paper types, it is 109 mm long. Color calibration takes about three to six minutes, depending on the paper type. NOTE: Color calibration can be requested manually at any time from the front panel, by selecting the icon, then Printhead management > Calibrate color. CAUTION: Color calibration can be performed successfully on opaque materials only. Do not attempt to calibrate transparent film. Perform black point compensation The black point compensation option controls whether to adjust for differences in black points when converting colors between color spaces. When this option is selected, the full dynamic range of the source space is mapped into the full dynamic range of the destination space. It can be very useful in preventing blocking shadows when the black point of the source space is darker than that of the destination space. This option is allowed only when the relative colorimetric rendering intent is selected (see Set the rendering intent on page 69). Black point compensation can be specified in the following ways: ● Using a Windows PostScript printer driver: select the Color tab, then Black point compensation. ● Using a Mac OS printer driver: select the Color Options panel, then Black Point Compensation. ● Using the Embedded Web Server: select the Submit Job page, then Black point compensation. ● Using the front panel: select the icon, then Default printing options > Color options > Black point compensation. 68 Chapter 8 How do I... (color topics) ENWW
-
 1
1 -
2
-
3
-
4
-
5
-
6
-
7
-
8
-
9
-
10
-
11
-
12
-
13
-
14
-
15
-
16
-
17
-
18
-
19
-
20
-
21
-
22
-
23
-
24
-
25
-
26
-
27
-
28
-
29
-
30
-
31
-
32
-
33
-
34
-
35
-
36
-
37
-
38
-
39
-
40
-
41
-
42
-
43
-
44
-
45
-
46
-
47
-
48
-
49
-
50
-
51
-
52
-
53
-
54
-
55
-
56
-
57
-
58
-
59
-
60
-
61
-
62
-
63
-
64
-
65
-
66
-
67
-
68
-
69
-
70
-
71
-
72
-
 73
73 -
 74
74 -
 75
75 -
 76
76 -
 77
77 -
 78
78 -
 79
79 -
 80
80 -
 81
81 -
 82
82 -
 83
83 -
84
-
85
-
86
-
87
-
88
-
89
-
90
-
91
-
92
-
93
-
94
-
95
-
96
-
97
-
98
-
99
-
100
-
101
-
102
-
103
-
104
-
105
-
106
-
107
-
108
-
109
-
110
-
111
-
112
-
113
-
114
-
115
-
116
-
117
-
118
-
119
-
120
-
121
-
122
-
123
-
124
-
125
-
126
-
127
-
128
-
129
-
130
-
131
-
132
-
133
-
134
-
135
-
136
-
137
-
138
-
139
-
140
-
141
-
142
-
143
-
144
-
145
-
146
-
147
-
148
-
149
-
150
-
151
-
152
-
153
-
154
-
155
-
156
-
157
-
158
-
159
-
160
-
161
-
162
-
163
-
164
-
165
-
166
-
167
-
168
-
169
-
170
-
171
-
172
-
173
-
174
-
175
-
176
-
177
-
178
-
179
-
180
-
181
-
182
-
183
-
184
-
185
-
186
-
187
-
188
-
189
-
190
-
191
-
192
-
193
-
194
-
195
-
196
-
197
-
198
-
199
-
200
-
201
-
202
-
203
-
204
-
205
-
206
-
207
-
208
-
209
-
210
-
211
-
212
-
213
-
214
-
215
-
216
-
217
-
218
-
219
-
220
-
221
-
222
-
223
-
224
-
225
-
226
-
227
-
228
-
229
-
230
-
231
-
232
-
233
-
234
-
235
 |
 |
