HP ElitePad 1000 HP ElitePad 1000 G2 Maintenance and Service Guide - Page 39
Move the HP ElitePad Service Tool retention bar, in the retention
 |
View all HP ElitePad 1000 manuals
Add to My Manuals
Save this manual to your list of manuals |
Page 39 highlights
Remove the display assembly: 1. Remove the two Phillips PM1.4×3.2 screws that secure the display assembly to the tablet. 2. Place the HP ElitePad Service Tool on a flat, sturdy surface. The HP ElitePad Service Tool is available using spare part number 714222-001. 3. Move the HP ElitePad Service Tool retention bar (1) to the left until the notch (2) in the retention bar allows the retention gate to open. Tablet component replacement procedures 31
-
 1
1 -
2
-
3
-
4
-
5
-
6
-
7
-
8
-
9
-
10
-
11
-
12
-
13
-
14
-
15
-
16
-
17
-
18
-
19
-
20
-
21
-
22
-
23
-
24
-
25
-
26
-
27
-
28
-
29
-
30
-
31
-
32
-
33
-
 34
34 -
 35
35 -
 36
36 -
 37
37 -
 38
38 -
 39
39 -
 40
40 -
 41
41 -
 42
42 -
 43
43 -
 44
44 -
45
-
46
-
47
-
48
-
49
-
50
-
51
-
52
-
53
-
54
-
55
-
56
-
57
-
58
-
59
-
60
-
61
-
62
-
63
-
64
-
65
-
66
-
67
-
68
-
69
-
70
-
71
-
72
-
73
-
74
-
75
-
76
-
77
-
78
-
79
-
80
-
81
-
82
-
83
-
84
-
85
-
86
-
87
-
88
-
89
-
90
-
91
-
92
-
93
-
94
-
95
-
96
-
97
-
98
-
99
-
100
-
101
-
102
-
103
-
104
-
105
-
106
-
107
-
108
-
109
-
110
-
111
-
112
-
113
-
114
-
115
-
116
-
117
-
118
-
119
-
120
 |
 |
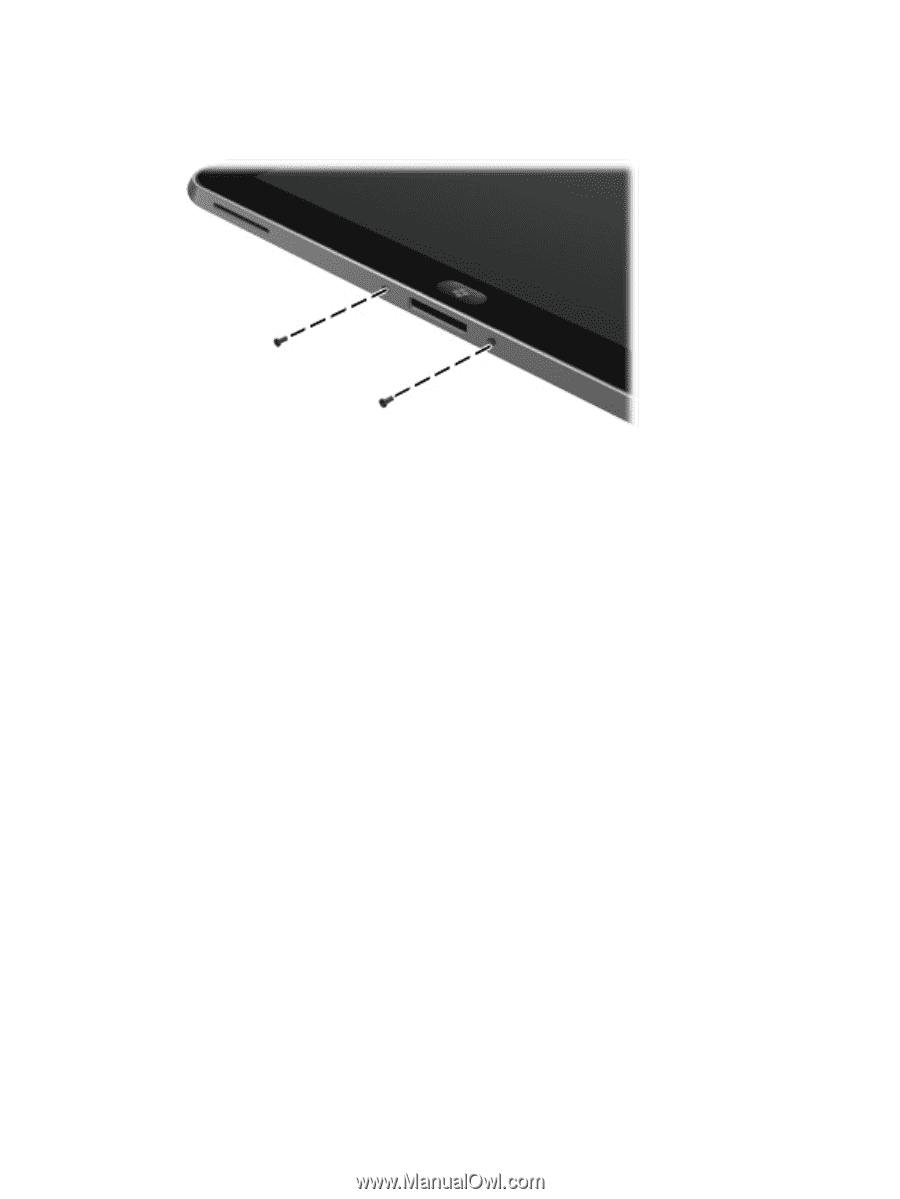
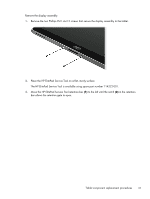
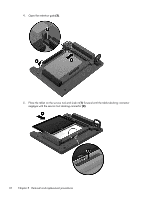
Remove the display assembly:
1.
Remove the two Phillips PM1.4×3.2 screws that secure the display assembly to the tablet.
2.
Place the HP ElitePad Service Tool on a flat, sturdy surface.
The HP ElitePad Service Tool is available using spare part number 714222-001.
3.
Move the HP ElitePad Service Tool retention bar
(1)
to the left until the notch
(2)
in the retention
bar allows the retention gate to open.
Tablet component replacement procedures
31