HP Integrity Superdome SX1000 Installation (Smart Setup) Guide, Windows Server - Page 42
Install Windows screen
 |
View all HP Integrity Superdome SX1000 manuals
Add to My Manuals
Save this manual to your list of manuals |
Page 42 highlights
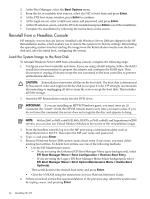
Figure 2-20 Install Windows screen 19. In the next screen, click Install Now. 20. In the next screen, enter your Product Key again and click Next. 21. In the License Terms screen, check the box labeled I accept the license terms and click Next. 22. In the next screen, click Custom (advanced). 23. In the next screen you are asked on which system partition to install the operating system. If more than one partition is available, you should select one that is marked "Unallocated" and also one that is formatted as NTFS. Then click Next. 42 Installing the OS
-
 1
1 -
2
-
3
-
4
-
5
-
6
-
7
-
8
-
9
-
10
-
11
-
12
-
13
-
14
-
15
-
16
-
17
-
18
-
19
-
20
-
21
-
22
-
23
-
24
-
25
-
26
-
27
-
28
-
29
-
30
-
31
-
32
-
33
-
34
-
35
-
36
-
 37
37 -
 38
38 -
 39
39 -
 40
40 -
 41
41 -
 42
42 -
 43
43 -
 44
44 -
 45
45 -
 46
46 -
 47
47 -
48
-
49
-
50
-
51
-
52
-
53
-
54
-
55
-
56
-
57
-
58
-
59
-
60
-
61
-
62
-
63
-
64
-
65
-
66
-
67
-
68
-
69
-
70
-
71
-
72
-
73
-
74
-
75
-
76
-
77
-
78
-
79
-
80
-
81
-
82
-
83
-
84
-
85
-
86
-
87
-
88
-
89
-
90
-
91
-
92
-
93
-
94
-
95
-
96
-
97
-
98
-
99
-
100
-
101
-
102
-
103
-
104
-
105
-
106
-
107
-
108
-
109
-
110
-
111
-
112
-
113
-
114
 |
 |
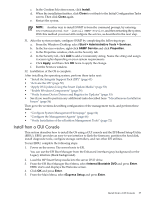
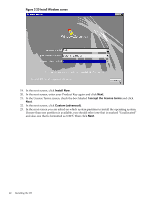
Figure 2-20 Install Windows screen
19.
In the next screen, click
Install Now
.
20.
In the next screen, enter your Product Key again and click
Next
.
21.
In the License Terms screen, check the box labeled
I accept the license terms
and click
Next
.
22.
In the next screen, click
Custom (advanced)
.
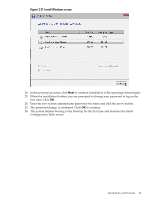
23.
In the next screen you are asked on which system partition to install the operating system.
If more than one partition is available, you should select one that is marked “Unallocated”
and also one that is formatted as NTFS. Then click
Next
.
42
Installing the OS