HP Integrity Superdome SX1000 Installation (Smart Setup) Guide, Windows Server - Page 61
Installing and Configuring the Management Tools, Install the Integrity Support Pack (ISP
 |
View all HP Integrity Superdome SX1000 manuals
Add to My Manuals
Save this manual to your list of manuals |
Page 61 highlights
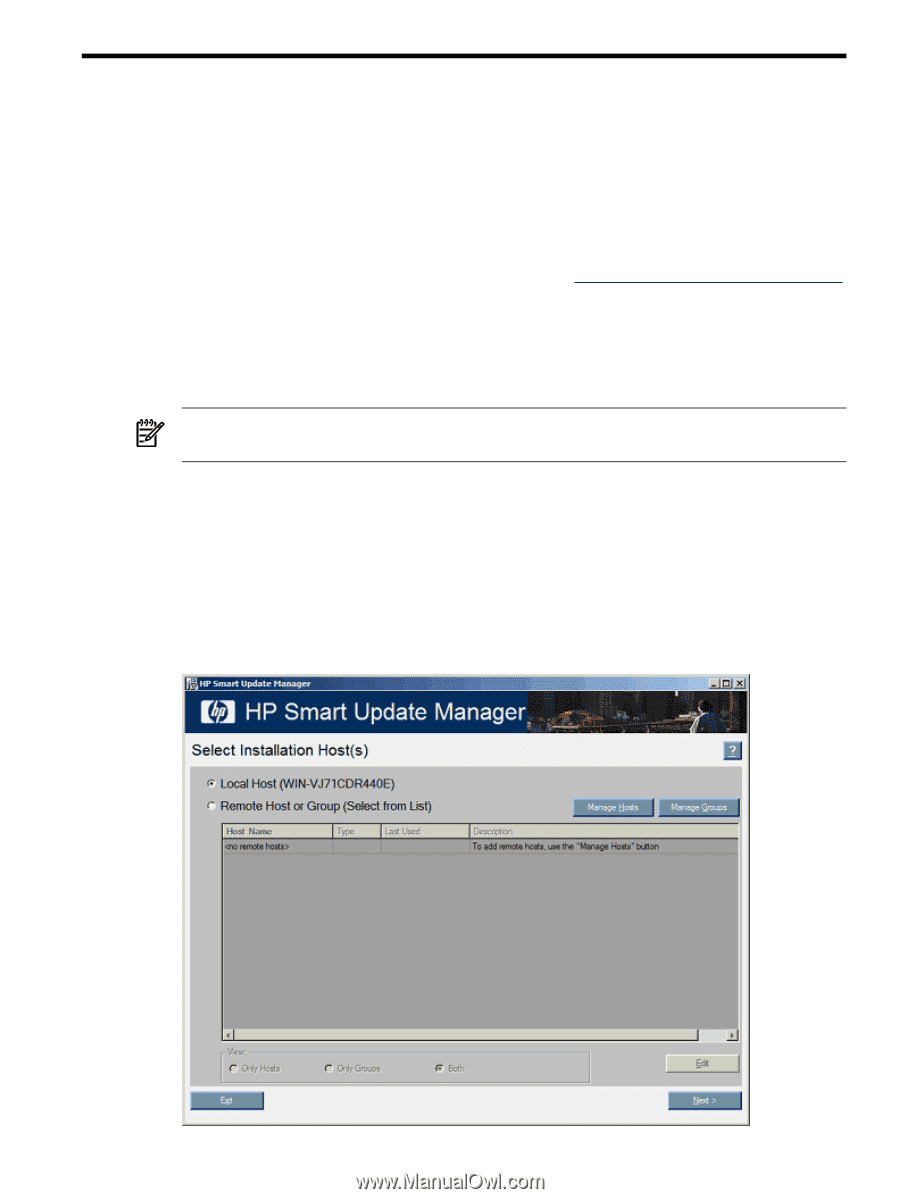
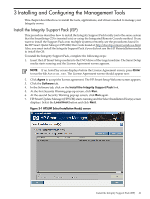
3 Installing and Configuring the Management Tools This chapter describes how to install the tools, applications, and drivers needed to manage your Integrity server. Install the Integrity Support Pack (ISP) This procedure describes how to install the Integrity Support Pack locally (onto the same system that the SmartSetup CD is inserted into) or using the Integrated Remote Console method. If you want to install the Support Pack onto multiple systems remotely, see the procedures found in the HP Smart Update Manager (HPSUM) User Guide found at: http://docs.hp.com/en/windows.html. Also, you must install the Integrity Support Pack if you did not use the HP Reinstallation media to install the OS. To install the Integrity Support Pack, complete the following steps: 1. Insert the HP Smart Setup media into the DVD drive of the target machine. The Smart Setup media starts running and the License Agreement screen appears. NOTE: If an AutoPlay screen displays before the License Agreement screen, press Enter to run the file Autorun.exe. The License Agreement screen should appear now. 2. Click Agree to accept the license agreement. The HP Smart Setup Welcome screen appears. 3. Click the Software tab. 4. In the Software tab, click on the Install the Integrity Support Pack link. 5. At the first Security Warning pop-up screen, click Run. 6. At the second Security Warning pop-up screen, click Run again. 7. HP Smart Update Manager (HPSUM) starts running and the Select Installation Host(s) screen displays. Select the Local Host button and click Next. Figure 3-1 HPSUM Select Installation Host(s) screen Install the Integrity Support Pack (ISP) 61
-
 1
1 -
2
-
3
-
4
-
5
-
6
-
7
-
8
-
9
-
10
-
11
-
12
-
13
-
14
-
15
-
16
-
17
-
18
-
19
-
20
-
21
-
22
-
23
-
24
-
25
-
26
-
27
-
28
-
29
-
30
-
31
-
32
-
33
-
34
-
35
-
36
-
37
-
38
-
39
-
40
-
41
-
42
-
43
-
44
-
45
-
46
-
47
-
48
-
49
-
50
-
51
-
52
-
53
-
54
-
55
-
 56
56 -
 57
57 -
 58
58 -
 59
59 -
 60
60 -
 61
61 -
 62
62 -
 63
63 -
 64
64 -
 65
65 -
 66
66 -
67
-
68
-
69
-
70
-
71
-
72
-
73
-
74
-
75
-
76
-
77
-
78
-
79
-
80
-
81
-
82
-
83
-
84
-
85
-
86
-
87
-
88
-
89
-
90
-
91
-
92
-
93
-
94
-
95
-
96
-
97
-
98
-
99
-
100
-
101
-
102
-
103
-
104
-
105
-
106
-
107
-
108
-
109
-
110
-
111
-
112
-
113
-
114
 |
 |