HP Integrity Superdome SX1000 Installation (Smart Setup) Guide, Windows Server - Page 43
Install Windows screen
 |
View all HP Integrity Superdome SX1000 manuals
Add to My Manuals
Save this manual to your list of manuals |
Page 43 highlights
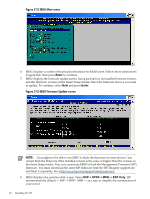
Figure 2-21 Install Windows screen 24. In the next pop-up screen, click Next to continue. Installation of the operating system begins. 25. When the installation finishes, you are prompted to change your password to log on the first time. Click OK. 26. Enter the new system administrator password two times and click the arrow button. 27. The password change is confirmed. Click OK to continue. 28. The system finishes booting to the Desktop for the first time and launches the Initial Configuration Tasks screen. Install from a GUI Console 43
-
 1
1 -
2
-
3
-
4
-
5
-
6
-
7
-
8
-
9
-
10
-
11
-
12
-
13
-
14
-
15
-
16
-
17
-
18
-
19
-
20
-
21
-
22
-
23
-
24
-
25
-
26
-
27
-
28
-
29
-
30
-
31
-
32
-
33
-
34
-
35
-
36
-
37
-
 38
38 -
 39
39 -
 40
40 -
 41
41 -
 42
42 -
 43
43 -
 44
44 -
 45
45 -
 46
46 -
 47
47 -
 48
48 -
49
-
50
-
51
-
52
-
53
-
54
-
55
-
56
-
57
-
58
-
59
-
60
-
61
-
62
-
63
-
64
-
65
-
66
-
67
-
68
-
69
-
70
-
71
-
72
-
73
-
74
-
75
-
76
-
77
-
78
-
79
-
80
-
81
-
82
-
83
-
84
-
85
-
86
-
87
-
88
-
89
-
90
-
91
-
92
-
93
-
94
-
95
-
96
-
97
-
98
-
99
-
100
-
101
-
102
-
103
-
104
-
105
-
106
-
107
-
108
-
109
-
110
-
111
-
112
-
113
-
114
 |
 |
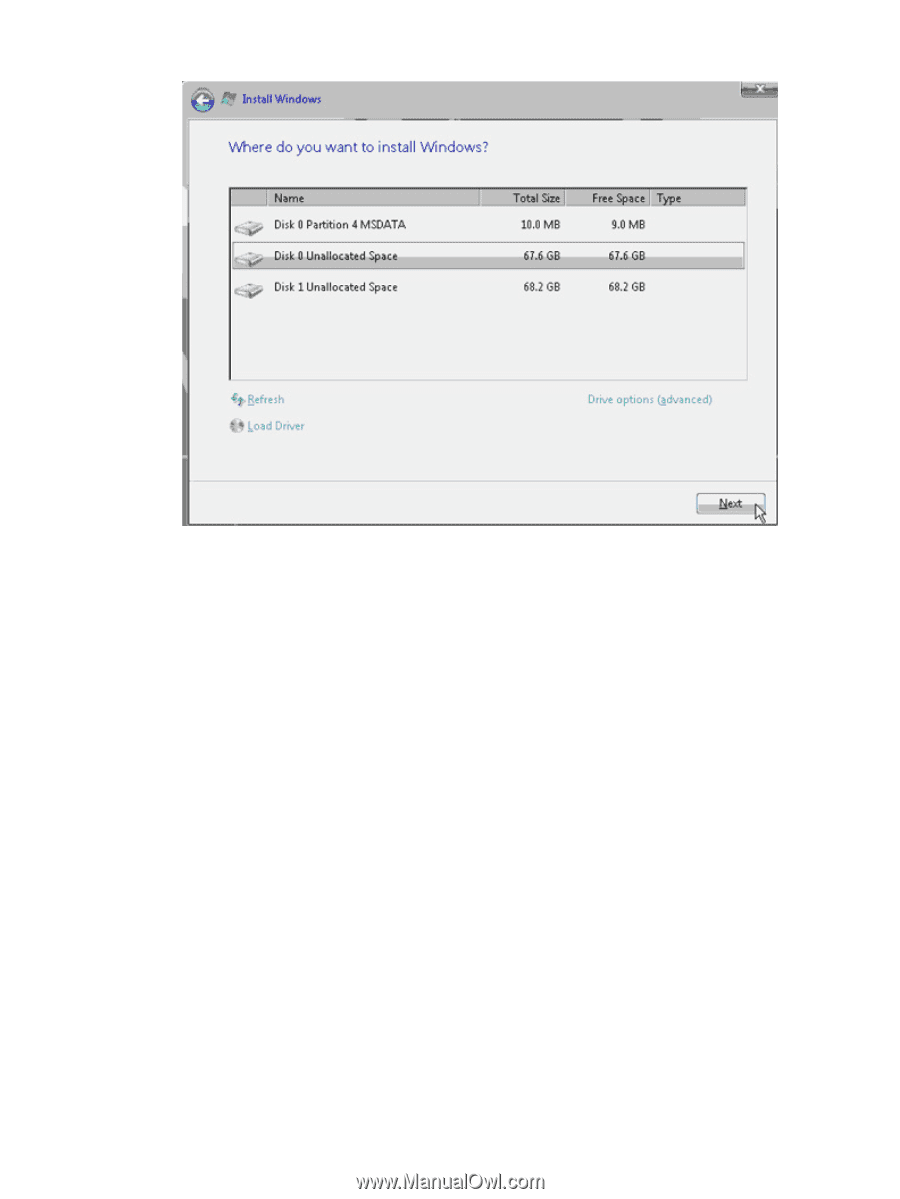
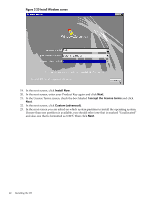
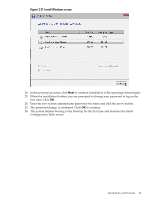
Figure 2-21 Install Windows screen
24.
In the next pop-up screen, click
Next
to continue. Installation of the operating system begins.
25.
When the installation finishes, you are prompted to change your password to log on the
first time. Click
OK
.
26.
Enter the new system administrator password two times and click the arrow button.
27.
The password change is confirmed. Click
OK
to continue.
28.
The system finishes booting to the Desktop for the first time and launches the Initial
Configuration Tasks screen.
Install from a GUI Console
43