HP LD4730 User Guide - Page 37
Mounting in portrait position, Considerations for wall mounting
 |
View all HP LD4730 manuals
Add to My Manuals
Save this manual to your list of manuals |
Page 37 highlights
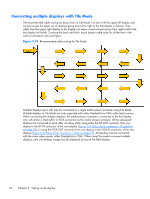
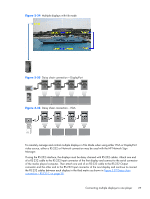
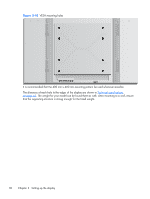
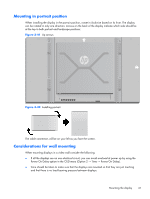
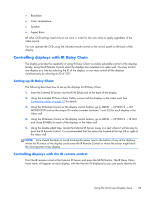
Mounting in portrait position When installing the display in the portrait position, rotate it clockwise based on its front. The display can be rotated in only one direction. Arrows on the back of the display indicate which side should be at the top in both portrait and landscape positions: Figure 3-41 Up arrows Figure 3-42 Installing portrait The cable connectors will be on your left as you face the screen. Considerations for wall mounting When mounting displays in a video wall consider the following: ● If all the displays are on one electrical circuit, you can avoid overload at power up by using the Power On Delay option in the OSD menu (Option 2 → Time → Power On Delay). ● Care should be taken to make sure that the displays are mounted so that they are just touching and that there is no load bearing pressure between displays. Mounting the display 31
-
 1
1 -
2
-
3
-
4
-
5
-
6
-
7
-
8
-
9
-
10
-
11
-
12
-
13
-
14
-
15
-
16
-
17
-
18
-
19
-
20
-
21
-
22
-
23
-
24
-
25
-
26
-
27
-
28
-
29
-
30
-
31
-
 32
32 -
 33
33 -
 34
34 -
 35
35 -
 36
36 -
 37
37 -
 38
38 -
 39
39 -
 40
40 -
 41
41 -
 42
42 -
43
-
44
-
45
-
46
-
47
-
48
-
49
-
50
-
51
-
52
-
53
-
54
-
55
-
56
-
57
-
58
-
59
-
60
-
61
-
62
-
63
-
64
-
65
-
66
-
67
-
68
-
69
-
70
-
71
-
72
-
73
-
74
-
75
 |
 |
