HP LD4730 User Guide - Page 60
Color Calibration, Enter,
 |
View all HP LD4730 manuals
Add to My Manuals
Save this manual to your list of manuals |
Page 60 highlights
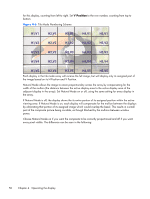
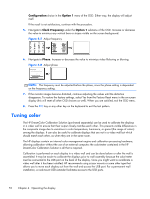
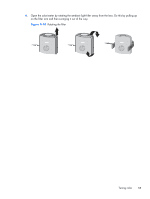
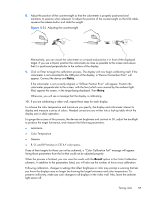
To calibrate the display, follow these steps: 1. Plug the colorimeter into the USB port. Figure 4-9 Plugging in the colorimeter R + L + 2. Navigate to the Color Calibration menu of the OSD. Use the Color Calibration option to Enter the calibration process. 3. The time since power-up will be shown. If the display has not yet warmed up for one hour, either wait for the display to complete the warm up or exit calibration menu and return later. If at least one hour has passed since the display was last powered on, proceed to the next step. 4. Choose the desired color temperature from the color temperature options provided. This setting must be the same for all displays in a video wall. The native color temperature of the display is 9300° Kelvin ("9300K"). You can choose between 6500K, 8000K and 9300K. A lower color temperature results in a warmer picture, which may be more pleasing, depending on the environmental lighting in the area of the video wall. However, in order to lower the color temperature, blue light output must be restricted, which will reduce the maximum possible brightness. After choosing a color temperature, click on Enter. 5. Choose the target luminance. The slider moves in increments of 10 cd/m2. Once you have set the luminance, click on Enter to move to the next option. NOTE: If the display cannot be calibrated to the target luminance, an error message will appear indicating the luminance that could be achieved. Use that or a lower value as the target for the video wall, to ensure equal light output across the wall. 54 Chapter 4 Operating the display
-
 1
1 -
2
-
3
-
4
-
5
-
6
-
7
-
8
-
9
-
10
-
11
-
12
-
13
-
14
-
15
-
16
-
17
-
18
-
19
-
20
-
21
-
22
-
23
-
24
-
25
-
26
-
27
-
28
-
29
-
30
-
31
-
32
-
33
-
34
-
35
-
36
-
37
-
38
-
39
-
40
-
41
-
42
-
43
-
44
-
45
-
46
-
47
-
48
-
49
-
50
-
51
-
52
-
53
-
54
-
 55
55 -
 56
56 -
 57
57 -
 58
58 -
 59
59 -
 60
60 -
 61
61 -
 62
62 -
 63
63 -
 64
64 -
 65
65 -
66
-
67
-
68
-
69
-
70
-
71
-
72
-
73
-
74
-
75
 |
 |
