HP LD4730 User Guide - Page 54
Power On Delay, Using Key Lock, Setting the backlight level, Level 1 Menu, Description, Tile Mode
 |
View all HP LD4730 manuals
Add to My Manuals
Save this manual to your list of manuals |
Page 54 highlights
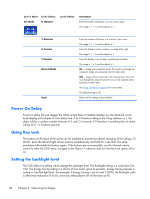
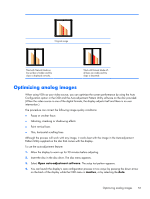
Level 1 Menu Level 2 Menu Tile Mode H Monitors Level 3 Menu Description Enter the number of displays in a row of your array. The range is 1 - 5 and the default is 1. V Monitors H Position V Position Natural Mode Reset Enter the number of displays in a column of your array. The range is 1 - 5 and the default is 1. Enter this display's column number, counting left to right. The range is 1 - 5 and the default is 1. Enter this display's row number, counting top to bottom. The range is 1 - 5 and the default is 1. On - Image will overlap the bezel. The result is as though the composite image was projected onto the video wall. Off - Image will be contained in the viewing area. The result is as though the composite picture was cut into separate pieces laid close to each other. See Using Tile Mode on page 49 for more detail. The default setting is Off. Returns all tile settings to their defaults. Power On Delay Power on delay lets you stagger the initial current draw of multiple displays on one electrical circuit. Each display will compute its own delay time. If its V Monitors setting in the Tiling submenu is 1, the delay will be a random number between 0.5 and 2.5 seconds. If V Monitors is anything else, its delay will be (0.5 * V Position) seconds. Using Key Lock The buttons on the back of the panel can be disabled to prevent accidental changing of the settings. To do this, press the left and right arrows buttons simultaneously and hold for 5 seconds. The same procedure will enable the buttons again. If the buttons are not accessible, use the infrared remote control to enter the OSD menu, navigate to the Option 2 submenu, and turn the Key Lock option off or on. Setting the backlight level The OSD offers two setting which change the backlight level. The Backlight setting is a scale from 0 to 100. The Energy Saving setting is a choice of four levels, given as percents. Energy Saving imposes a ceiling on the Backlight level. For example, if Energy Saving is set to Level 2 (60%), the Backlight scale is effectively reduced to 0 to 60, since any setting above 60 will function as 60. 48 Chapter 4 Operating the display
-
 1
1 -
2
-
3
-
4
-
5
-
6
-
7
-
8
-
9
-
10
-
11
-
12
-
13
-
14
-
15
-
16
-
17
-
18
-
19
-
20
-
21
-
22
-
23
-
24
-
25
-
26
-
27
-
28
-
29
-
30
-
31
-
32
-
33
-
34
-
35
-
36
-
37
-
38
-
39
-
40
-
41
-
42
-
43
-
44
-
45
-
46
-
47
-
48
-
 49
49 -
 50
50 -
 51
51 -
 52
52 -
 53
53 -
 54
54 -
 55
55 -
 56
56 -
 57
57 -
 58
58 -
 59
59 -
60
-
61
-
62
-
63
-
64
-
65
-
66
-
67
-
68
-
69
-
70
-
71
-
72
-
73
-
74
-
75
 |
 |
