HP LD4730 User Guide - Page 43
Navigating with the infrared remote control, IR Lock Message,
 |
View all HP LD4730 manuals
Add to My Manuals
Save this manual to your list of manuals |
Page 43 highlights
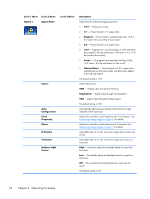
Press the SET button to select the display ID number as the display you want to send commands. The LOCK message window will appear in all the other displays to indicate that they will not receive any commands from the IR remote control through the External IR Sensor (Figure 4-3 IR Lock Message on page 37). The On-Screen Display Menu will appear in the display selected. Any command, menu selection, or setting entered with the IR remote control will now be executed by the selected display. Figure 4-3 IR Lock Message After a short period of time, the Lock message will disappear from the displays. At any time, you may press the INFO button on the IR remote control and the Lock message will reappear on the displays not selected to receive the IR commands: Figure 4-4 Lock message from INFO command Pressing the MENU key on the IR remote control will exit the IR daisy chain mode and unlock all the displays. Navigating with the infrared remote control The IR sensor is on the back of the display but will receive IR signals coming from the front. Point the remote control toward the bottom center of the screen. You can also use the external sensor provided, which makes the remote control very easy to use. This is especially true for displays in a video wall. If you have connected multiple displays with IR daisy chain, they will all respond to a key press of the remote. See Controlling displays with IR Daisy Chain on page 35 for more details. See Identifying remote control buttons on page 10 for details on IR remote control buttons and their functions. Using the On-Screen Display menu 37
-
 1
1 -
2
-
3
-
4
-
5
-
6
-
7
-
8
-
9
-
10
-
11
-
12
-
13
-
14
-
15
-
16
-
17
-
18
-
19
-
20
-
21
-
22
-
23
-
24
-
25
-
26
-
27
-
28
-
29
-
30
-
31
-
32
-
33
-
34
-
35
-
36
-
37
-
 38
38 -
 39
39 -
 40
40 -
 41
41 -
 42
42 -
 43
43 -
 44
44 -
 45
45 -
 46
46 -
 47
47 -
 48
48 -
49
-
50
-
51
-
52
-
53
-
54
-
55
-
56
-
57
-
58
-
59
-
60
-
61
-
62
-
63
-
64
-
65
-
66
-
67
-
68
-
69
-
70
-
71
-
72
-
73
-
74
-
75
 |
 |
