HP LaserJet Pro M1212nf HP LaserJet M1319 MFP Series - Software Technical Refe - Page 131
Uninstall the XPS driver, XPS HP LaserJet Professional XXXX
 |
View all HP LaserJet Pro M1212nf manuals
Add to My Manuals
Save this manual to your list of manuals |
Page 131 highlights
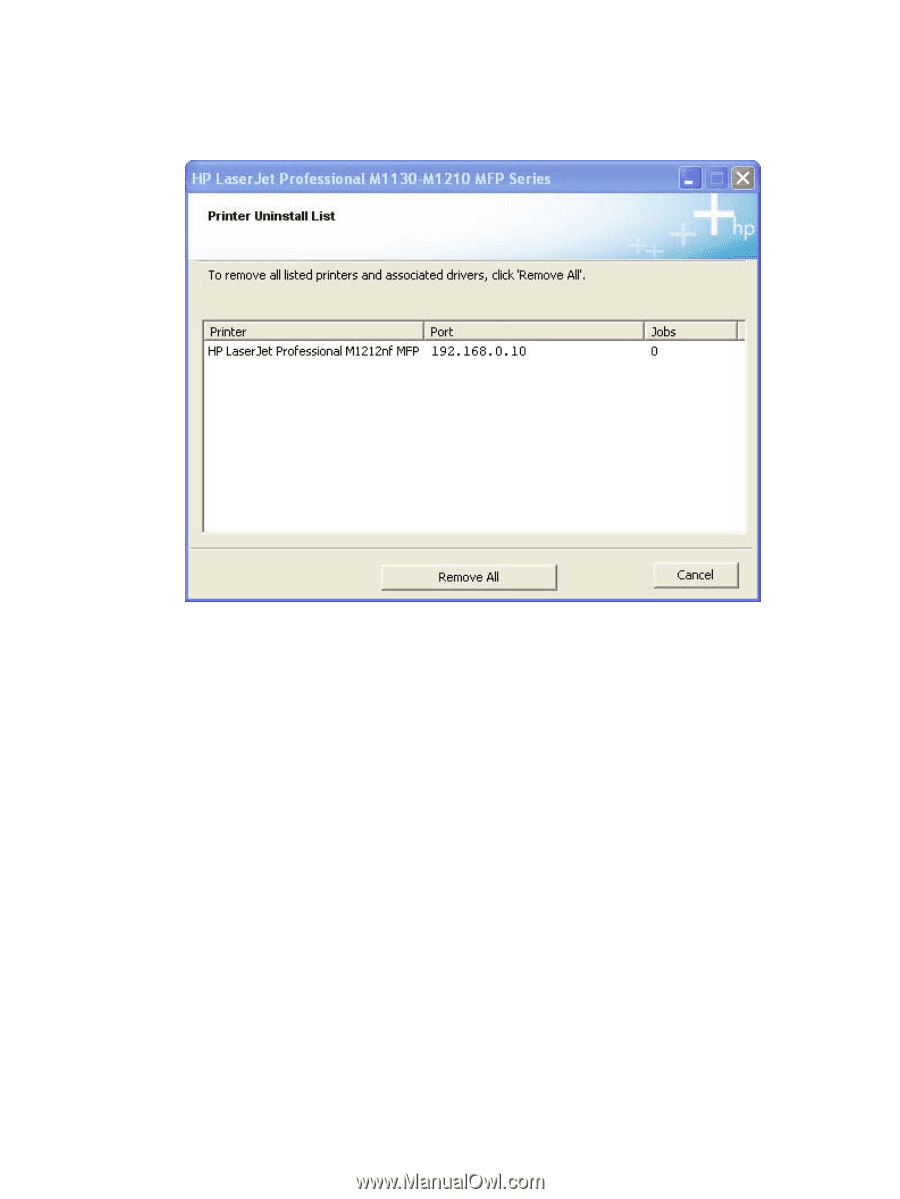
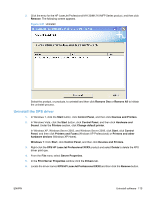
2. Click the entry for the HP LaserJet Professional M1130/M1210 MFP Series product, and then click Remove. The following screen appears. Figure 3-51 Uninstall Select the product, or products, to uninstall and then click Remove One or Remove All to initiate the uninstall process. Uninstall the XPS driver 1. In Windows 7, click the Start button, click Control Panel, and then click Devices and Printers. 2. In Windows Vista, click the Start button, click Control Panel, and then click Hardware and Sound. Under the Printers section, click Change default printer. In Windows XP, Windows Server 2003, and Windows Server 2008, click Start, click Control Panel, and then click Printers and Faxes (Windows XP Professional) or Printers and other hardware devices (Windows XP Home). Windows 7: Click Start, click Control Panel, and then click Devices and Printers. 3. Right-click the XPS HP LaserJet Professional XXXX product and select Delete to delete the XPS driver print que. 4. From the File menu select Server Properties. 5. In the Print Server Properties window click the Drivers tab. 6. Locate the driver named XPS HP LaserJet Professional XXXX and then click the Remove button. ENWW Uninstall software 115
-
 1
1 -
2
-
3
-
4
-
5
-
6
-
7
-
8
-
9
-
10
-
11
-
12
-
13
-
14
-
15
-
16
-
17
-
18
-
19
-
20
-
21
-
22
-
23
-
24
-
25
-
26
-
27
-
28
-
29
-
30
-
31
-
32
-
33
-
34
-
35
-
36
-
37
-
38
-
39
-
40
-
41
-
42
-
43
-
44
-
45
-
46
-
47
-
48
-
49
-
50
-
51
-
52
-
53
-
54
-
55
-
56
-
57
-
58
-
59
-
60
-
61
-
62
-
63
-
64
-
65
-
66
-
67
-
68
-
69
-
70
-
71
-
72
-
73
-
74
-
75
-
76
-
77
-
78
-
79
-
80
-
81
-
82
-
83
-
84
-
85
-
86
-
87
-
88
-
89
-
90
-
91
-
92
-
93
-
94
-
95
-
96
-
97
-
98
-
99
-
100
-
101
-
102
-
103
-
104
-
105
-
106
-
107
-
108
-
109
-
110
-
111
-
112
-
113
-
114
-
115
-
116
-
117
-
118
-
119
-
120
-
121
-
122
-
123
-
124
-
125
-
 126
126 -
 127
127 -
 128
128 -
 129
129 -
 130
130 -
 131
131 -
 132
132 -
 133
133 -
 134
134 -
 135
135 -
 136
136 -
137
-
138
-
139
-
140
-
141
-
142
-
143
-
144
-
145
-
146
-
147
-
148
-
149
-
150
-
151
-
152
-
153
-
154
-
155
-
156
-
157
-
158
-
159
-
160
-
161
-
162
-
163
-
164
-
165
-
166
-
167
-
168
-
169
-
170
-
171
-
172
-
173
-
174
-
175
-
176
-
177
-
178
-
179
-
180
-
181
-
182
-
183
-
184
-
185
-
186
-
187
-
188
-
189
-
190
-
191
-
192
-
193
-
194
 |
 |