HP Latex 3200 Users Guide - Page 115

Test print, Within the ink density band you have selected

Page 115 highlights

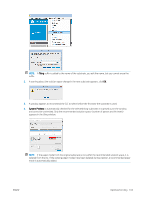
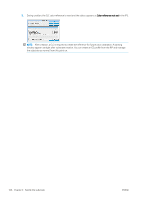
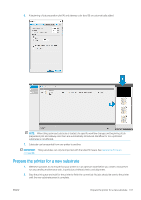
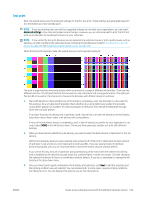
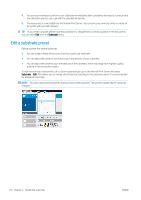
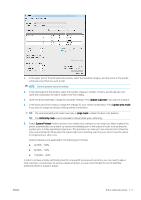
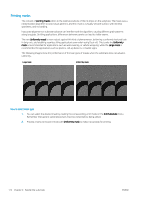
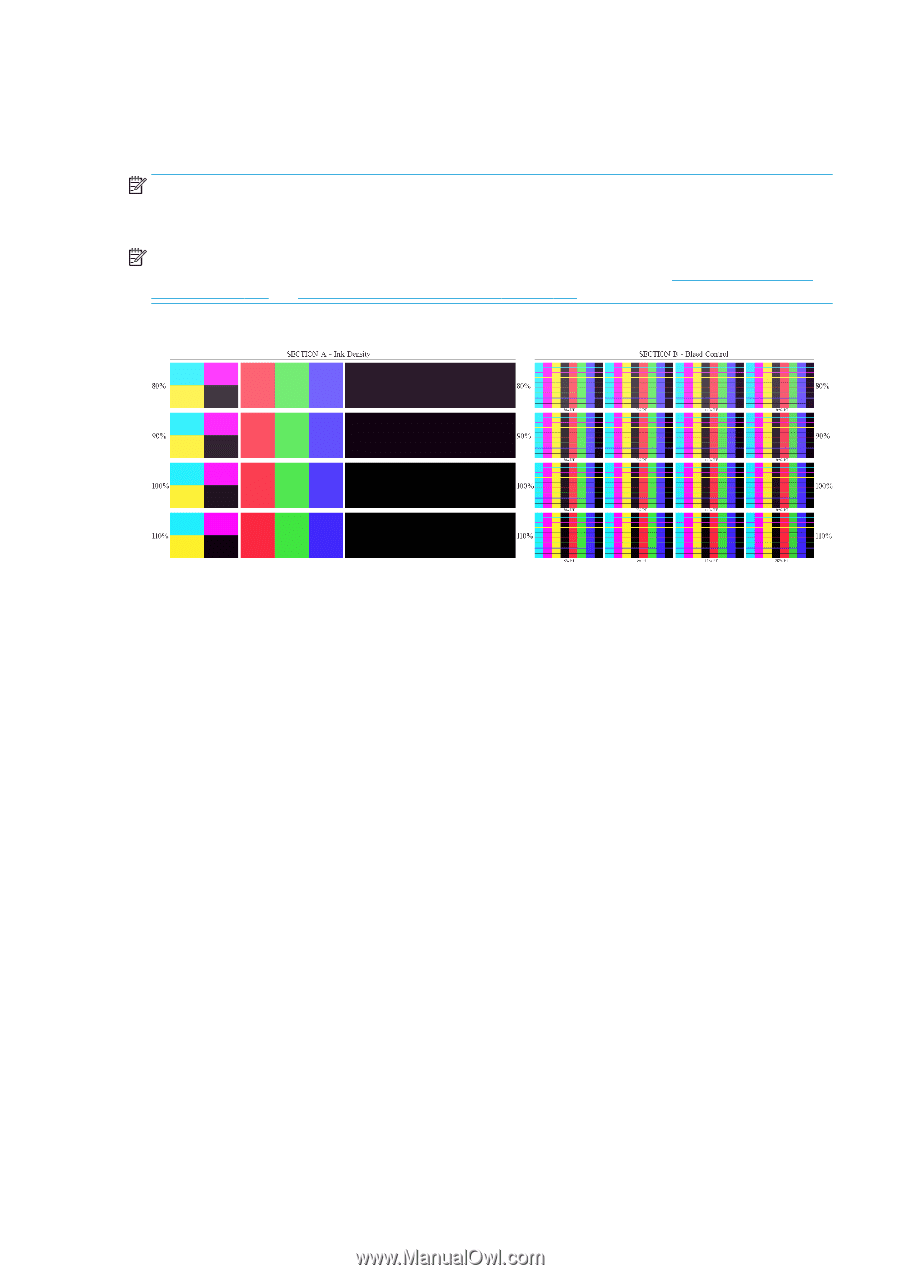
Test print Next, the wizard shows you the proposed settings for the first test print. These settings are generated based on the information you have already given. NOTE: If you are an advanced user and the suggested settings do not meet your expectations, you can select Advanced settings at any time and make manual changes. However, you are recommended to print the first test print as an indication of overall performance on your substrate. NOTE: If you cancel the test print because you are experiencing substrate issues or print-quality issues such as banding, consider modifying the substrate preset, following the guidelines provided in Troubleshoot substrate issues on page 359 and Troubleshoot print-quality issues on page 378. When the test print has been made, the wizard asks you some questions about it. The print is organized into horizontal bands which are printed at a range of different ink densities. There are two different sections. The left part (Section A) is focused on color saturation and curing performance. The right part (Section B) is focused on the interaction of several ink densities with different levels of optimizer. 1. Start with Section A. Check whether any of the bands is completely cured. Use the black 4-color patch for this purpose. Do a smudge test if possible. Check whether any curing defects are visible. One possible curing defect appears as a pattern of small round spots on the print, from the perforated plate through which the curing air passes. If you have found an ink density that is perfectly cured, choose this or a lower ink density in the Ink Density drop-down menu. Never select a ink density with curing defects. If none of the ink density bands is completely cured, or the ink density you prefer for your application is not cured, select NONE in the Ink Density menu. The wizard then generates another test print with different settings. 2. When you have found a satisfactory ink density, you need to select the best amount of optimizer for this ink density. Within the ink density band you have selected, look at Section B of the print to determine the best amount of optimizer. Look at color-to-color bleed and smooth area fills. If you see several levels of optimizer performing equally well, you are recommended to choose the lowest amount without defects. If you cannot find any amount of optimizer giving satisfactory performance with the selected ink density, look at neighboring ink densities (usually lower, but could be higher in some rare cases). Consider changing the selected ink density if there is a combination without defects. If you do so, remember to change the ink density in the drop-down menu. 3. Once you have found a good combination of ink density and optimizer, click Next to add the substrate and the printing condition you just selected. You can rename both. In some cases, several printing conditions are offered at once. You can deselect the options you are not interested in. ENWW Create a new substrate preset with the Add New Substrate wizard 109
  • 1
  • 2
  • 3
  • 4
  • 5
  • 6
  • 7
  • 8
  • 9
  • 10
  • 11
  • 12
  • 13
  • 14
  • 15
  • 16
  • 17
  • 18
  • 19
  • 20
  • 21
  • 22
  • 23
  • 24
  • 25
  • 26
  • 27
  • 28
  • 29
  • 30
  • 31
  • 32
  • 33
  • 34
  • 35
  • 36
  • 37
  • 38
  • 39
  • 40
  • 41
  • 42
  • 43
  • 44
  • 45
  • 46
  • 47
  • 48
  • 49
  • 50
  • 51
  • 52
  • 53
  • 54
  • 55
  • 56
  • 57
  • 58
  • 59
  • 60
  • 61
  • 62
  • 63
  • 64
  • 65
  • 66
  • 67
  • 68
  • 69
  • 70
  • 71
  • 72
  • 73
  • 74
  • 75
  • 76
  • 77
  • 78
  • 79
  • 80
  • 81
  • 82
  • 83
  • 84
  • 85
  • 86
  • 87
  • 88
  • 89
  • 90
  • 91
  • 92
  • 93
  • 94
  • 95
  • 96
  • 97
  • 98
  • 99
  • 100
  • 101
  • 102
  • 103
  • 104
  • 105
  • 106
  • 107
  • 108
  • 109
  • 110
  • 111
  • 112
  • 113
  • 114
  • 115
  • 116
  • 117
  • 118
  • 119
  • 120
  • 121
  • 122
  • 123
  • 124
  • 125
  • 126
  • 127
  • 128
  • 129
  • 130
  • 131
  • 132
  • 133
  • 134
  • 135
  • 136
  • 137
  • 138
  • 139
  • 140
  • 141
  • 142
  • 143
  • 144
  • 145
  • 146
  • 147
  • 148
  • 149
  • 150
  • 151
  • 152
  • 153
  • 154
  • 155
  • 156
  • 157
  • 158
  • 159
  • 160
  • 161
  • 162
  • 163
  • 164
  • 165
  • 166
  • 167
  • 168
  • 169
  • 170
  • 171
  • 172
  • 173
  • 174
  • 175
  • 176
  • 177
  • 178
  • 179
  • 180
  • 181
  • 182
  • 183
  • 184
  • 185
  • 186
  • 187
  • 188
  • 189
  • 190
  • 191
  • 192
  • 193
  • 194
  • 195
  • 196
  • 197
  • 198
  • 199
  • 200
  • 201
  • 202
  • 203
  • 204
  • 205
  • 206
  • 207
  • 208
  • 209
  • 210
  • 211
  • 212
  • 213
  • 214
  • 215
  • 216
  • 217
  • 218
  • 219
  • 220
  • 221
  • 222
  • 223
  • 224
  • 225
  • 226
  • 227
  • 228
  • 229
  • 230
  • 231
  • 232
  • 233
  • 234
  • 235
  • 236
  • 237
  • 238
  • 239
  • 240
  • 241
  • 242
  • 243
  • 244
  • 245
  • 246
  • 247
  • 248
  • 249
  • 250
  • 251
  • 252
  • 253
  • 254
  • 255
  • 256
  • 257
  • 258
  • 259
  • 260
  • 261
  • 262
  • 263
  • 264
  • 265
  • 266
  • 267
  • 268
  • 269
  • 270
  • 271
  • 272
  • 273
  • 274
  • 275
  • 276
  • 277
  • 278
  • 279
  • 280
  • 281
  • 282
  • 283
  • 284
  • 285
  • 286
  • 287
  • 288
  • 289
  • 290
  • 291
  • 292
  • 293
  • 294
  • 295
  • 296
  • 297
  • 298
  • 299
  • 300
  • 301
  • 302
  • 303
  • 304
  • 305
  • 306
  • 307
  • 308
  • 309
  • 310
  • 311
  • 312
  • 313
  • 314
  • 315
  • 316
  • 317
  • 318
  • 319
  • 320
  • 321
  • 322
  • 323
  • 324
  • 325
  • 326
  • 327
  • 328
  • 329
  • 330
  • 331
  • 332
  • 333
  • 334
  • 335
  • 336
  • 337
  • 338
  • 339
  • 340
  • 341
  • 342
  • 343
  • 344
  • 345
  • 346
  • 347
  • 348
  • 349
  • 350
  • 351
  • 352
  • 353
  • 354
  • 355
  • 356
  • 357
  • 358
  • 359
  • 360
  • 361
  • 362
  • 363
  • 364
  • 365
  • 366
  • 367
  • 368
  • 369
  • 370
  • 371
  • 372
  • 373
  • 374
  • 375
  • 376
  • 377
  • 378
  • 379
  • 380
  • 381
  • 382
  • 383
  • 384
  • 385
  • 386
  • 387
  • 388
  • 389
  • 390
  • 391
  • 392
  • 393
  • 394
  • 395
  • 396
  • 397
  • 398
  • 399
  • 400
  • 401
  • 402
  • 403
  • 404
  • 405
  • 406
  • 407
  • 408
  • 409
  • 410
  • 411
  • 412
  • 413
  • 414
  • 415
  • 416
  • 417
  • 418
  • 419
  • 420
  • 421
  • 422
  • 423
  • 424
  • 425
  • 426
  • 427
  • 428
  • 429

Test print
Next, the wizard shows you the proposed settings for the first test print. These settings are generated based on
the information you have already given.
NOTE:
If you are an advanced user and the suggested settings do not meet your expectations, you can select
Advanced settings
at any time and make manual changes. However, you are recommended to print the first test
print as an indication of overall performance on your substrate.
NOTE:
If you cancel the test print because you are experiencing substrate issues or print-quality issues such as
banding, consider modifying the substrate preset, following the guidelines provided in
Troubleshoot substrate
issues
on page
359
and
Troubleshoot print-quality issues
on page
378
.
When the test print has been made, the wizard asks you some questions about it.
The print is organized into horizontal bands which are printed at a range of different ink densities. There are two
different sections. The left part (Section A) is focused on color saturation and curing performance. The right part
(Section B) is focused on the interaction of several ink densities with different levels of optimizer.
1.
Start with Section A. Check whether any of the bands is completely cured. Use the black 4-color patch for
this purpose. Do a smudge test if possible. Check whether any curing defects are visible. One possible
curing defect appears as a pattern of small round spots on the print, from the perforated plate through
which the curing air passes.
If you have found an ink density that is perfectly cured, choose this or a lower ink density in the Ink Density
drop-down menu. Never select a ink density with curing defects.
If none of the ink density bands is completely cured, or the ink density you prefer for your application is not
cured, select
NONE
in the Ink Density menu. The wizard then generates another test print with different
settings.
2.
When you have found a satisfactory ink density, you need to select the best amount of optimizer for this ink
density.
Within the ink density band you have selected, look at Section B of the print to determine the best amount
of optimizer. Look at color-to-color bleed and smooth area fills. If you see several levels of optimizer
performing equally well, you are recommended to choose the lowest amount without defects.
If you cannot find any amount of optimizer giving satisfactory performance with the selected ink density,
look at neighboring ink densities (usually lower, but could be higher in some rare cases). Consider changing
the selected ink density if there is a combination without defects. If you do so, remember to change the ink
density in the drop-down menu.
3.
Once you have found a good combination of ink density and optimizer, click
Next
to add the substrate and
the printing condition you just selected. You can rename both. In some cases, several printing conditions
are offered at once. You can deselect the options you are not interested in.
ENWW
Create a new substrate preset with the Add New Substrate wizard
109