HP Latex 3200 Users Guide - Page 366

The substrate is not attached to the core and/or spindle, The substrate is not flat

Page 366 highlights

7. Use the same menu to lower the carriage beam to its normal position. 8. Before restarting the printer, check that all circuit breakers are on and all emergency stop buttons released. 9. Use Print Care to restart the printer in normal mode. 10. Reload the substrate. The substrate is not attached to the core and/or spindle If the printer detects a lack of tension during the substrate check after loading, it will ask you to confirm the winding direction. If the roll is not firmly attached during printing, you may see banding on your prints, or hear metallic noises. If you see an error message numbered 41.00.00.62 or 41.00.01.62 while printing, it means that the substrate may have become detached from the spindle, or the core is slipping on the spindle. This could mean that you have reached the end of the roll, or the spindle is not correctly inflated, or the dual-roll differential hub is locked. The substrate is automatically unloaded when this error occurs. You should respond to this error in the following ways. ● Check whether you have reached the end of a roll. ● Check that the spindle is correctly inflated: one valve for the single-roll spindle, and both valves for the dual-roll spindle. NOTE: If you are using only one half of the dual-roll spindle, only that half needs to be inflated. ● For dual-roll printing, check that the differential hub is unlocked. ● Check that the inner diameter of each substrate core is not too large for the spindle. If the roll is not firmly attached to the input core, proceed as follows. 1. Unload the roll from the input spindle and load it onto the output spindle. Take care to avoid telescoping. 2. Raise the pinches and, using the Internal Print Server, raise the carriage beam to its maximum height. 3. Unload substrate from the roll and pass it backwards through the printer towards the input spindle. Attach it to the empty core on the input spindle, securing it with adhesive tape. Wrap a couple of turns of substrate around the input core. Take care to align the substrate with the output roll. 4. Lower the pinchwheels. 5. Go to the Internal Print Server and select Substrate Load/Unload, then select the printer configuration and press Load. 6. Select the correct substrate in the Internal Print Server. 7. Press Move substrate in the Internal Print Server, then Back, and wait until all the roll has been wound onto the input spindle. 8. You may decide to cancel rewinding when the substrate is detached from the output roll. Then attach it to the output core to print immediately, or rewind it completely onto the input core if you want to remove the roll. The substrate is not flat If the substrate does not lie flat when it comes out of the printer, but has shallow waves in it, you are likely to see defects in the printed image, such as vertical stripes. This can happen when you use thin substrate that becomes saturated with ink; it can also be caused by the combination of heat and vacuum pressure that is applied to the substrate. 360 Chapter 10 Troubleshoot substrate issues ENWW

  • 1
  • 2
  • 3
  • 4
  • 5
  • 6
  • 7
  • 8
  • 9
  • 10
  • 11
  • 12
  • 13
  • 14
  • 15
  • 16
  • 17
  • 18
  • 19
  • 20
  • 21
  • 22
  • 23
  • 24
  • 25
  • 26
  • 27
  • 28
  • 29
  • 30
  • 31
  • 32
  • 33
  • 34
  • 35
  • 36
  • 37
  • 38
  • 39
  • 40
  • 41
  • 42
  • 43
  • 44
  • 45
  • 46
  • 47
  • 48
  • 49
  • 50
  • 51
  • 52
  • 53
  • 54
  • 55
  • 56
  • 57
  • 58
  • 59
  • 60
  • 61
  • 62
  • 63
  • 64
  • 65
  • 66
  • 67
  • 68
  • 69
  • 70
  • 71
  • 72
  • 73
  • 74
  • 75
  • 76
  • 77
  • 78
  • 79
  • 80
  • 81
  • 82
  • 83
  • 84
  • 85
  • 86
  • 87
  • 88
  • 89
  • 90
  • 91
  • 92
  • 93
  • 94
  • 95
  • 96
  • 97
  • 98
  • 99
  • 100
  • 101
  • 102
  • 103
  • 104
  • 105
  • 106
  • 107
  • 108
  • 109
  • 110
  • 111
  • 112
  • 113
  • 114
  • 115
  • 116
  • 117
  • 118
  • 119
  • 120
  • 121
  • 122
  • 123
  • 124
  • 125
  • 126
  • 127
  • 128
  • 129
  • 130
  • 131
  • 132
  • 133
  • 134
  • 135
  • 136
  • 137
  • 138
  • 139
  • 140
  • 141
  • 142
  • 143
  • 144
  • 145
  • 146
  • 147
  • 148
  • 149
  • 150
  • 151
  • 152
  • 153
  • 154
  • 155
  • 156
  • 157
  • 158
  • 159
  • 160
  • 161
  • 162
  • 163
  • 164
  • 165
  • 166
  • 167
  • 168
  • 169
  • 170
  • 171
  • 172
  • 173
  • 174
  • 175
  • 176
  • 177
  • 178
  • 179
  • 180
  • 181
  • 182
  • 183
  • 184
  • 185
  • 186
  • 187
  • 188
  • 189
  • 190
  • 191
  • 192
  • 193
  • 194
  • 195
  • 196
  • 197
  • 198
  • 199
  • 200
  • 201
  • 202
  • 203
  • 204
  • 205
  • 206
  • 207
  • 208
  • 209
  • 210
  • 211
  • 212
  • 213
  • 214
  • 215
  • 216
  • 217
  • 218
  • 219
  • 220
  • 221
  • 222
  • 223
  • 224
  • 225
  • 226
  • 227
  • 228
  • 229
  • 230
  • 231
  • 232
  • 233
  • 234
  • 235
  • 236
  • 237
  • 238
  • 239
  • 240
  • 241
  • 242
  • 243
  • 244
  • 245
  • 246
  • 247
  • 248
  • 249
  • 250
  • 251
  • 252
  • 253
  • 254
  • 255
  • 256
  • 257
  • 258
  • 259
  • 260
  • 261
  • 262
  • 263
  • 264
  • 265
  • 266
  • 267
  • 268
  • 269
  • 270
  • 271
  • 272
  • 273
  • 274
  • 275
  • 276
  • 277
  • 278
  • 279
  • 280
  • 281
  • 282
  • 283
  • 284
  • 285
  • 286
  • 287
  • 288
  • 289
  • 290
  • 291
  • 292
  • 293
  • 294
  • 295
  • 296
  • 297
  • 298
  • 299
  • 300
  • 301
  • 302
  • 303
  • 304
  • 305
  • 306
  • 307
  • 308
  • 309
  • 310
  • 311
  • 312
  • 313
  • 314
  • 315
  • 316
  • 317
  • 318
  • 319
  • 320
  • 321
  • 322
  • 323
  • 324
  • 325
  • 326
  • 327
  • 328
  • 329
  • 330
  • 331
  • 332
  • 333
  • 334
  • 335
  • 336
  • 337
  • 338
  • 339
  • 340
  • 341
  • 342
  • 343
  • 344
  • 345
  • 346
  • 347
  • 348
  • 349
  • 350
  • 351
  • 352
  • 353
  • 354
  • 355
  • 356
  • 357
  • 358
  • 359
  • 360
  • 361
  • 362
  • 363
  • 364
  • 365
  • 366
  • 367
  • 368
  • 369
  • 370
  • 371
  • 372
  • 373
  • 374
  • 375
  • 376
  • 377
  • 378
  • 379
  • 380
  • 381
  • 382
  • 383
  • 384
  • 385
  • 386
  • 387
  • 388
  • 389
  • 390
  • 391
  • 392
  • 393
  • 394
  • 395
  • 396
  • 397
  • 398
  • 399
  • 400
  • 401
  • 402
  • 403
  • 404
  • 405
  • 406
  • 407
  • 408
  • 409
  • 410
  • 411
  • 412
  • 413
  • 414
  • 415
  • 416
  • 417
  • 418
  • 419
  • 420
  • 421
  • 422
  • 423
  • 424
  • 425
  • 426
  • 427
  • 428
  • 429

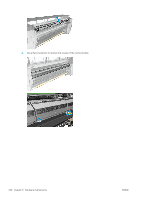
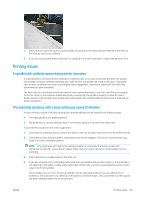
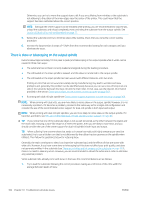
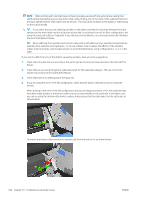
7.
Use the same menu to lower the carriage beam to its normal position.
8.
Before restarting the printer, check that all circuit breakers are on and all emergency stop buttons released.
9.
Use Print Care to restart the printer in normal mode.
10.
Reload the substrate.
The substrate is not attached to the core and/or spindle
If the printer detects a lack of tension during the substrate check after loading, it will ask you to confirm the
winding direction.
If the roll is not firmly attached during printing, you may see banding on your prints, or hear metallic noises.
If you see an error message numbered 41.00.00.62 or 41.00.01.62 while printing, it means that the substrate
may have become detached from the spindle, or the core is slipping on the spindle. This could mean that you
have reached the end of the roll, or the spindle is not correctly inflated, or the dual-roll differential hub is locked.
The substrate is automatically unloaded when this error occurs.
You should respond to this error in the following ways.
Check whether you have reached the end of a roll.
Check that the spindle is correctly inflated: one valve for the single-roll spindle, and both valves for the
dual-roll spindle.
NOTE:
If you are using only one half of the dual-roll spindle, only that half needs to be inflated.
For dual-roll printing, check that the differential hub is unlocked.
Check that the inner diameter of each substrate core is not too large for the spindle.
If the roll is not firmly attached to the input core, proceed as follows.
1.
Unload the roll from the input spindle and load it onto the output spindle. Take care to avoid telescoping.
2.
Raise the pinches and, using the Internal Print Server, raise the carriage beam to its maximum height.
3.
Unload substrate from the roll and pass it backwards through the printer towards the input spindle. Attach
it to the empty core on the input spindle, securing it with adhesive tape. Wrap a couple of turns of substrate
around the input core. Take care to align the substrate with the output roll.
4.
Lower the pinchwheels.
5.
Go to the Internal Print Server and select
Substrate Load/Unload
, then select the printer configuration and
press
Load
.
6.
Select the correct substrate in the Internal Print Server.
7.
Press
Move substrate
in the Internal Print Server, then
Back
, and wait until all the roll has been wound onto
the input spindle.
8.
You may decide to cancel rewinding when the substrate is detached from the output roll. Then attach it to
the output core to print immediately, or rewind it completely onto the input core if you want to remove the
roll.
The substrate is not flat
If the substrate does not lie flat when it comes out of the printer, but has shallow waves in it, you are likely to see
defects in the printed image, such as vertical stripes. This can happen when you use thin substrate that becomes
saturated with ink; it can also be caused by the combination of heat and vacuum pressure that is applied to the
substrate.
360
Chapter 10
Troubleshoot substrate issues
ENWW