HP Latex 3200 Users Guide - Page 188
Substrate-advance test print, Apply, Substrate, Clone, Printer, Advance calibration
 |
View all HP Latex 3200 manuals
Add to My Manuals
Save this manual to your list of manuals |
Page 188 highlights
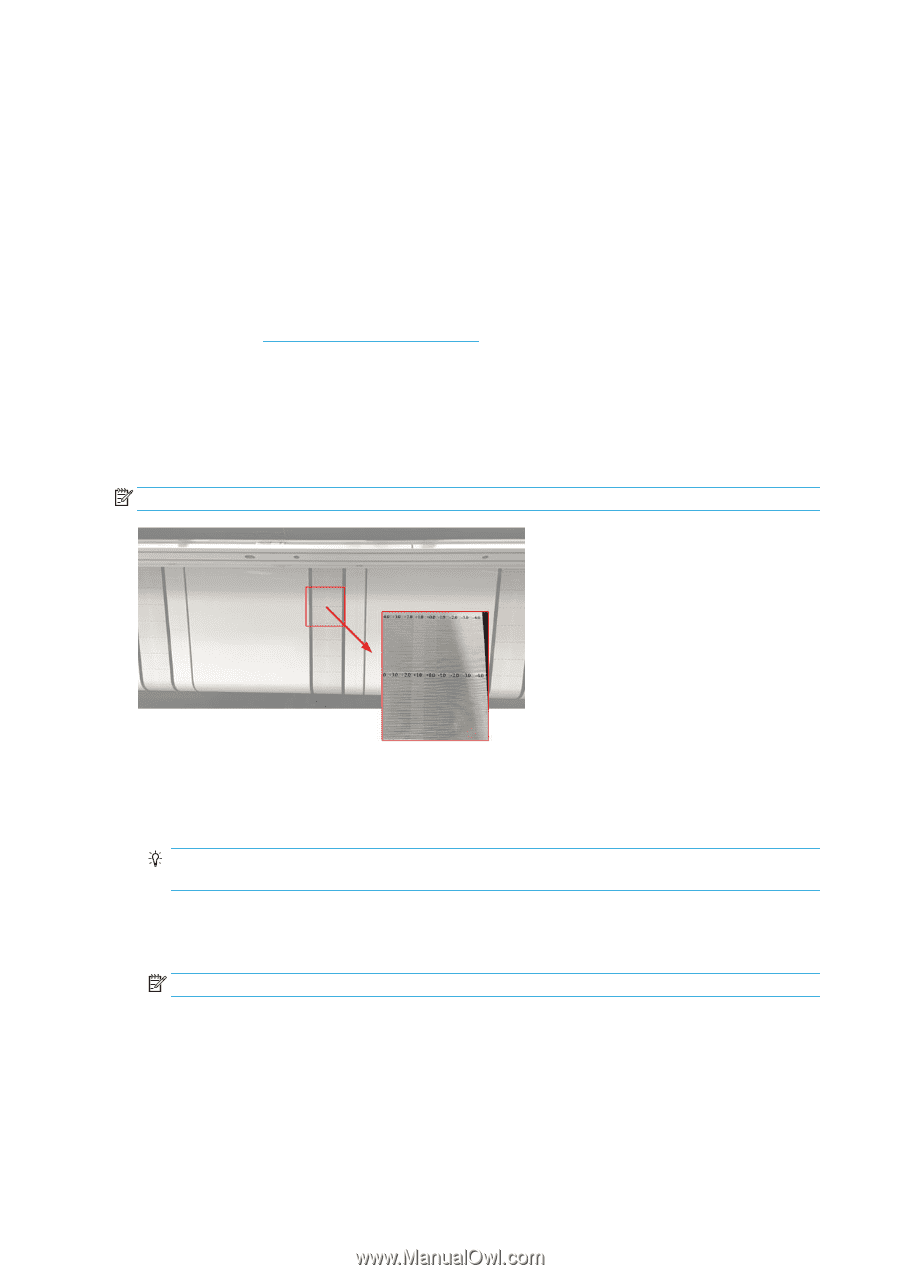
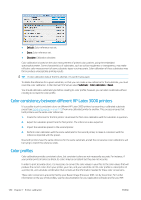
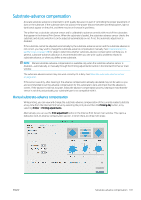
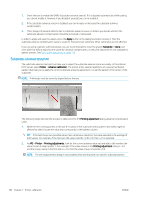
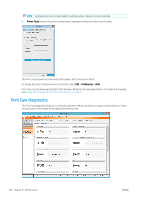
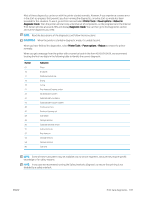
1. Check the box to enable the OMAS (substrate-advance sensor). If it is disabled automatically while loading, you cannot enable it. However, if you disable it yourself, you can re-enable it. 2. If the substrate-advance sensor is disabled, you can increase or decrease the substrate-advance compensation. 3. Three images of possible defects due to substrate-advance issues, to help to you decide whether the substrate-advance compensation should be increased or decreased. In order to apply and save the values, press the Apply button in the dialog box before closing it. Then the substrate-advance compensation value is saved for that particular substrate. Other substrates are not affected. If you are using a generic substrate preset, you are recommended to clone the preset (Substrate > Clone) and work with that before adjusting the substrate-advance compensation, as the print adjustment is not available for generic presets. See Edit a substrate preset on page 110. Substrate-advance test print The substrate-advance test print can help you to adjust the substrate advance more accurately. In the Internal Print Server, select Printer > Advance calibration. The printer prints several repetitions of a special numbered pattern that help you to apply the correct substrate-advance adjustment. Locate the pattern in the center of the substrate. NOTE: Printheads must be correctly aligned before the test. The following steps describe the process to determine the IPS Printing adjustment dialog advance compensation value. 1. While the test is being printed, in the last 8-10 plots of the substrate central pattern (the sides might be affected by skew), locate the value that corresponds to the lightest column. TIP: If the test shows two possible values (two continuous columns), the value selected is the average of both values. For example, if the test says the value could be +2.0/+3.0, then +2.5 is selected. 2. Via IPS > Printer > Printing adjustments, look for the current advance value set and add to this number the value chosen in step number 1. For example, if the value shown in the Printing adjustment dialog is -2.0 and the chosen value in the first step is +2.5, then the value chosen should be +0.5. NOTE: The print adjustments dialog is only enabled when printing with non-generic substrate presets. 182 Chapter 7 Printer calibration ENWW
-
 1
1 -
2
-
3
-
4
-
5
-
6
-
7
-
8
-
9
-
10
-
11
-
12
-
13
-
14
-
15
-
16
-
17
-
18
-
19
-
20
-
21
-
22
-
23
-
24
-
25
-
26
-
27
-
28
-
29
-
30
-
31
-
32
-
33
-
34
-
35
-
36
-
37
-
38
-
39
-
40
-
41
-
42
-
43
-
44
-
45
-
46
-
47
-
48
-
49
-
50
-
51
-
52
-
53
-
54
-
55
-
56
-
57
-
58
-
59
-
60
-
61
-
62
-
63
-
64
-
65
-
66
-
67
-
68
-
69
-
70
-
71
-
72
-
73
-
74
-
75
-
76
-
77
-
78
-
79
-
80
-
81
-
82
-
83
-
84
-
85
-
86
-
87
-
88
-
89
-
90
-
91
-
92
-
93
-
94
-
95
-
96
-
97
-
98
-
99
-
100
-
101
-
102
-
103
-
104
-
105
-
106
-
107
-
108
-
109
-
110
-
111
-
112
-
113
-
114
-
115
-
116
-
117
-
118
-
119
-
120
-
121
-
122
-
123
-
124
-
125
-
126
-
127
-
128
-
129
-
130
-
131
-
132
-
133
-
134
-
135
-
136
-
137
-
138
-
139
-
140
-
141
-
142
-
143
-
144
-
145
-
146
-
147
-
148
-
149
-
150
-
151
-
152
-
153
-
154
-
155
-
156
-
157
-
158
-
159
-
160
-
161
-
162
-
163
-
164
-
165
-
166
-
167
-
168
-
169
-
170
-
171
-
172
-
173
-
174
-
175
-
176
-
177
-
178
-
179
-
180
-
181
-
182
-
 183
183 -
 184
184 -
 185
185 -
 186
186 -
 187
187 -
 188
188 -
 189
189 -
 190
190 -
 191
191 -
 192
192 -
 193
193 -
194
-
195
-
196
-
197
-
198
-
199
-
200
-
201
-
202
-
203
-
204
-
205
-
206
-
207
-
208
-
209
-
210
-
211
-
212
-
213
-
214
-
215
-
216
-
217
-
218
-
219
-
220
-
221
-
222
-
223
-
224
-
225
-
226
-
227
-
228
-
229
-
230
-
231
-
232
-
233
-
234
-
235
-
236
-
237
-
238
-
239
-
240
-
241
-
242
-
243
-
244
-
245
-
246
-
247
-
248
-
249
-
250
-
251
-
252
-
253
-
254
-
255
-
256
-
257
-
258
-
259
-
260
-
261
-
262
-
263
-
264
-
265
-
266
-
267
-
268
-
269
-
270
-
271
-
272
-
273
-
274
-
275
-
276
-
277
-
278
-
279
-
280
-
281
-
282
-
283
-
284
-
285
-
286
-
287
-
288
-
289
-
290
-
291
-
292
-
293
-
294
-
295
-
296
-
297
-
298
-
299
-
300
-
301
-
302
-
303
-
304
-
305
-
306
-
307
-
308
-
309
-
310
-
311
-
312
-
313
-
314
-
315
-
316
-
317
-
318
-
319
-
320
-
321
-
322
-
323
-
324
-
325
-
326
-
327
-
328
-
329
-
330
-
331
-
332
-
333
-
334
-
335
-
336
-
337
-
338
-
339
-
340
-
341
-
342
-
343
-
344
-
345
-
346
-
347
-
348
-
349
-
350
-
351
-
352
-
353
-
354
-
355
-
356
-
357
-
358
-
359
-
360
-
361
-
362
-
363
-
364
-
365
-
366
-
367
-
368
-
369
-
370
-
371
-
372
-
373
-
374
-
375
-
376
-
377
-
378
-
379
-
380
-
381
-
382
-
383
-
384
-
385
-
386
-
387
-
388
-
389
-
390
-
391
-
392
-
393
-
394
-
395
-
396
-
397
-
398
-
399
-
400
-
401
-
402
-
403
-
404
-
405
-
406
-
407
-
408
-
409
-
410
-
411
-
412
-
413
-
414
-
415
-
416
-
417
-
418
-
419
-
420
-
421
-
422
-
423
-
424
-
425
-
426
-
427
-
428
-
429
 |
 |