HP Officejet 5600 User Guide - Page 57
Make a 10 x 15 cm (4 x 6 inch) borderless copy of a photo - ink cartridge
 |
View all HP Officejet 5600 manuals
Add to My Manuals
Save this manual to your list of manuals |
Page 57 highlights
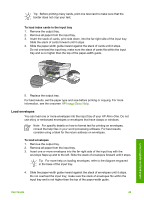
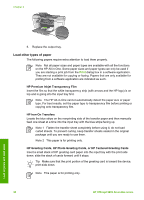
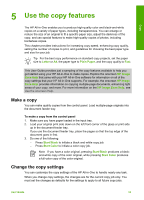
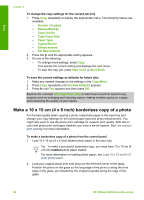
Copy Chapter 5 To change the copy settings for the current job only 1. Press Copy repeatedly to display the appropriate menu. The following menus are available: - Number of copies - Reduce/Enlarge - Copy Quality - Copy Paper Size - Paper Type - Lighter/Darker - Enhancements - Set New Defaults 2. Press the until the appropriate setting appears. 3. Do one of the following: - To change more settings, press Copy. This selects the current setting and displays the next menu. - To start the copy job, press Start Color or Start Black. To save the current settings as defaults for future jobs 1. Make any needed changes to the settings in the Copy Menu. 2. Press Copy repeatedly until Set New Defaults appears. 3. Press until Yes appears and then press OK. Explore the onscreen HP Image Zone Help to learn how to perform special copy projects such as enlarging and reducing copies, making multiple copies on a page, and enhancing the quality of your copies. Make a 10 x 15 cm (4 x 6 inch) borderless copy of a photo For the best quality when copying a photo, load photo paper in the input tray and change your copy settings for the correct paper type and photo enhancement. You might also want to use the photo print cartridge for superior print quality. With the tricolor and photo print cartridges installed, you have a six-ink system. See Use a photo print cartridge for more information. To make a borderless copy of a photo from the control panel 1. Load 10 x 15 cm (4 x 6 inch) tabbed photo paper in the input tray. Tip To make a successful borderless copy, you must have 10 x 15 cm (4 x 6 inch) tabbed photo paper loaded. For more information on loading photo paper, see Load 10 x 15 cm (4 x 6 inch) photo paper. 2. Load your original photo print side down on the left front corner of the glass. Position the photo on the glass so the long edge of the photo is along the front edge of the glass, as indicated by the engraved guides along the edge of the glass. 54 HP Officejet 5600 All-in-One series
-
 1
1 -
2
-
3
-
4
-
5
-
6
-
7
-
8
-
9
-
10
-
11
-
12
-
13
-
14
-
15
-
16
-
17
-
18
-
19
-
20
-
21
-
22
-
23
-
24
-
25
-
26
-
27
-
28
-
29
-
30
-
31
-
32
-
33
-
34
-
35
-
36
-
37
-
38
-
39
-
40
-
41
-
42
-
43
-
44
-
45
-
46
-
47
-
48
-
49
-
50
-
51
-
 52
52 -
 53
53 -
 54
54 -
 55
55 -
 56
56 -
 57
57 -
 58
58 -
 59
59 -
 60
60 -
 61
61 -
 62
62 -
63
-
64
-
65
-
66
-
67
-
68
-
69
-
70
-
71
-
72
-
73
-
74
-
75
-
76
-
77
-
78
-
79
-
80
-
81
-
82
-
83
-
84
-
85
-
86
-
87
-
88
-
89
-
90
-
91
-
92
-
93
-
94
-
95
-
96
-
97
-
98
-
99
-
100
-
101
-
102
-
103
-
104
-
105
-
106
-
107
-
108
-
109
-
110
-
111
-
112
-
113
-
114
-
115
-
116
-
117
-
118
-
119
-
120
-
121
-
122
-
123
-
124
-
125
-
126
-
127
-
128
-
129
-
130
-
131
-
132
-
133
-
134
-
135
-
136
-
137
-
138
-
139
-
140
-
141
-
142
 |
 |
