HP Officejet 5600 User Guide - Page 90
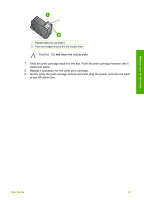
Caution, Repeat if necessary for the other print cartridge.
 |
View all HP Officejet 5600 manuals
Add to My Manuals
Save this manual to your list of manuals |
Page 90 highlights
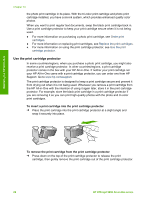
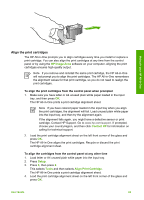
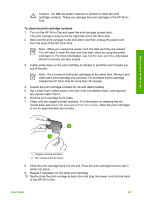
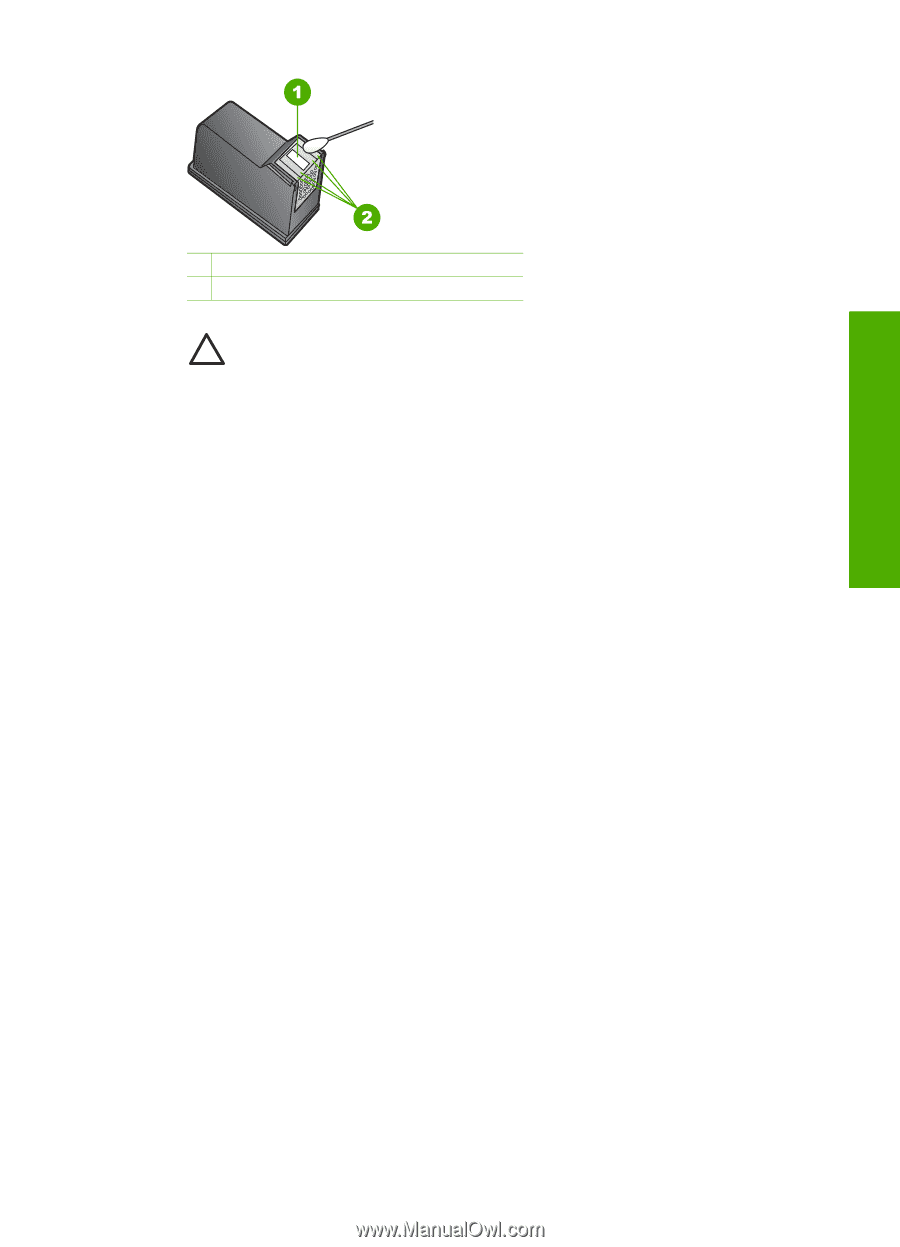
Maintain your HP All-in-One 1 Nozzle plate (do not clean) 2 Face and edges around the ink nozzle area Caution Do not clean the nozzle plate. 7. Slide the print cartridge back into the slot. Push the print cartridge forward until it clicks into place. 8. Repeat if necessary for the other print cartridge. 9. Gently close the print-carriage access door and plug the power cord into the back of the HP All-in-One. User Guide 87
-
 1
1 -
2
-
3
-
4
-
5
-
6
-
7
-
8
-
9
-
10
-
11
-
12
-
13
-
14
-
15
-
16
-
17
-
18
-
19
-
20
-
21
-
22
-
23
-
24
-
25
-
26
-
27
-
28
-
29
-
30
-
31
-
32
-
33
-
34
-
35
-
36
-
37
-
38
-
39
-
40
-
41
-
42
-
43
-
44
-
45
-
46
-
47
-
48
-
49
-
50
-
51
-
52
-
53
-
54
-
55
-
56
-
57
-
58
-
59
-
60
-
61
-
62
-
63
-
64
-
65
-
66
-
67
-
68
-
69
-
70
-
71
-
72
-
73
-
74
-
75
-
76
-
77
-
78
-
79
-
80
-
81
-
82
-
83
-
84
-
 85
85 -
 86
86 -
 87
87 -
 88
88 -
 89
89 -
 90
90 -
 91
91 -
 92
92 -
 93
93 -
 94
94 -
 95
95 -
96
-
97
-
98
-
99
-
100
-
101
-
102
-
103
-
104
-
105
-
106
-
107
-
108
-
109
-
110
-
111
-
112
-
113
-
114
-
115
-
116
-
117
-
118
-
119
-
120
-
121
-
122
-
123
-
124
-
125
-
126
-
127
-
128
-
129
-
130
-
131
-
132
-
133
-
134
-
135
-
136
-
137
-
138
-
139
-
140
-
141
-
142
 |
 |
1
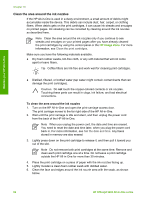
Nozzle plate (do not clean)
2
Face and edges around the ink nozzle area
Caution
Do
not
clean the nozzle plate.
7.
Slide the print cartridge back into the slot. Push the print cartridge forward until it
clicks into place.
8.
Repeat if necessary for the other print cartridge.
9.
Gently close the print-carriage access door and plug the power cord into the back
of the HP All-in-One.
User Guide
87
Maintain your HP All-in-One