HP Scanjet Enterprise 8500 HP Scanjet Enterprise 8500 fn1 - User Guide - Page 30
Con time settings, Assign IP address, on the Date/Time Settings
 |
View all HP Scanjet Enterprise 8500 manuals
Add to My Manuals
Save this manual to your list of manuals |
Page 30 highlights
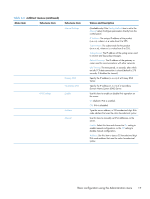
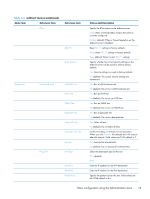
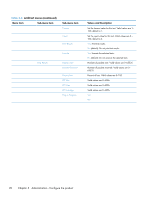
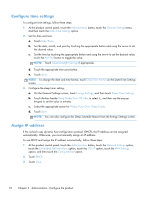
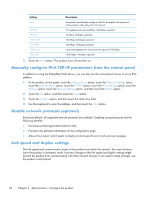
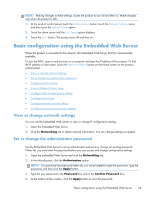
Configure time settings To configure time settings, follow these steps: 1. At the product control panel, touch the Administration button, touch the General Settings menu, and then touch the Date/Time Settings option. 2. Set the date and time. a. Touch Date/Time. b. Set the date, month, and year by touching the appropriate button and using the arrow to set the desired value. c. Set the time by touching the appropriate button and using the arrow to set the desired value; touch the AM/PM button to toggle the value. NOTE: Touch Adjust Daylight Savings if appropriate. d. Touch the appropriate time zone button. e. Touch Save. NOTE: To change the date and time format, touch Date/Time Format on the Date/Time Settings screen. 3. Configure the sleep timer setting. a. On the General Settings screen, touch Energy Settings, and then touch Sleep Timer Settings. b. Touch the box beside Sleep Mode/Auto Off After to select it,, and then use the pop-up keypad to set the value in minutes. c. Select the appropriate action for Wake/Auto On to These Events. d. Touch Save. NOTE: You can also configure the Sleep Schedule feature from the Energy Settings screen. Assign IP address If the network uses dynamic host configuration protocol (DHCP), the IP address can be assigned automatically. Otherwise, you must manually assign an IP address. To use DHCP and assign the IP address automatically, follow these steps: 1. At the product control panel, touch the Administration button, touch the Network Settings option, touch the Embedded JetDirect Menu option, touch the TCP/IP option, touch the IPV4 Settings option, and then touch the Config Method option. 2. Touch DHCP. 3. Touch Save. 22 Chapter 3 Administration - Configure the product
-
 1
1 -
2
-
3
-
4
-
5
-
6
-
7
-
8
-
9
-
10
-
11
-
12
-
13
-
14
-
15
-
16
-
17
-
18
-
19
-
20
-
21
-
22
-
23
-
24
-
 25
25 -
 26
26 -
 27
27 -
 28
28 -
 29
29 -
 30
30 -
 31
31 -
 32
32 -
 33
33 -
 34
34 -
 35
35 -
36
-
37
-
38
-
39
-
40
-
41
-
42
-
43
-
44
-
45
-
46
-
47
-
48
-
49
-
50
-
51
-
52
-
53
-
54
-
55
-
56
-
57
-
58
-
59
-
60
-
61
-
62
-
63
-
64
-
65
-
66
-
67
-
68
-
69
-
70
-
71
-
72
-
73
-
74
-
75
-
76
-
77
-
78
-
79
-
80
-
81
-
82
-
83
-
84
-
85
-
86
-
87
-
88
-
89
-
90
-
91
-
92
-
93
-
94
-
95
-
96
-
97
-
98
-
99
-
100
-
101
-
102
-
103
 |
 |
