HP Scanjet Enterprise 8500 HP Scanjet Enterprise 8500 fn1 - User Guide - Page 74
Replace the keyboard
 |
View all HP Scanjet Enterprise 8500 manuals
Add to My Manuals
Save this manual to your list of manuals |
Page 74 highlights
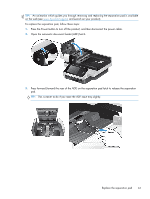
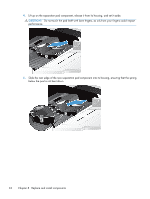
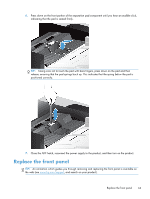
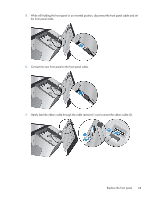
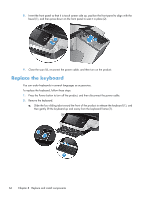
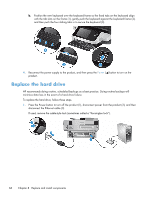
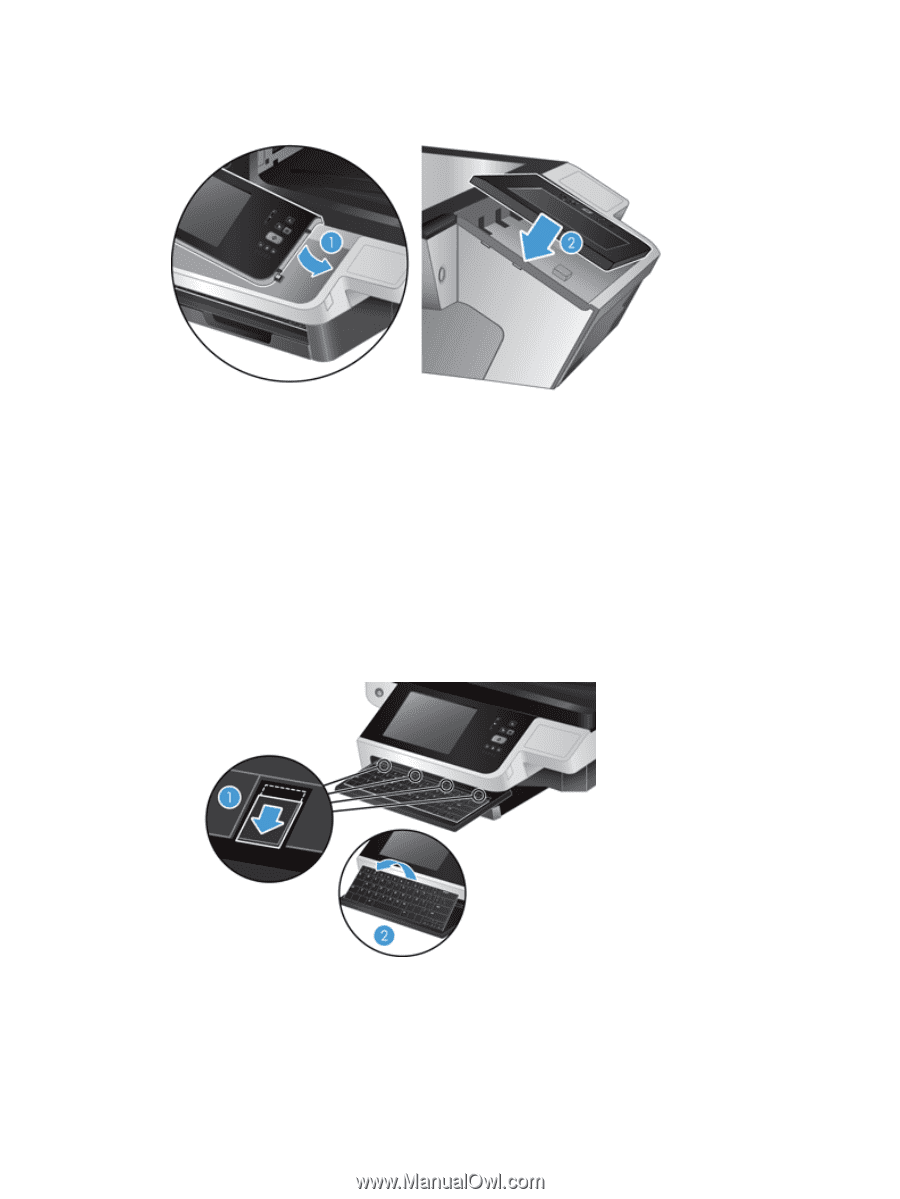
8. Invert the front panel so that it is touch screen side up, position the front panel to align with the bezel (1), and then press down on the front panel to seat it in place (2). 9. Close the scan lid, reconnect the power cable, and then turn on the product. Replace the keyboard You can order keyboards in several languages as accessories. To replace the keyboard, follow these steps: 1. Press the Power button to turn off the product, and then disconnect the power cable. 2. Remove the keyboard. a. Slide the four sliding tabs toward the front of the product to release the keyboard (1), and then gently lift the keyboard up and away from the keyboard frame (2). 66 Chapter 8 Replace and install components
-
 1
1 -
2
-
3
-
4
-
5
-
6
-
7
-
8
-
9
-
10
-
11
-
12
-
13
-
14
-
15
-
16
-
17
-
18
-
19
-
20
-
21
-
22
-
23
-
24
-
25
-
26
-
27
-
28
-
29
-
30
-
31
-
32
-
33
-
34
-
35
-
36
-
37
-
38
-
39
-
40
-
41
-
42
-
43
-
44
-
45
-
46
-
47
-
48
-
49
-
50
-
51
-
52
-
53
-
54
-
55
-
56
-
57
-
58
-
59
-
60
-
61
-
62
-
63
-
64
-
65
-
66
-
67
-
68
-
 69
69 -
 70
70 -
 71
71 -
 72
72 -
 73
73 -
 74
74 -
 75
75 -
 76
76 -
 77
77 -
 78
78 -
 79
79 -
80
-
81
-
82
-
83
-
84
-
85
-
86
-
87
-
88
-
89
-
90
-
91
-
92
-
93
-
94
-
95
-
96
-
97
-
98
-
99
-
100
-
101
-
102
-
103
 |
 |
8.
Invert the front panel so that it is touch screen side up, position the front panel to align with the
bezel (1), and then press down on the front panel to seat it in place (2).
9.
Close the scan lid, reconnect the power cable, and then turn on the product.
Replace the keyboard
You can order keyboards in several languages as accessories.
To replace the keyboard, follow these steps:
1.
Press the Power button to turn off the product, and then disconnect the power cable.
2.
Remove the keyboard.
a.
Slide the four sliding tabs toward the front of the product to release the keyboard (1), and
then gently lift the keyboard up and away from the keyboard frame (2).
66
Chapter 8
Replace and install components