HP Scanjet Enterprise 8500 HP Scanjet Enterprise 8500 fn1 - User Guide - Page 33
Basic configuration using the Embedded Web Server, View or change network settings
 |
View all HP Scanjet Enterprise 8500 manuals
Add to My Manuals
Save this manual to your list of manuals |
Page 33 highlights
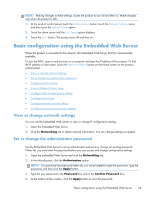
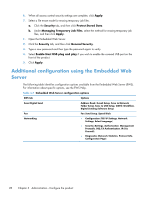
NOTE: Making changes to these settings causes the product to turn off and then on. Make changes only when the product is idle. 1. At the product control panel, touch the Administration button, touch the Network Settings menu, and then touch the Jetdirect Menu option. 2. Touch the down arrow until the Link Speed option displays. 3. Touch the Save button. The product turns off and then on. Basic configuration using the Embedded Web Server When the product is connected to the network, the Embedded Web Server (EWS) is automatically available. To start the EWS, open a web browser on a computer and type the IP address of the product. To find the IP address or host name, touch the Network Address button on the Home screen on the product control panel. ● View or change network settings ● Set or change the administrator password ● Configure e-mail options ● Save to Network Folder Setup ● Configure USB storage device settings ● Configure Quick Sets ● Configure general security settings ● Configure access control security settings View or change network settings You can use the Embedded Web Server to view or change IP configuration settings. 1. Open the Embedded Web Server. 2. Click the Networking tab to obtain network information. You can change settings as needed. Set or change the administrator password Use the Embedded Web Server to set an administrator password or change an existing password. When set, you must enter this password before you can access and change configuration settings. 1. Open the Embedded Web Server and click the Networking tab. 2. In the left-side pane, click the Authorization option. NOTE: If a password has previously been set, you are prompted to type the password. Type the password, and then click the Apply button. 3. Type the new password in the Password box and in the Confirm Password box. 4. At the bottom of the window, click the Apply button to save the password. Basic configuration using the Embedded Web Server 25
-
 1
1 -
2
-
3
-
4
-
5
-
6
-
7
-
8
-
9
-
10
-
11
-
12
-
13
-
14
-
15
-
16
-
17
-
18
-
19
-
20
-
21
-
22
-
23
-
24
-
25
-
26
-
27
-
 28
28 -
 29
29 -
 30
30 -
 31
31 -
 32
32 -
 33
33 -
 34
34 -
 35
35 -
 36
36 -
 37
37 -
 38
38 -
39
-
40
-
41
-
42
-
43
-
44
-
45
-
46
-
47
-
48
-
49
-
50
-
51
-
52
-
53
-
54
-
55
-
56
-
57
-
58
-
59
-
60
-
61
-
62
-
63
-
64
-
65
-
66
-
67
-
68
-
69
-
70
-
71
-
72
-
73
-
74
-
75
-
76
-
77
-
78
-
79
-
80
-
81
-
82
-
83
-
84
-
85
-
86
-
87
-
88
-
89
-
90
-
91
-
92
-
93
-
94
-
95
-
96
-
97
-
98
-
99
-
100
-
101
-
102
-
103
 |
 |