HP Scanjet Enterprise 8500 HP Scanjet Enterprise 8500 fn1 - User Guide - Page 45
Backup product data, Restore product data, General, Firmware Upgrade, Backup and Restore, Backup
 |
View all HP Scanjet Enterprise 8500 manuals
Add to My Manuals
Save this manual to your list of manuals |
Page 45 highlights
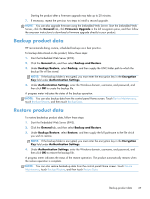
Starting the product after a firmware upgrade may take up to 20 minutes. 7. If necessary, repeat the previous two steps to install a second upgrade. NOTE: You can also upgrade firmware using the Embedded Web Server. Start the Embedded Web Server, click the General tab, click Firmware Upgrade in the left navigation pane, and then follow the onscreen instructions to download a firmware upgrade directly to your product. Backup product data HP recommends doing routine, scheduled backups as a best practice. To backup data stored on the product, follow these steps: 1. Start the Embedded Web Server (EWS). 2. Click the General tab, and then select Backup and Restore. 3. Under Backup/Restore, select Backup, and then supply the UNC folder path to which the backup file will be stored. NOTE: If the backup folder is encrypted, you must enter the encryption key in the Encryption Key field under Authentication Settings. 4. Under Authentication Settings, enter the Windows domain, username, and password, and then click OK to create the backup file. A progress meter indicates the status of the backup operation. NOTE: You can also backup data from the control panel Home screen. Touch Device Maintenance, touch Backup/Restore, and then touch Backup Data. Restore product data To restore backed-up product data, follow these steps: 1. Start the Embedded Web Server (EWS). 2. Click the General tab, and then select Backup and Restore. 3. Under Backup/Restore, select Restore, and then supply the full pathname to the file which you wish to restore. NOTE: If the backup folder is encrypted, you must enter the encryption key in the Encryption Key field under Authentication Settings. 4. Under Authentication Settings, enter the Windows domain, username, and password, and then click OK to restore the backup file. A progress meter indicates the status of the restore operation. The product automatically restarts when the restore operation is complete. NOTE: You can also restore backed-up data from the control panel Home screen. Touch Device Maintenance, touch Backup/Restore, and then touch Restore Data. Backup product data 37
-
 1
1 -
2
-
3
-
4
-
5
-
6
-
7
-
8
-
9
-
10
-
11
-
12
-
13
-
14
-
15
-
16
-
17
-
18
-
19
-
20
-
21
-
22
-
23
-
24
-
25
-
26
-
27
-
28
-
29
-
30
-
31
-
32
-
33
-
34
-
35
-
36
-
37
-
38
-
39
-
 40
40 -
 41
41 -
 42
42 -
 43
43 -
 44
44 -
 45
45 -
 46
46 -
 47
47 -
 48
48 -
 49
49 -
 50
50 -
51
-
52
-
53
-
54
-
55
-
56
-
57
-
58
-
59
-
60
-
61
-
62
-
63
-
64
-
65
-
66
-
67
-
68
-
69
-
70
-
71
-
72
-
73
-
74
-
75
-
76
-
77
-
78
-
79
-
80
-
81
-
82
-
83
-
84
-
85
-
86
-
87
-
88
-
89
-
90
-
91
-
92
-
93
-
94
-
95
-
96
-
97
-
98
-
99
-
100
-
101
-
102
-
103
 |
 |