HP Tc2120 HP Server tc2120 Network Operating System - Installation Guide - Page 13
Phase 2 – Install the HP LAN Driver - network lan driver
 |
UPC - 808736945332
View all HP Tc2120 manuals
Add to My Manuals
Save this manual to your list of manuals |
Page 13 highlights
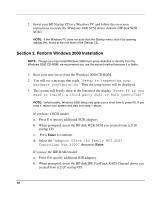
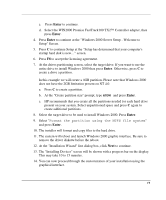
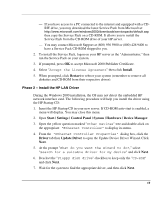
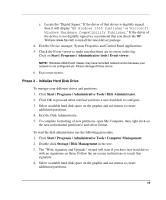
- If you have access to a PC connected to the internet and equipped with a CDRW drive, you may download the latest Service Pack from Microsoft at: http://www.microsoft.com/windows2000/downloads/servicepacks/default.asp then copy the Service Pack on a CD-ROM. It allows you to install the Service Pack from the CD-ROM drive of your HP server. - You may contact Microsoft Support at (800) 936 5900 or (800) 426 9400 to have a Service Pack CD-ROM shipped to you. 2. To install the Service Pack, logon on your HP server as the "Administrator," then run the Service Pack on your system. 3. If prompted, press OK to accept Microsoft 2000 Publisher Certificate. 4. Select "Accept the License Agreement" then click Install. 5. When prompted, click Restart to reboot your system (remember to remove all diskettes and CD-ROM from their respective drives). Phase 2 - Install the HP LAN Driver During the Windows 2000 installation, the OS may not detect the embedded HP network interface card. The following procedure will help you install the driver using the HP Startup CD: 1. Insert the HP Startup CD in your new server. If CD-ROM auto-start is enabled, a menu will display. You may close this menu. 2. Open Start | Settings | Control Panel | System | Hardware | Device Manager. 3. Open the yellow question marked "Other Devices" tree and double-click on the appropriate "Ethernet Controller" to display its menu. 4. From the "Ethernet Controller Properties" dialog box, click the Driver tab then Update Driver to open the Update Device Driver Wizard. Click Next. 5. At the prompt "What do you want the wizard to do?," select "Search for a suitable driver for my device" and click Next. 6. Deselect the "Floppy disk drive" checkbox to keep only the "CD-ROM" and click Next. 7. Wait for the system to find the appropriate driver, and then click Next. 13
-
 1
1 -
2
-
3
-
4
-
5
-
6
-
7
-
 8
8 -
 9
9 -
 10
10 -
 11
11 -
 12
12 -
 13
13 -
 14
14 -
 15
15 -
 16
16 -
 17
17 -
 18
18 -
19
-
20
-
21
-
22
-
23
-
24
-
25
-
26
-
27
-
28
-
29
-
30
-
31
-
32
-
33
-
34
-
35
-
36
-
37
-
38
-
39
-
40
-
41
-
42
-
43
-
44
-
45
-
46
-
47
-
48
-
49
-
50
-
51
-
52
-
53
-
54
-
55
-
56
-
57
-
58
-
59
-
60
-
61
-
62
-
63
-
64
-
65
-
66
-
67
-
68
-
69
-
70
-
71
-
72
-
73
-
74
-
75
-
76
-
77
-
78
-
79
-
80
-
81
-
82
-
83
-
84
-
85
-
86
-
87
-
88
-
89
-
90
-
91
-
92
 |
 |
