HP Tc2120 HP Server tc2120 Network Operating System - Installation Guide - Page 90
Confirm Installation, Phase 3 – Complete the Installation - bios
 |
UPC - 808736945332
View all HP Tc2120 manuals
Add to My Manuals
Save this manual to your list of manuals |
Page 90 highlights
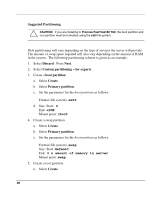
Confirm Installation 1. The installation program will summarize the HDD partitioning information, boot manager installation location as well as the size of software that will be installed. Review, and if this is acceptable, click Next to proceed. 2. Click Yes, install to proceed with the installation. Phase 3 - Complete the Installation 1. When installation of SuSE Linux 7.3 is completed, you will have the option of selecting to have the system bootup in either text or graphical mode. HP recommends booting up into a graphical desktop environment. Click Next to test the GUI settings, if chosen. CAUTION: If installing to a Promise FastTrak100 TX2, these additional steps are required. Failure to follow these additional steps may result in the user unable to successfully boot to the SuSE Linux 7.3 environment. 2. If booting to a Promise FastTrak100 TX2: a. Press Ctrl-Alt-F2. b. Using a Linux editor such as "vi," enter the command: vi /etc/lilo.conf c. Remove these two lines (if they exist): Disk=/dev/hda Bios=0x.. (Could be 0x80 or 0x81, remove either one). d. Add these lines (if it does not exist): disk=/dev/sdX bios=0x80 (Where /dev/sdX is the location of your Promise boot drive.) 3. Return to the GUI Installation screen by pressing Ctrl-Alt-F7. 90
-
 1
1 -
2
-
3
-
4
-
5
-
6
-
7
-
8
-
9
-
10
-
11
-
12
-
13
-
14
-
15
-
16
-
17
-
18
-
19
-
20
-
21
-
22
-
23
-
24
-
25
-
26
-
27
-
28
-
29
-
30
-
31
-
32
-
33
-
34
-
35
-
36
-
37
-
38
-
39
-
40
-
41
-
42
-
43
-
44
-
45
-
46
-
47
-
48
-
49
-
50
-
51
-
52
-
53
-
54
-
55
-
56
-
57
-
58
-
59
-
60
-
61
-
62
-
63
-
64
-
65
-
66
-
67
-
68
-
69
-
70
-
71
-
72
-
73
-
74
-
75
-
76
-
77
-
78
-
79
-
80
-
81
-
82
-
83
-
84
-
 85
85 -
 86
86 -
 87
87 -
 88
88 -
 89
89 -
 90
90 -
 91
91 -
 92
92
 |
 |
