HP Tc2120 HP Server tc2120 Network Operating System - Installation Guide - Page 76
Package Group Selection, 1.8 Post Installation Configuration, Boot Diskette Creation:
 |
UPC - 808736945332
View all HP Tc2120 manuals
Add to My Manuals
Save this manual to your list of manuals |
Page 76 highlights
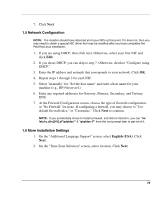
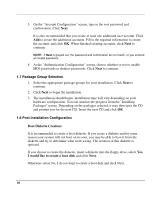
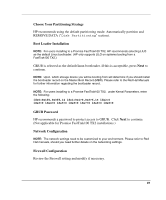
3. On the "Account Configuration" screen, type in the root password and confirmation. Click Next. It is also recommended that you create at least one additional user account. Click Add to create the additional accounts. Fill in the required information to create the account, and click OK. When finished creating accounts, click Next to continue. NOTE: If Next is grayed out, the password and confirmation do not match, or you entered an invalid password. 4. At the "Authentication Configuration" screen, choose whether or not to enable MD5 passwords or shadow passwords. Click Next to continue. 1.7 Package Group Selection 1. Select the appropriate package groups for your installation. Click Next to continue. 2. Click Next to begin the installation. 3. The installation should begin. Installation time will vary depending on your hardware configuration. You can monitor the progress from the "Installing Packages" screen. Depending on the packages selected, it may then eject the CD and prompt you for the next CD. Insert the next CD and click OK. 1.8 Post Installation Configuration Boot Diskette Creation: It is recommended to create a boot diskette. If you create a diskette and for some reason your system will not boot on its own, you may be able to boot it from the diskette and try to determine what went wrong. The creation of this diskette is optional. If you choose to create the diskette, insert a diskette into the floppy drive, select Yes, I would like to create a boot disk and click Next. Otherwise select No, I do not want to create a boot disk and click Next. 76
-
 1
1 -
2
-
3
-
4
-
5
-
6
-
7
-
8
-
9
-
10
-
11
-
12
-
13
-
14
-
15
-
16
-
17
-
18
-
19
-
20
-
21
-
22
-
23
-
24
-
25
-
26
-
27
-
28
-
29
-
30
-
31
-
32
-
33
-
34
-
35
-
36
-
37
-
38
-
39
-
40
-
41
-
42
-
43
-
44
-
45
-
46
-
47
-
48
-
49
-
50
-
51
-
52
-
53
-
54
-
55
-
56
-
57
-
58
-
59
-
60
-
61
-
62
-
63
-
64
-
65
-
66
-
67
-
68
-
69
-
70
-
 71
71 -
 72
72 -
 73
73 -
 74
74 -
 75
75 -
 76
76 -
 77
77 -
 78
78 -
 79
79 -
 80
80 -
 81
81 -
82
-
83
-
84
-
85
-
86
-
87
-
88
-
89
-
90
-
91
-
92
 |
 |
