HP Tc2120 HP Server tc2120 Network Operating System - Installation Guide - Page 77
Graphical Interface Configuration:, Monitor Configuration:, Customize Graphics Configuration:
 |
UPC - 808736945332
View all HP Tc2120 manuals
Add to My Manuals
Save this manual to your list of manuals |
Page 77 highlights
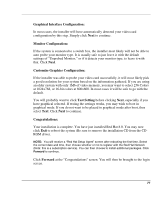
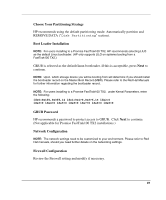
Graphical Interface Configuration: In most cases, the installer will have automatically detected your video card configuration by this step. Simply click Next to continue. Monitor Configuration: If the system is connected to a switch box, the installer most likely will not be able to auto probe your monitor type. It is usually safe to just leave it with the default settings of "Unprobed Monitor," or if it detects your monitor type, to leave it with that. Click Next. Customize Graphics Configuration: If the installer was able to probe your video card successfully, it will most likely pick a good resolution for your system based on the information gathered. If you are using an older system with only 1Mb of video memory, you may want to select 256 Colors at 1024x768, or 16-bit colors at 800x600. In most cases it will be safe to go with the default. You will probably want to click Test Setting before clicking Next, especially if you have graphical selected. If testing the settings works, you may wish to boot in graphical mode. If you do not want to be placed in graphical mode after boot, then select Text. Click Next to continue. Congratulations: Your installation is complete. You have just installed Red Hat 8.0. You may now click Exit to reboot the system (Be sure to remove the installation CD from the CDROM drive). NOTE: You will receive a "Red Hat Setup Agent" screen after rebooting the first time. Select the correct date and time, then choose whether or not to register with the Red Hat Network (Note: this is a subscription service). You can then choose to install additional packages. Click Forward to continue. Click Forward at the "Congratulations" screen. You will then be brought to the login screen. 77
-
 1
1 -
2
-
3
-
4
-
5
-
6
-
7
-
8
-
9
-
10
-
11
-
12
-
13
-
14
-
15
-
16
-
17
-
18
-
19
-
20
-
21
-
22
-
23
-
24
-
25
-
26
-
27
-
28
-
29
-
30
-
31
-
32
-
33
-
34
-
35
-
36
-
37
-
38
-
39
-
40
-
41
-
42
-
43
-
44
-
45
-
46
-
47
-
48
-
49
-
50
-
51
-
52
-
53
-
54
-
55
-
56
-
57
-
58
-
59
-
60
-
61
-
62
-
63
-
64
-
65
-
66
-
67
-
68
-
69
-
70
-
71
-
 72
72 -
 73
73 -
 74
74 -
 75
75 -
 76
76 -
 77
77 -
 78
78 -
 79
79 -
 80
80 -
 81
81 -
 82
82 -
83
-
84
-
85
-
86
-
87
-
88
-
89
-
90
-
91
-
92
 |
 |
