HP Vectra XU 6/XXX HP Vectra XU 6/xxx Pc User’s Guide - d4369-90001 - Page 57
Completing the Main Memory Installation Procedure
 |
View all HP Vectra XU 6/XXX manuals
Add to My Manuals
Save this manual to your list of manuals |
Page 57 highlights
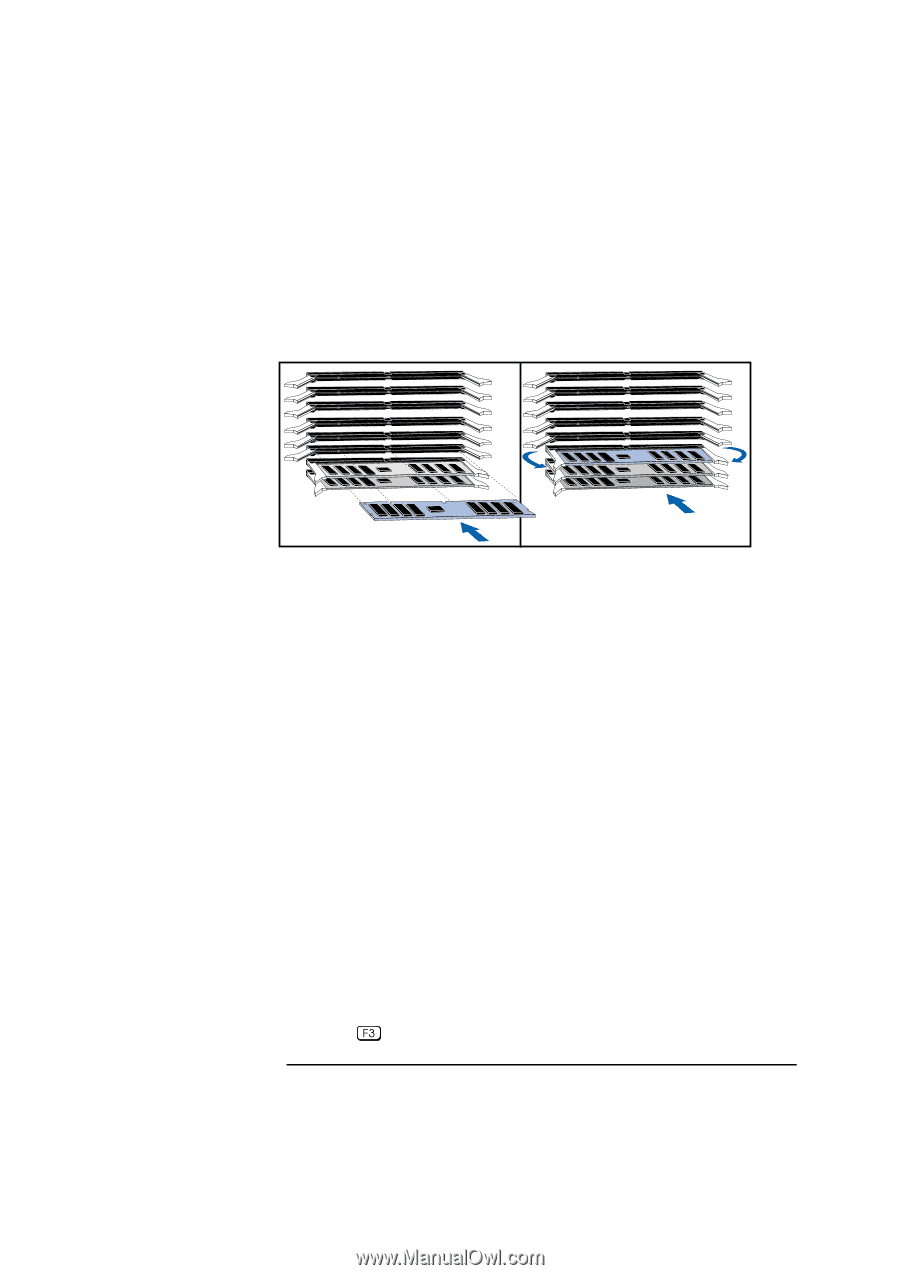
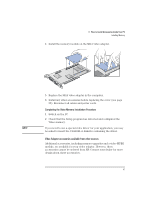
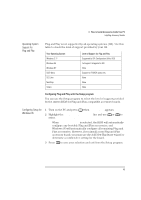
3 How to Install Accessories Inside Your PC Installing Memory 3 Slide each memory module into the slot at 90° to the system board (hold the memory module with the cutouts closest to the processor). Slide the memory module into the slot at 90o Push the module until the retaining clips click into position 4 Firmly press each memory module completely into the connector until the retaining clips click into position. 5 Repeat this procedure for each pair of memory modules you are installing. 6 Install any other accessories before replacing the cover (see page 38). Reconnect all cables and power cords. Completing the Main Memory Installation Procedure: 1 Switch on the PC. When Error 0250 appears (indicating that the Power-On-Self-Test has detected a change in your memory configuration) follow the displayed instructions to run the Setup program. 2 Check that Setup has automatically detected and configured the Memory Size fields. Ensure the TOTAL memory is correct. If it is incorrect, check that you have correctly installed the memory modules. 3 Set the extended memory limit field to Y if you use software designed for i286 processors (or earlier processors) that cannot work with more than 16 MB total memory. 4 Press to save and exit the Setup program. English 45
-
 1
1 -
2
-
3
-
4
-
5
-
6
-
7
-
8
-
9
-
10
-
11
-
12
-
13
-
14
-
15
-
16
-
17
-
18
-
19
-
20
-
21
-
22
-
23
-
24
-
25
-
26
-
27
-
28
-
29
-
30
-
31
-
32
-
33
-
34
-
35
-
36
-
37
-
38
-
39
-
40
-
41
-
42
-
43
-
44
-
45
-
46
-
47
-
48
-
49
-
50
-
51
-
 52
52 -
 53
53 -
 54
54 -
 55
55 -
 56
56 -
 57
57 -
 58
58 -
 59
59 -
 60
60 -
 61
61 -
 62
62 -
63
-
64
-
65
-
66
-
67
-
68
-
69
-
70
-
71
-
72
-
73
-
74
-
75
-
76
-
77
-
78
-
79
-
80
-
81
-
82
-
83
-
84
-
85
-
86
-
87
-
88
-
89
-
90
-
91
-
92
-
93
-
94
-
95
-
96
-
97
-
98
-
99
-
100
-
101
-
102
-
103
-
104
-
105
-
106
-
107
-
108
-
109
-
110
-
111
-
112
-
113
-
114
-
115
-
116
-
117
-
118
-
119
-
120
-
121
-
122
-
123
-
124
-
125
-
126
-
127
-
128
-
129
-
130
-
131
-
132
-
133
-
134
-
135
-
136
-
137
-
138
-
139
-
140
-
141
-
142
-
143
-
144
-
145
-
146
-
147
-
148
-
149
-
150
-
151
-
152
-
153
-
154
-
155
-
156
-
157
-
158
-
159
-
160
-
161
-
162
-
163
-
164
-
165
-
166
-
167
-
168
 |
 |